Quick Start Guide
From a pile of files to an organized, searchable case — in an afternoon
You focus on the facts. ● Arc does the rest.
Arc is your guide
Arc is the AI assistant built into ChargeStack. Any time you’re unsure what to do next, just type your question in plain English — “How do I…”, “Can you…”, “What does this mean?” Each step below tells you what you’re trying to accomplish, not every click. Work through them in order: they take you from an empty workspace to an organized, searchable, fully analyzed — and, where needed, redacted and exported — case.
Look for the ? help button in the corner of the app whenever you want a hand. And if it doesn’t answer your question, email us at support@chargestack.ai — we respond quickly.
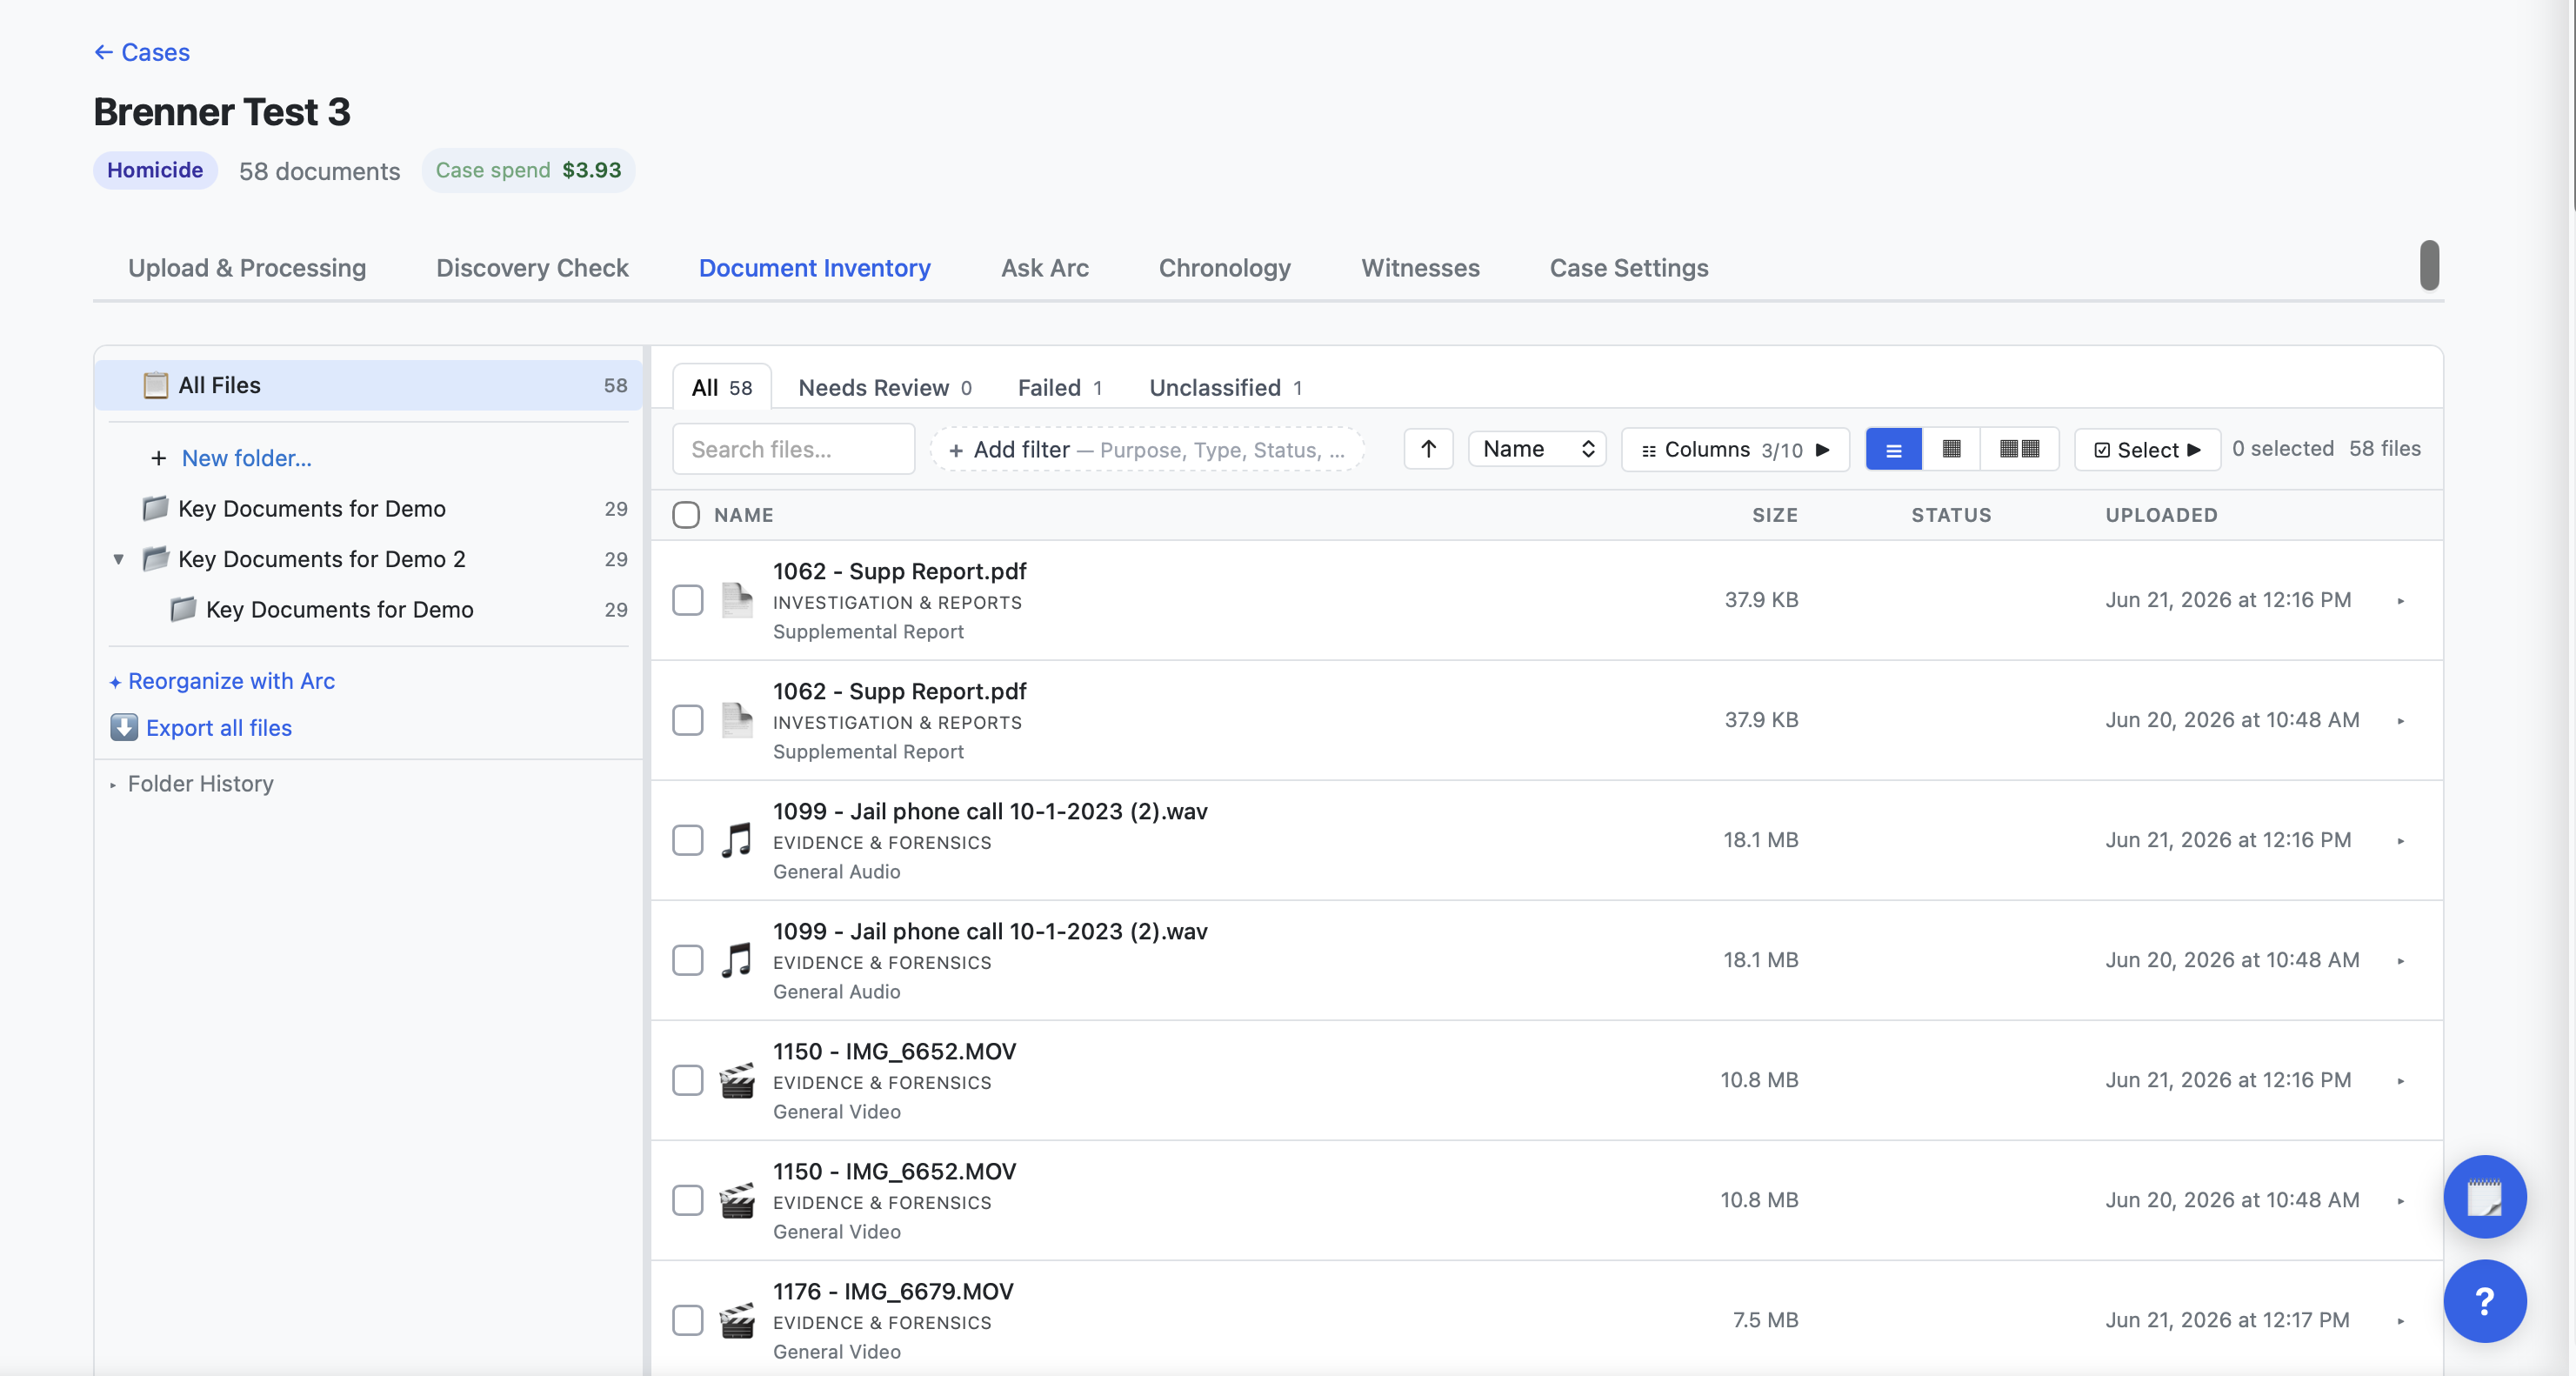
The sixteen steps
Get onboarded
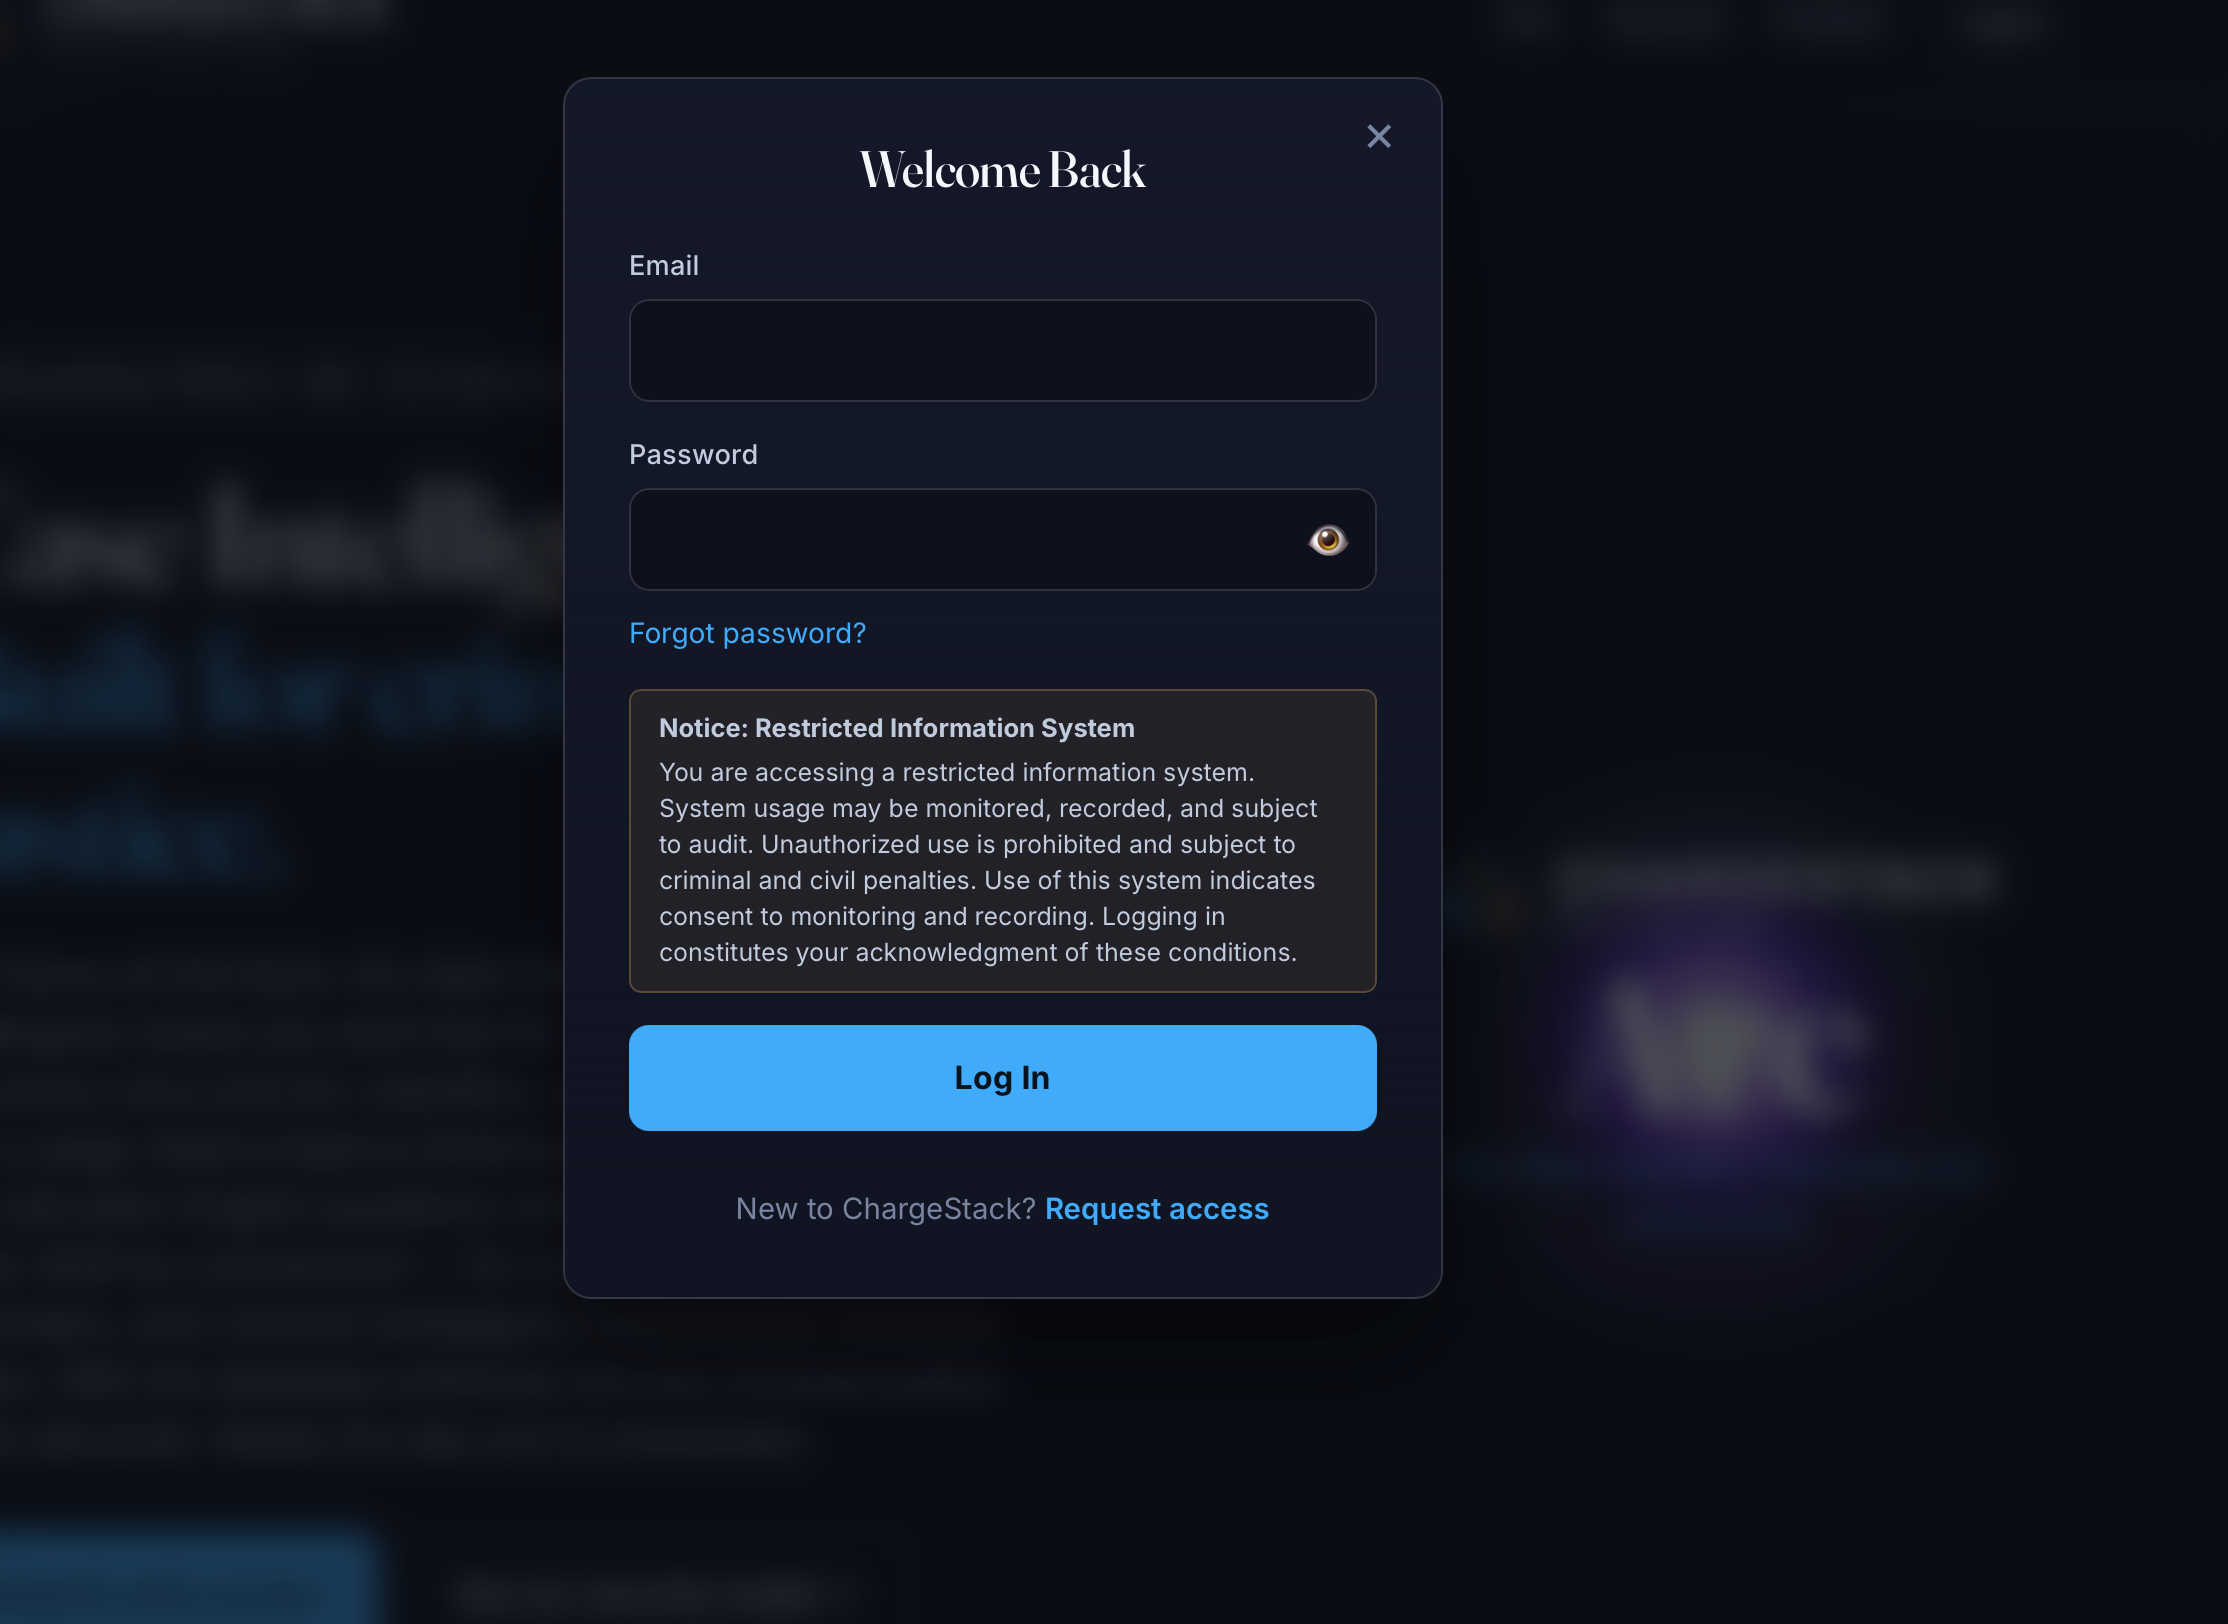
Getting started takes two things: signing in and turning on two-factor security. You'll receive an email invitation — follow it to set your password and sign in.
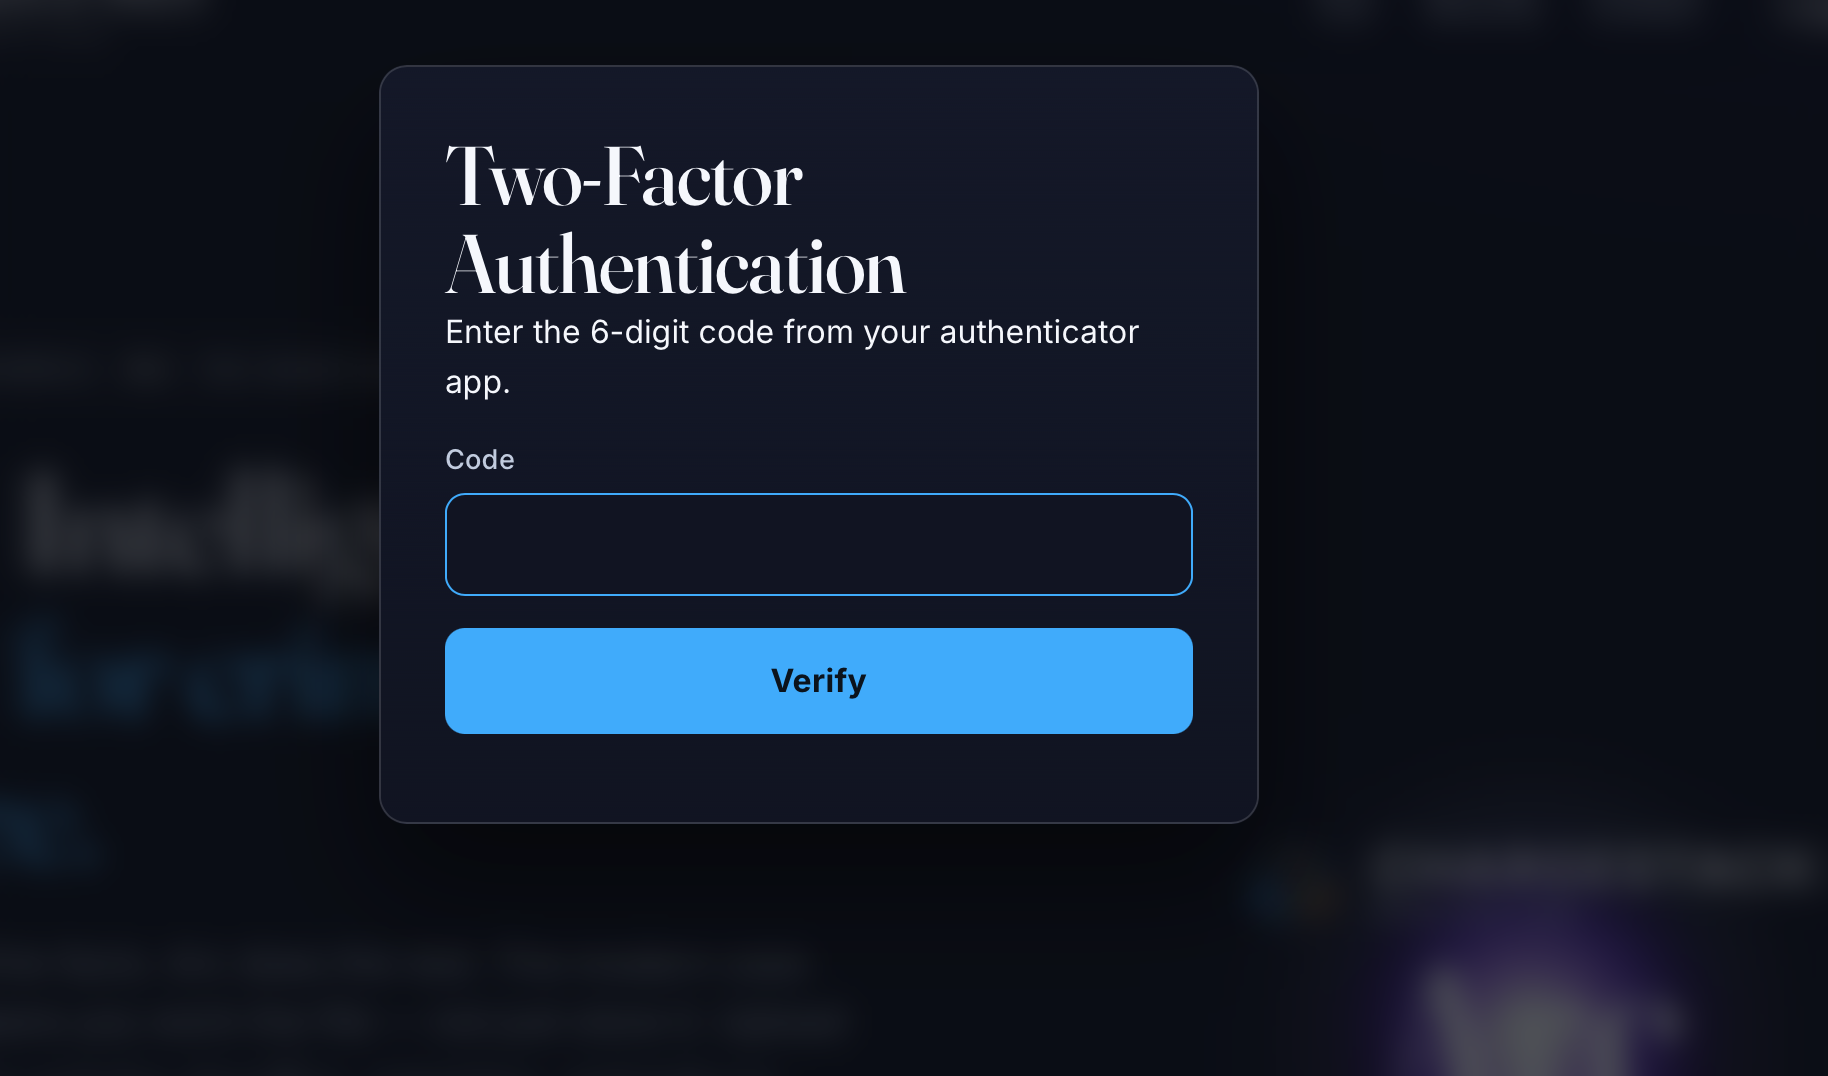
As part of signing in, we'll have you set up two-factor authentication (sometimes called “MFA” or “2FA”). It's a one-time setup that protects your account with a short code that changes every 30 seconds, on top of your password. Use any authenticator app on your phone — Google Authenticator, Microsoft Authenticator, Authy, or one built into a password manager.
When the screen shows a QR code, open the app, choose “Scan a QR code,” and point your camera at it — no typing. From then on, each sign-in asks for the current 6-digit code, so keep your phone within reach. Once you're in, you'll land on your case list.
ASK ARC IFyou don't see the invitation, or the authenticator step is unclear.
Install the desktop uploader
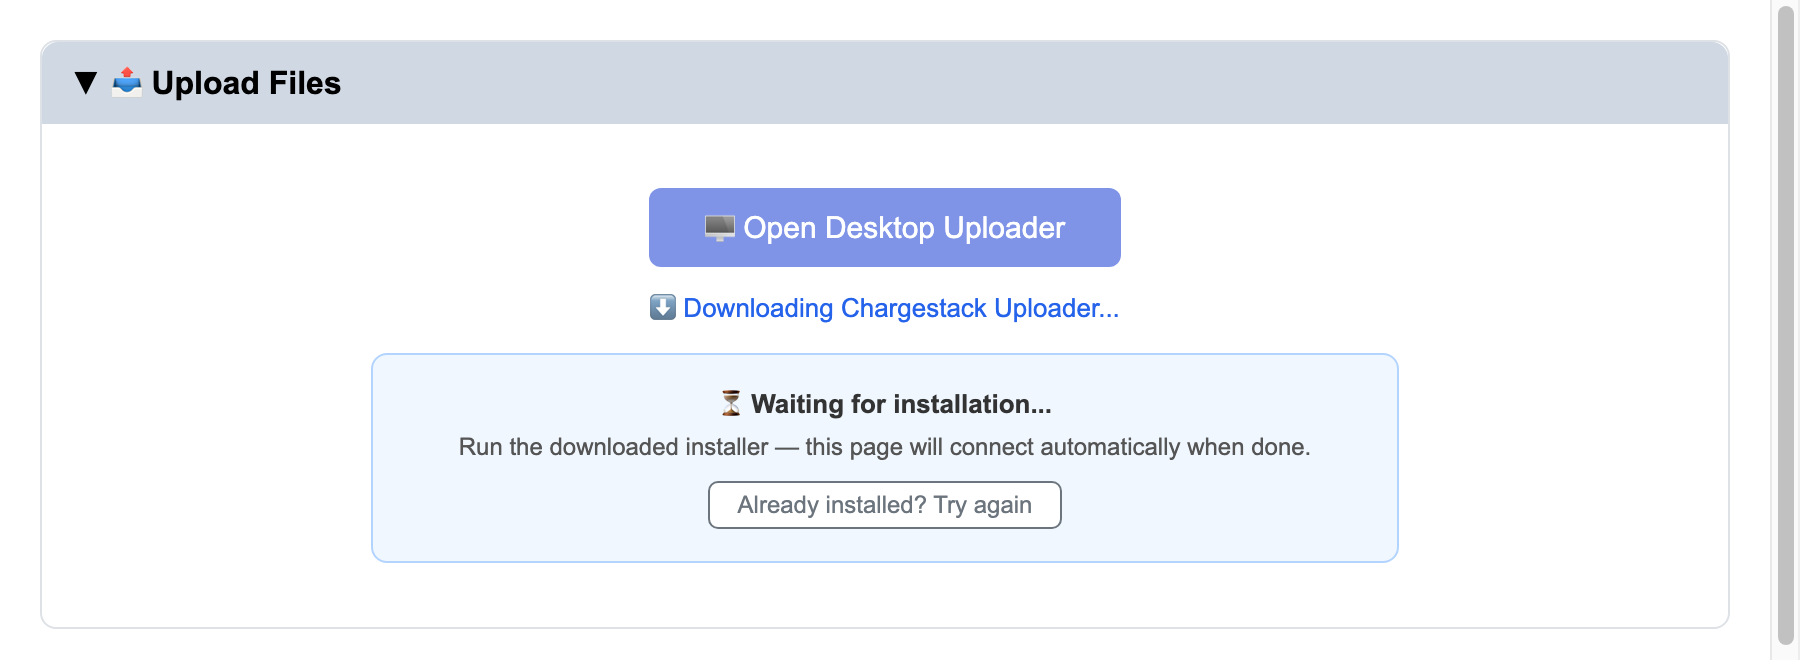
The desktop app is how you'll send files into ChargeStack — it moves large sets reliably, even if your connection hiccups partway through. Download it from inside ChargeStack: when you go to add files, the app offers a download link for your computer (Mac or Windows). Pick the one for your operating system, then open the downloaded file and follow the prompts to install it.
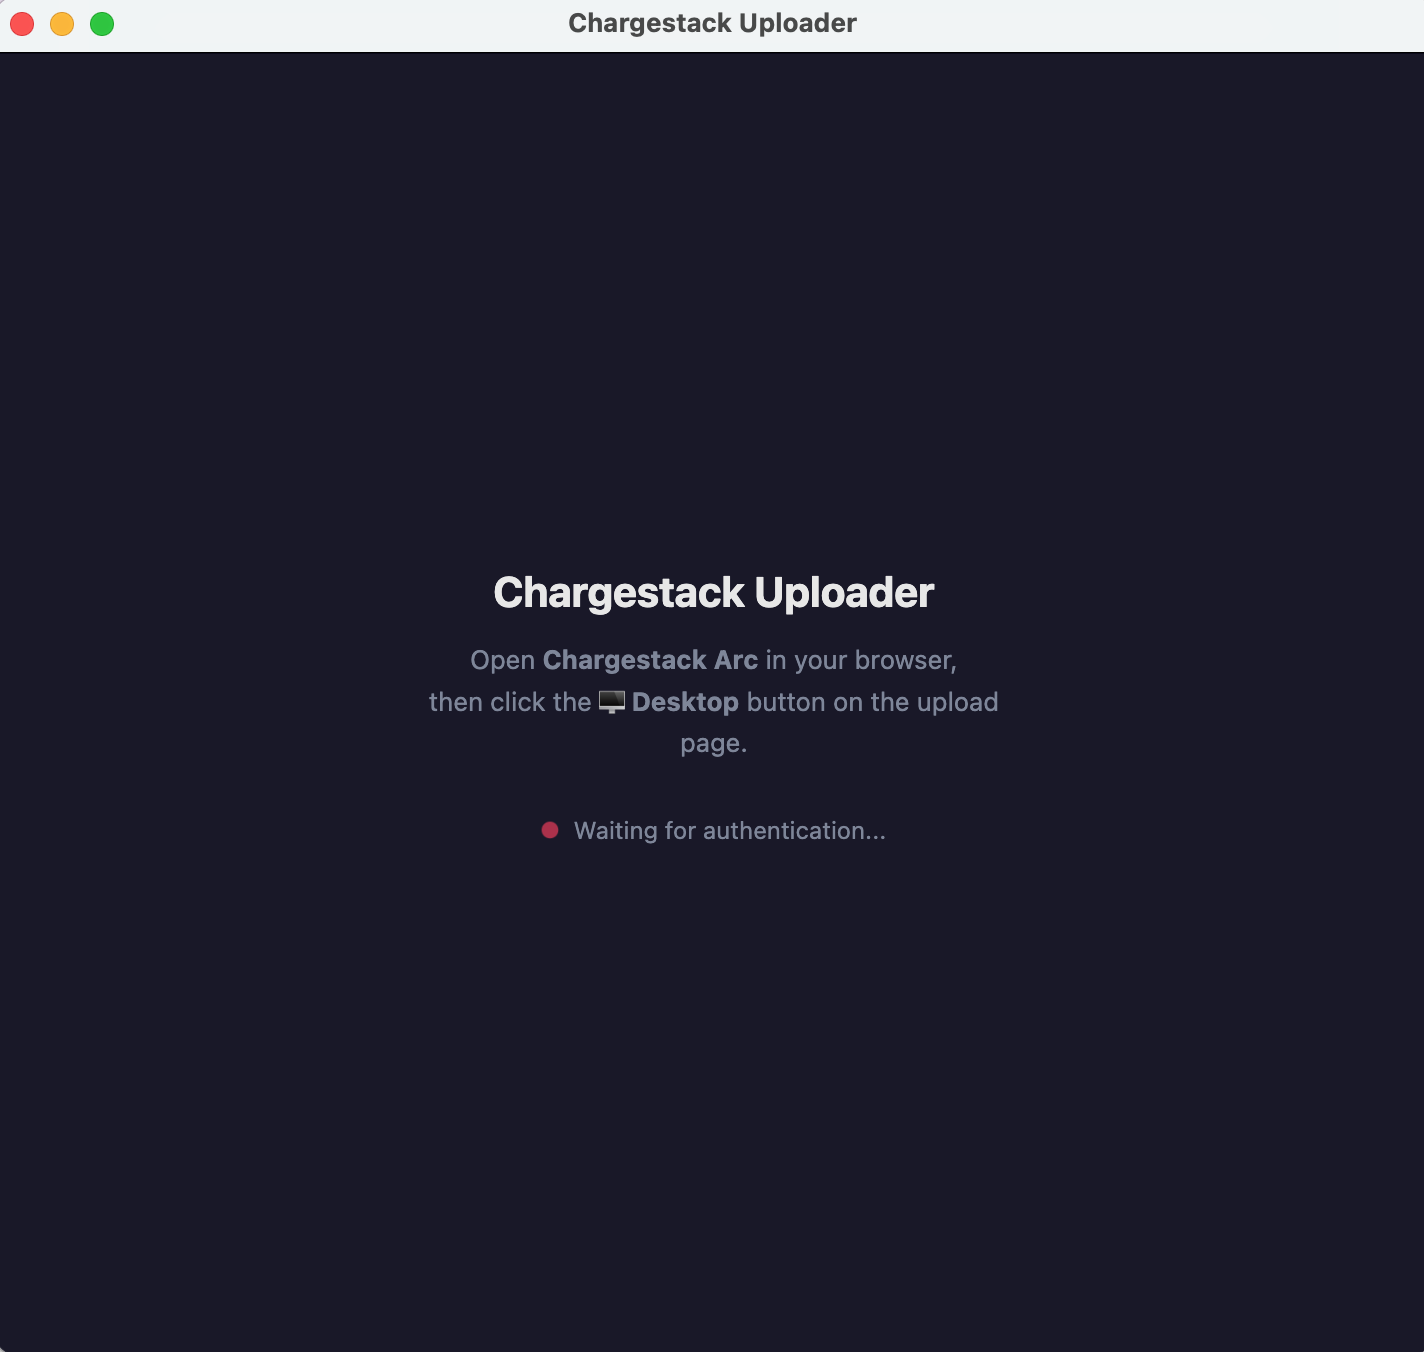
There's no separate password for the desktop app — it signs in through ChargeStack itself. When you first open it, it waits for you to connect it: go back to your browser and click the Desktop button on the upload page, and the app authenticates as you automatically. From then on it knows who you are — it shows your cases, ready to upload — and when you click to open the uploader from inside ChargeStack, it launches the installed app automatically (no second download).
ASK ARC IFthe download or install doesn't work on your machine, or the app won't recognize your sign-in.
Create your case, then send your documents
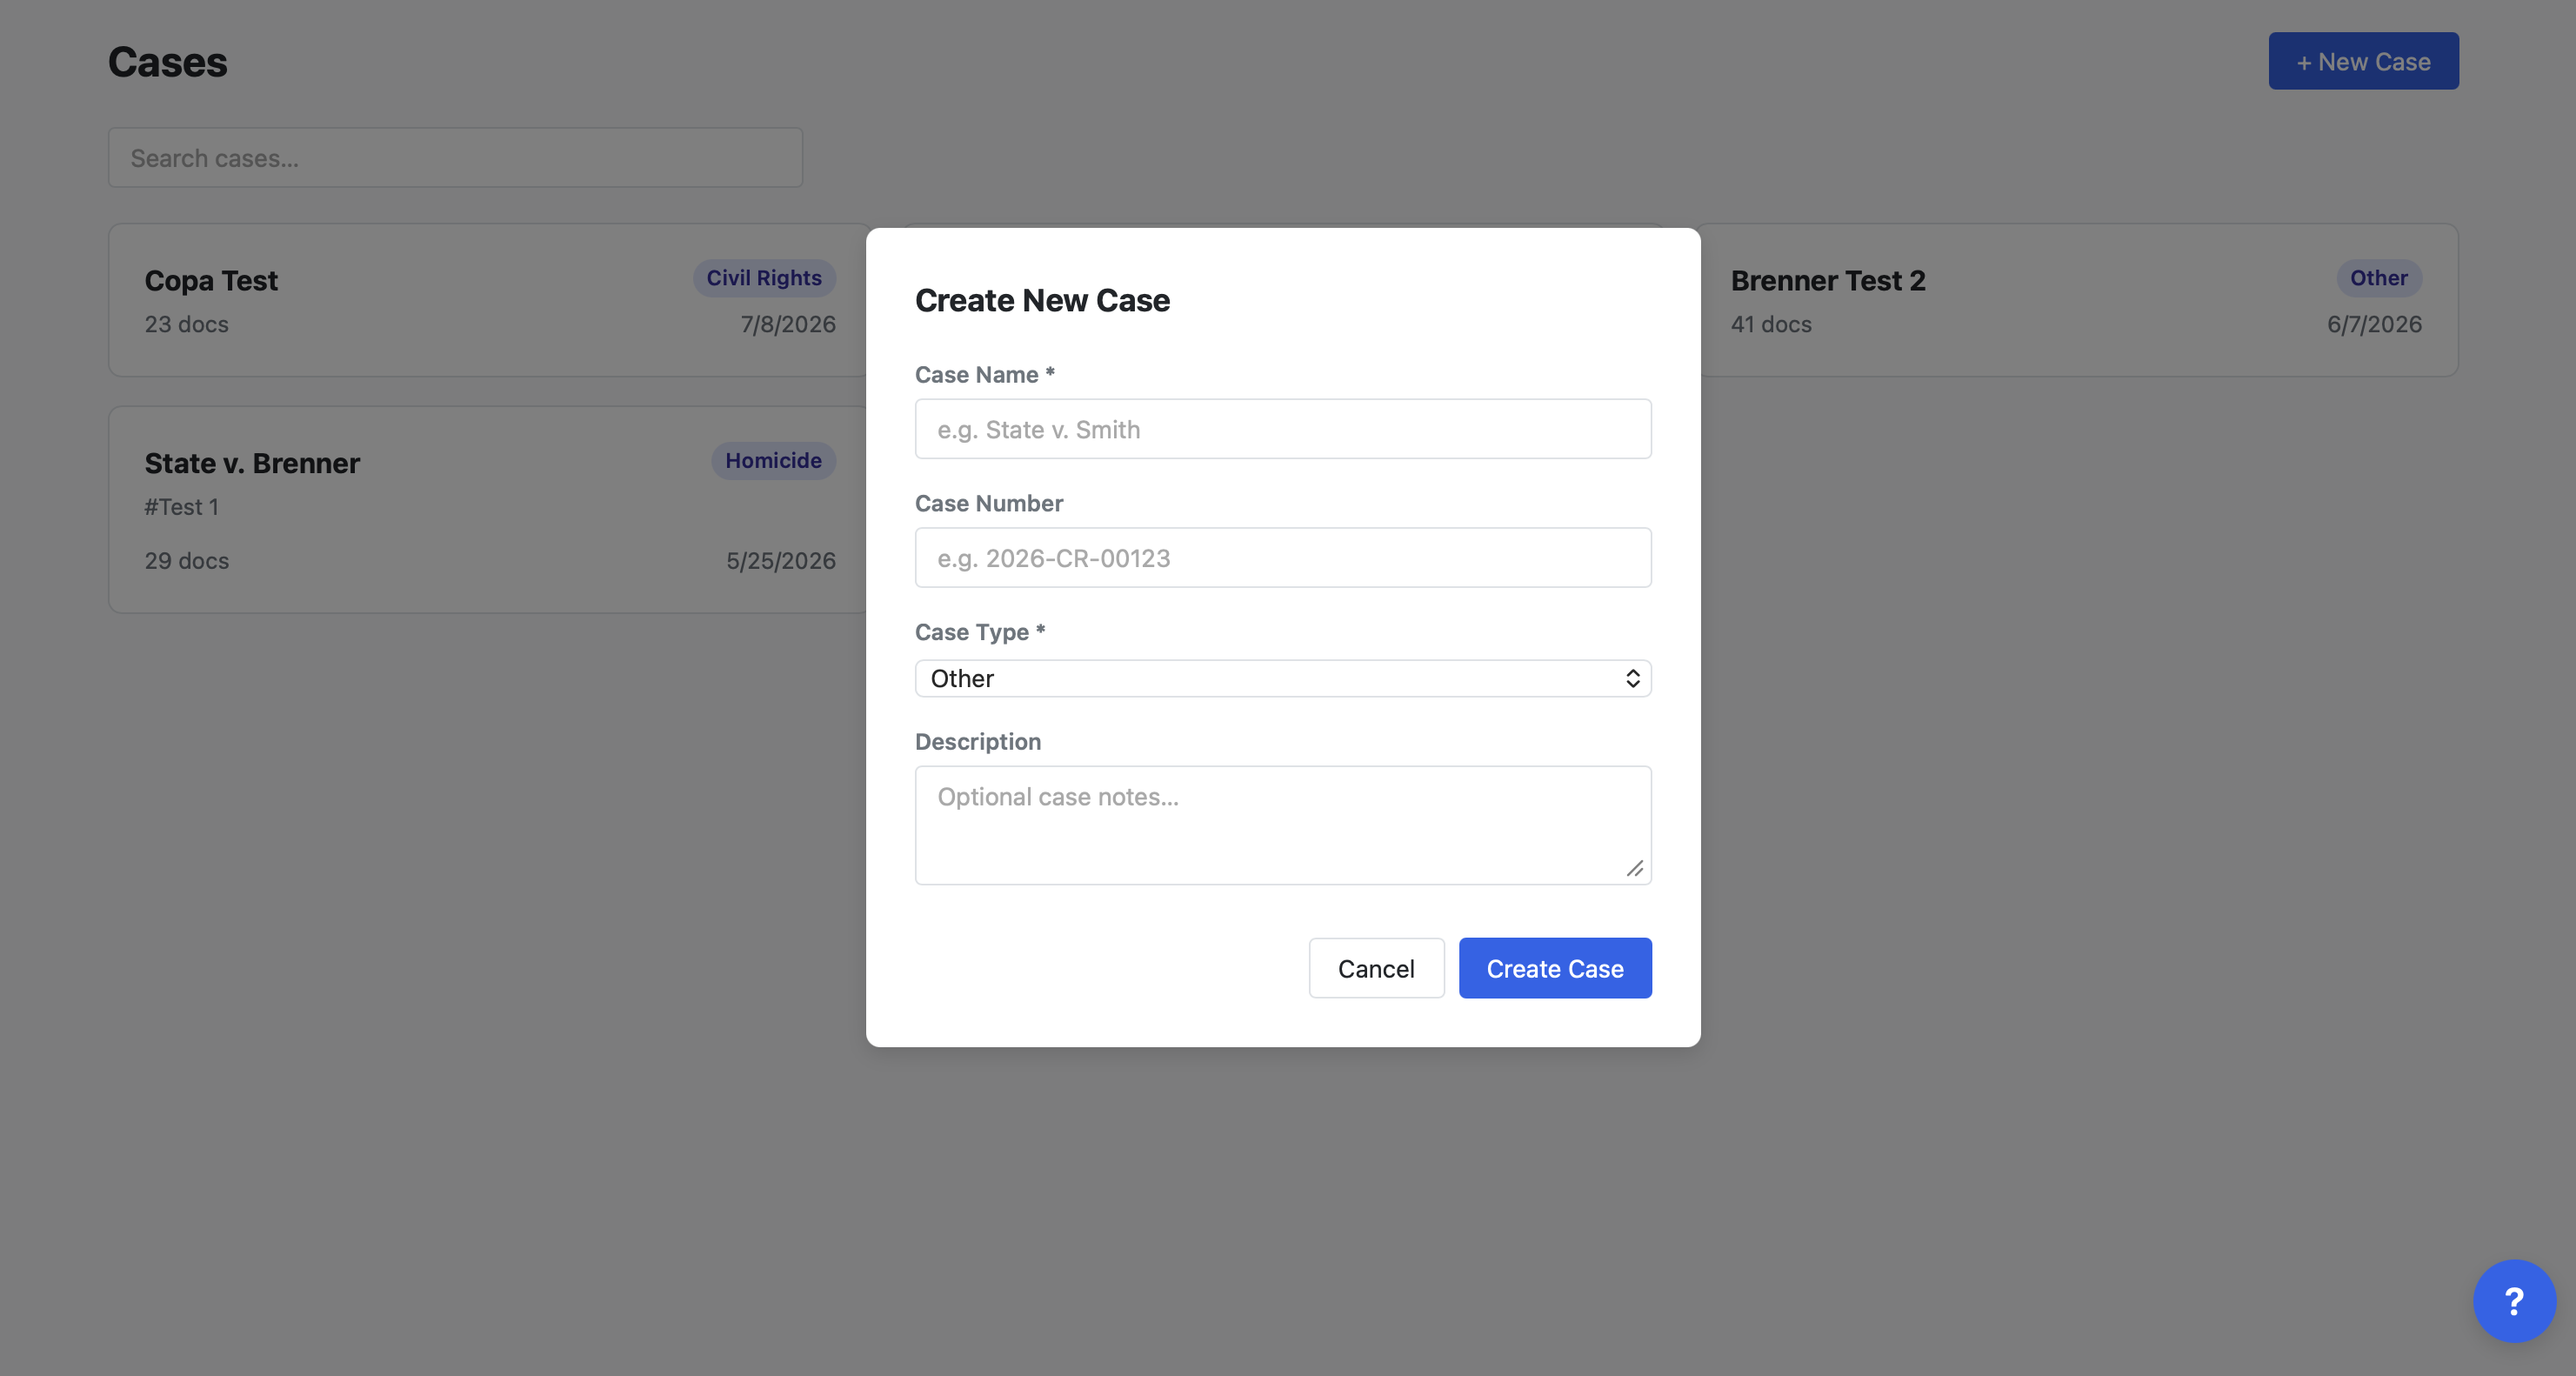
Everything you do in Arc lives inside a case, so that's your first move. From your case list, create a new case and give it a name (the matter name works well), then open it.
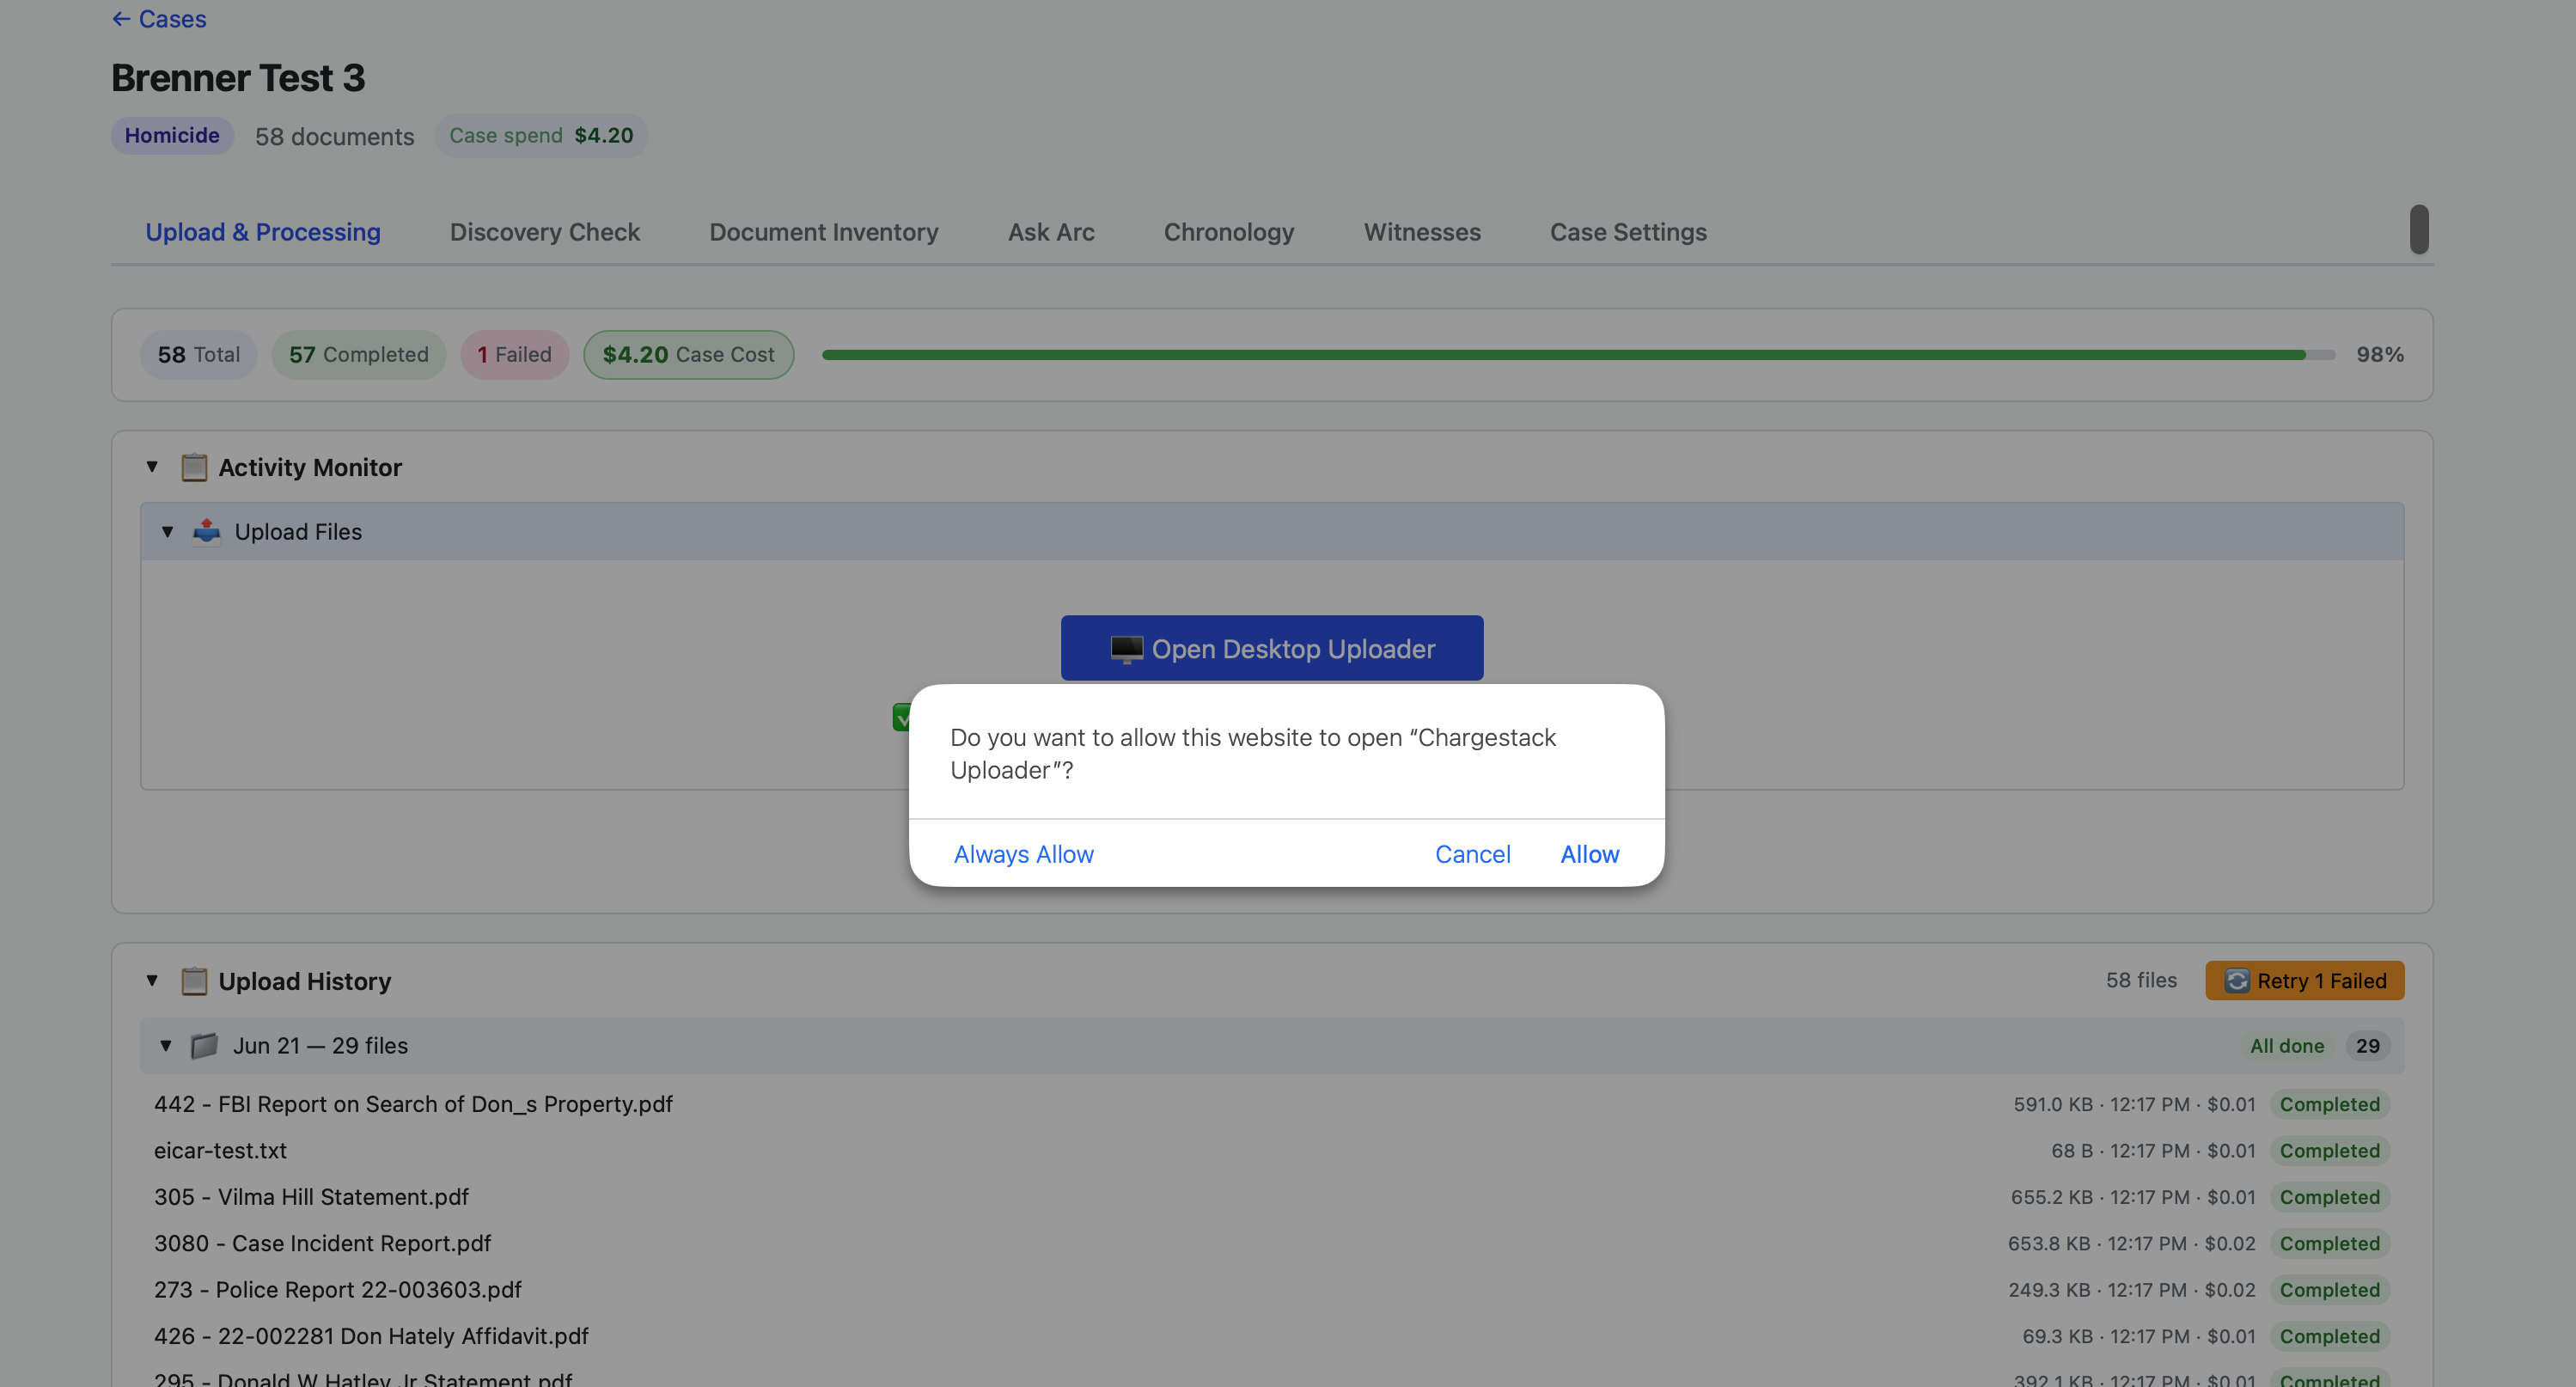
Now switch to the desktop uploader you installed in Step 2 — or open it from the “Open Desktop Uploader” button on the Upload & Processing tab.
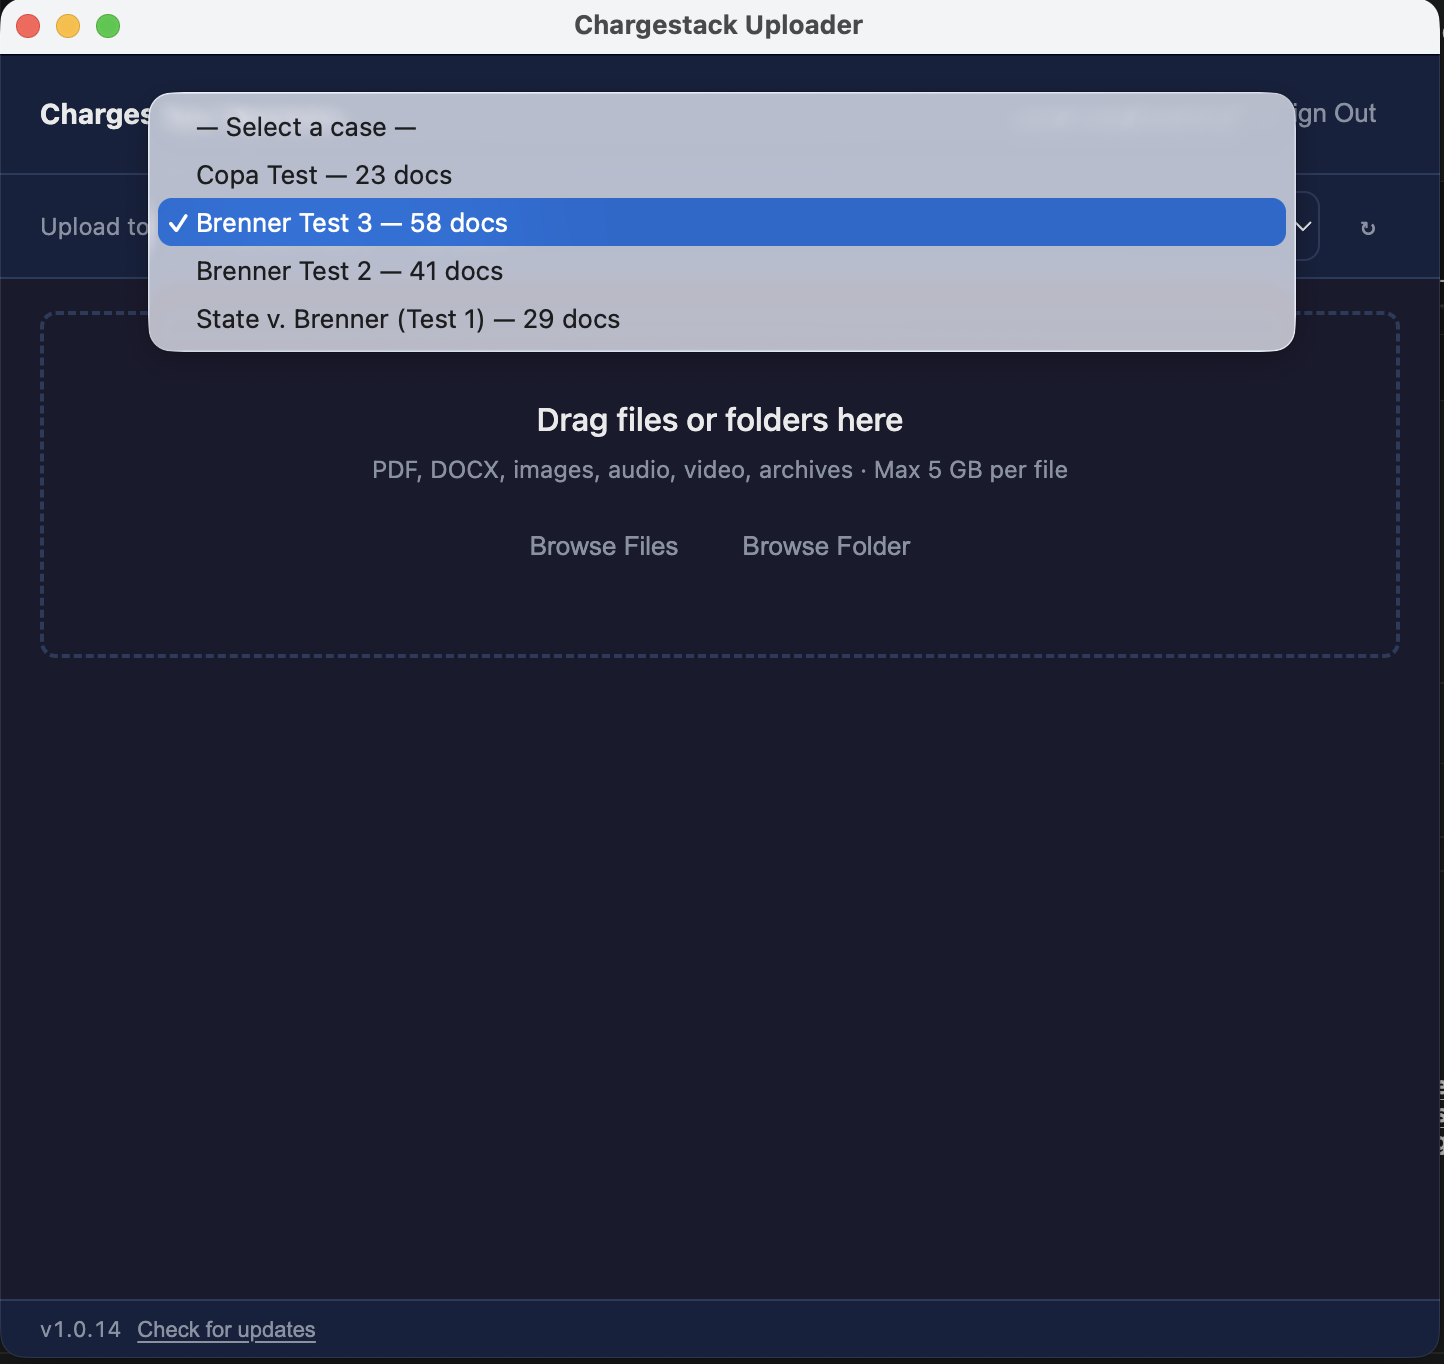
With your case selected, drag in your files. Keep the desktop uploader running until it finishes sending them — if you quit the uploader mid-transfer, it pauses, and picks back up where it left off the next time you open it. Once the files have uploaded, the rest happens on our servers: ChargeStack reads, transcribes, and indexes everything in the background, so you can close the uploader, sign out of the web app, or walk away — the processing keeps going without you.
The Upload & Processing tab shows live progress: total files, how many are done, and anything that needs a retry. You're ready for the next step when it reads “All caught up.”
ASK ARC IFfiles seem stuck, you're not sure everything came through, or you can't tell which case the uploader is pointing at. (“Arc, did all my files come through?”)
Run a Discovery Check
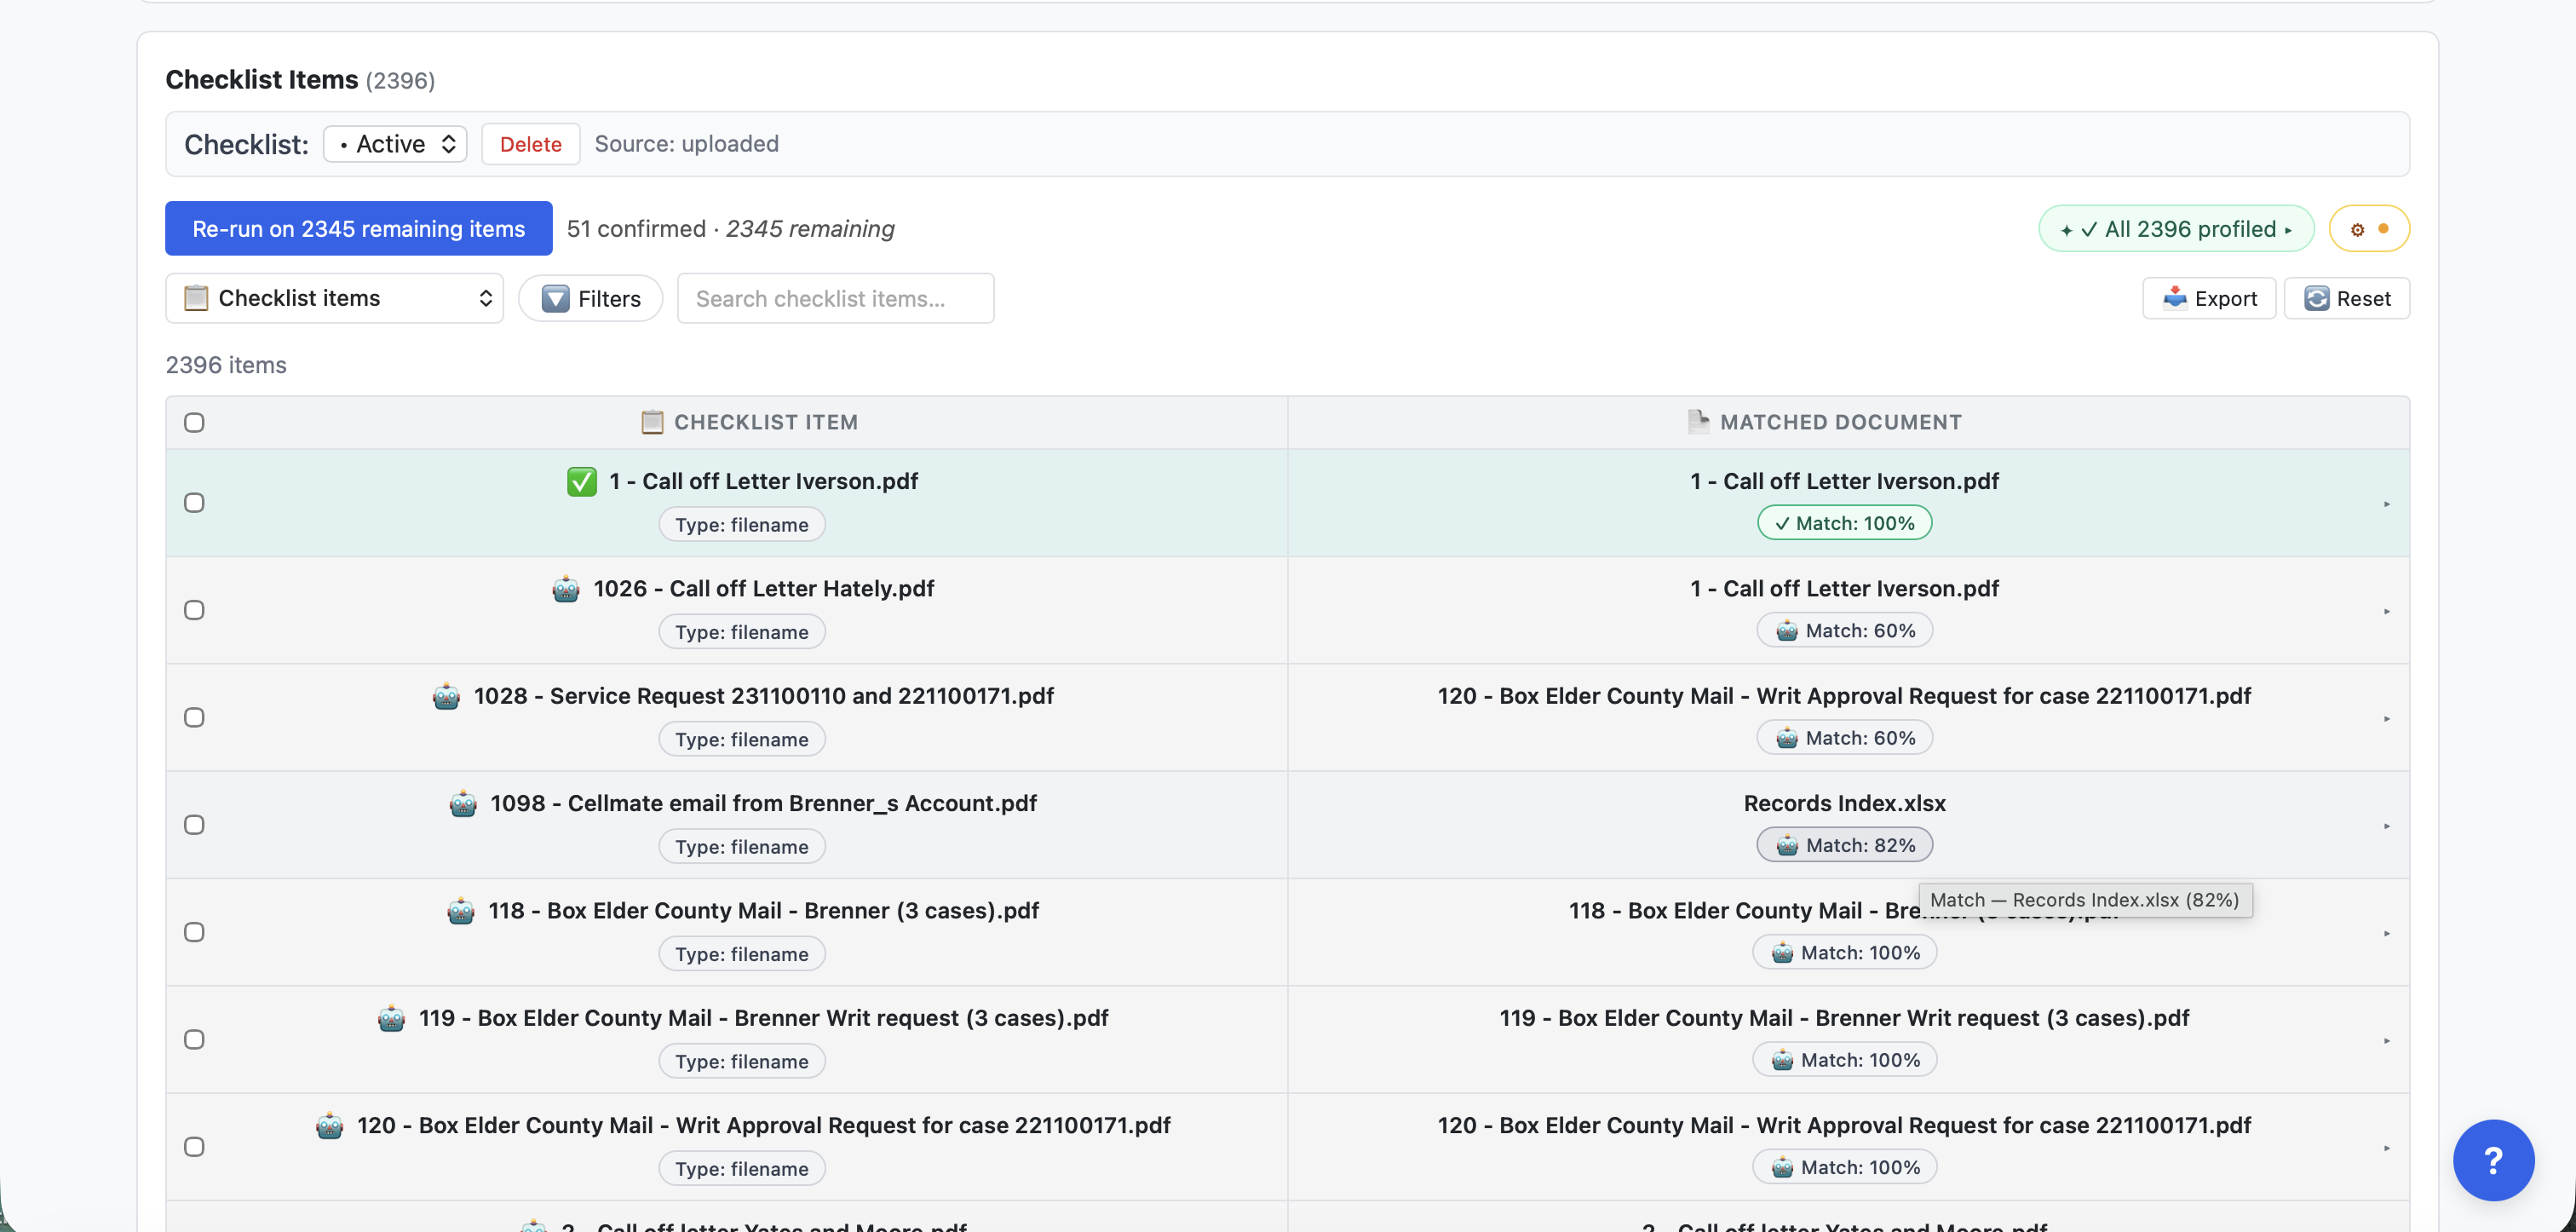
A Discovery Check shows you, item by item, what was actually produced against what was requested. Go to the Discovery Check tab and upload your checklist of what's supposed to be in the case, then have ChargeStack match your uploaded documents against each item on it.
Each requested item shows suggested matches with a confidence level. Work through them: confirm the good matches, mark items that genuinely weren't produced as “No Match,” and mark anything that doesn't apply as “N/A.” Use the filter to focus on the items still needing review. You're done when every item has a decision and you can read off, at a glance, what's confirmed, what's missing, and what's outstanding.
ASK ARC IFa suggested match looks wrong, the matching missed a document you know is there, or you want help deciding whether an item was really produced. (“Arc, was the deposition transcript produced?”)
Organize the files with Arc
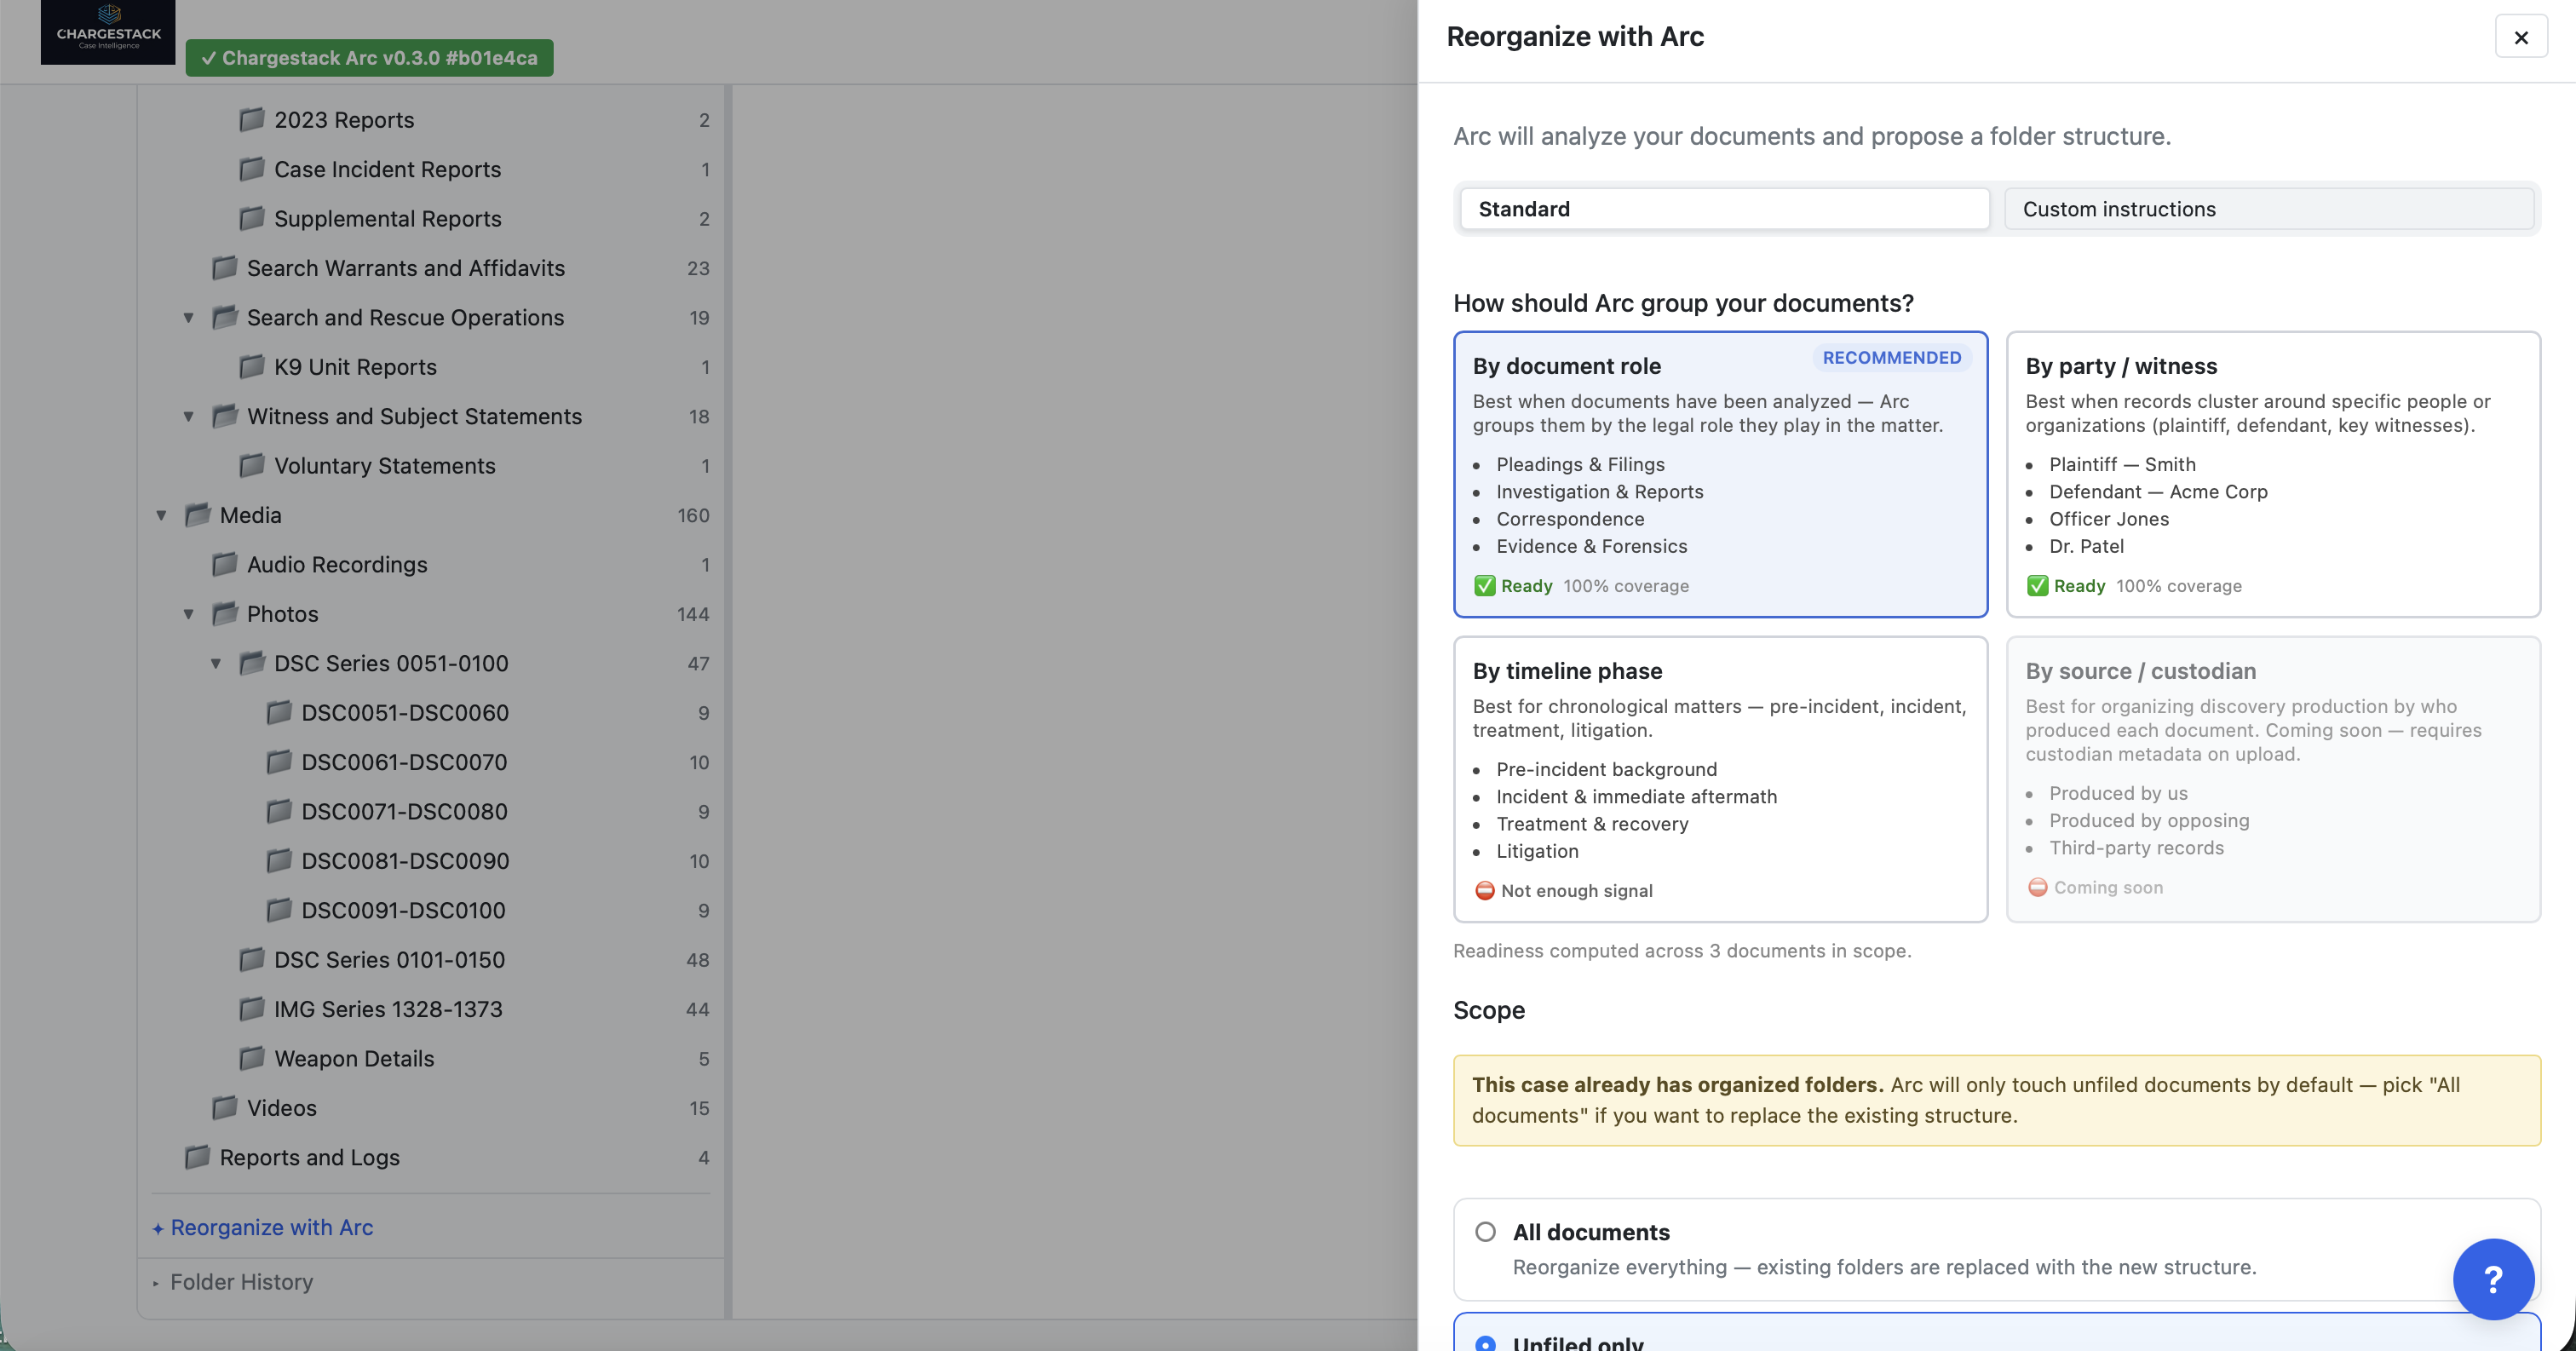
Rather than sort a flat pile of files by hand, ask Arc to organize them for you (“Arc, can you organize these files?”). Arc proposes a folder structure that would make sense to a colleague picking up the case cold — and shows you the plan before anything moves. Review it, adjust if something looks off, then accept.
ASK ARC IFthe grouping doesn't match how you think about the case, or you'd like it organized a different way.
Open and review your documents
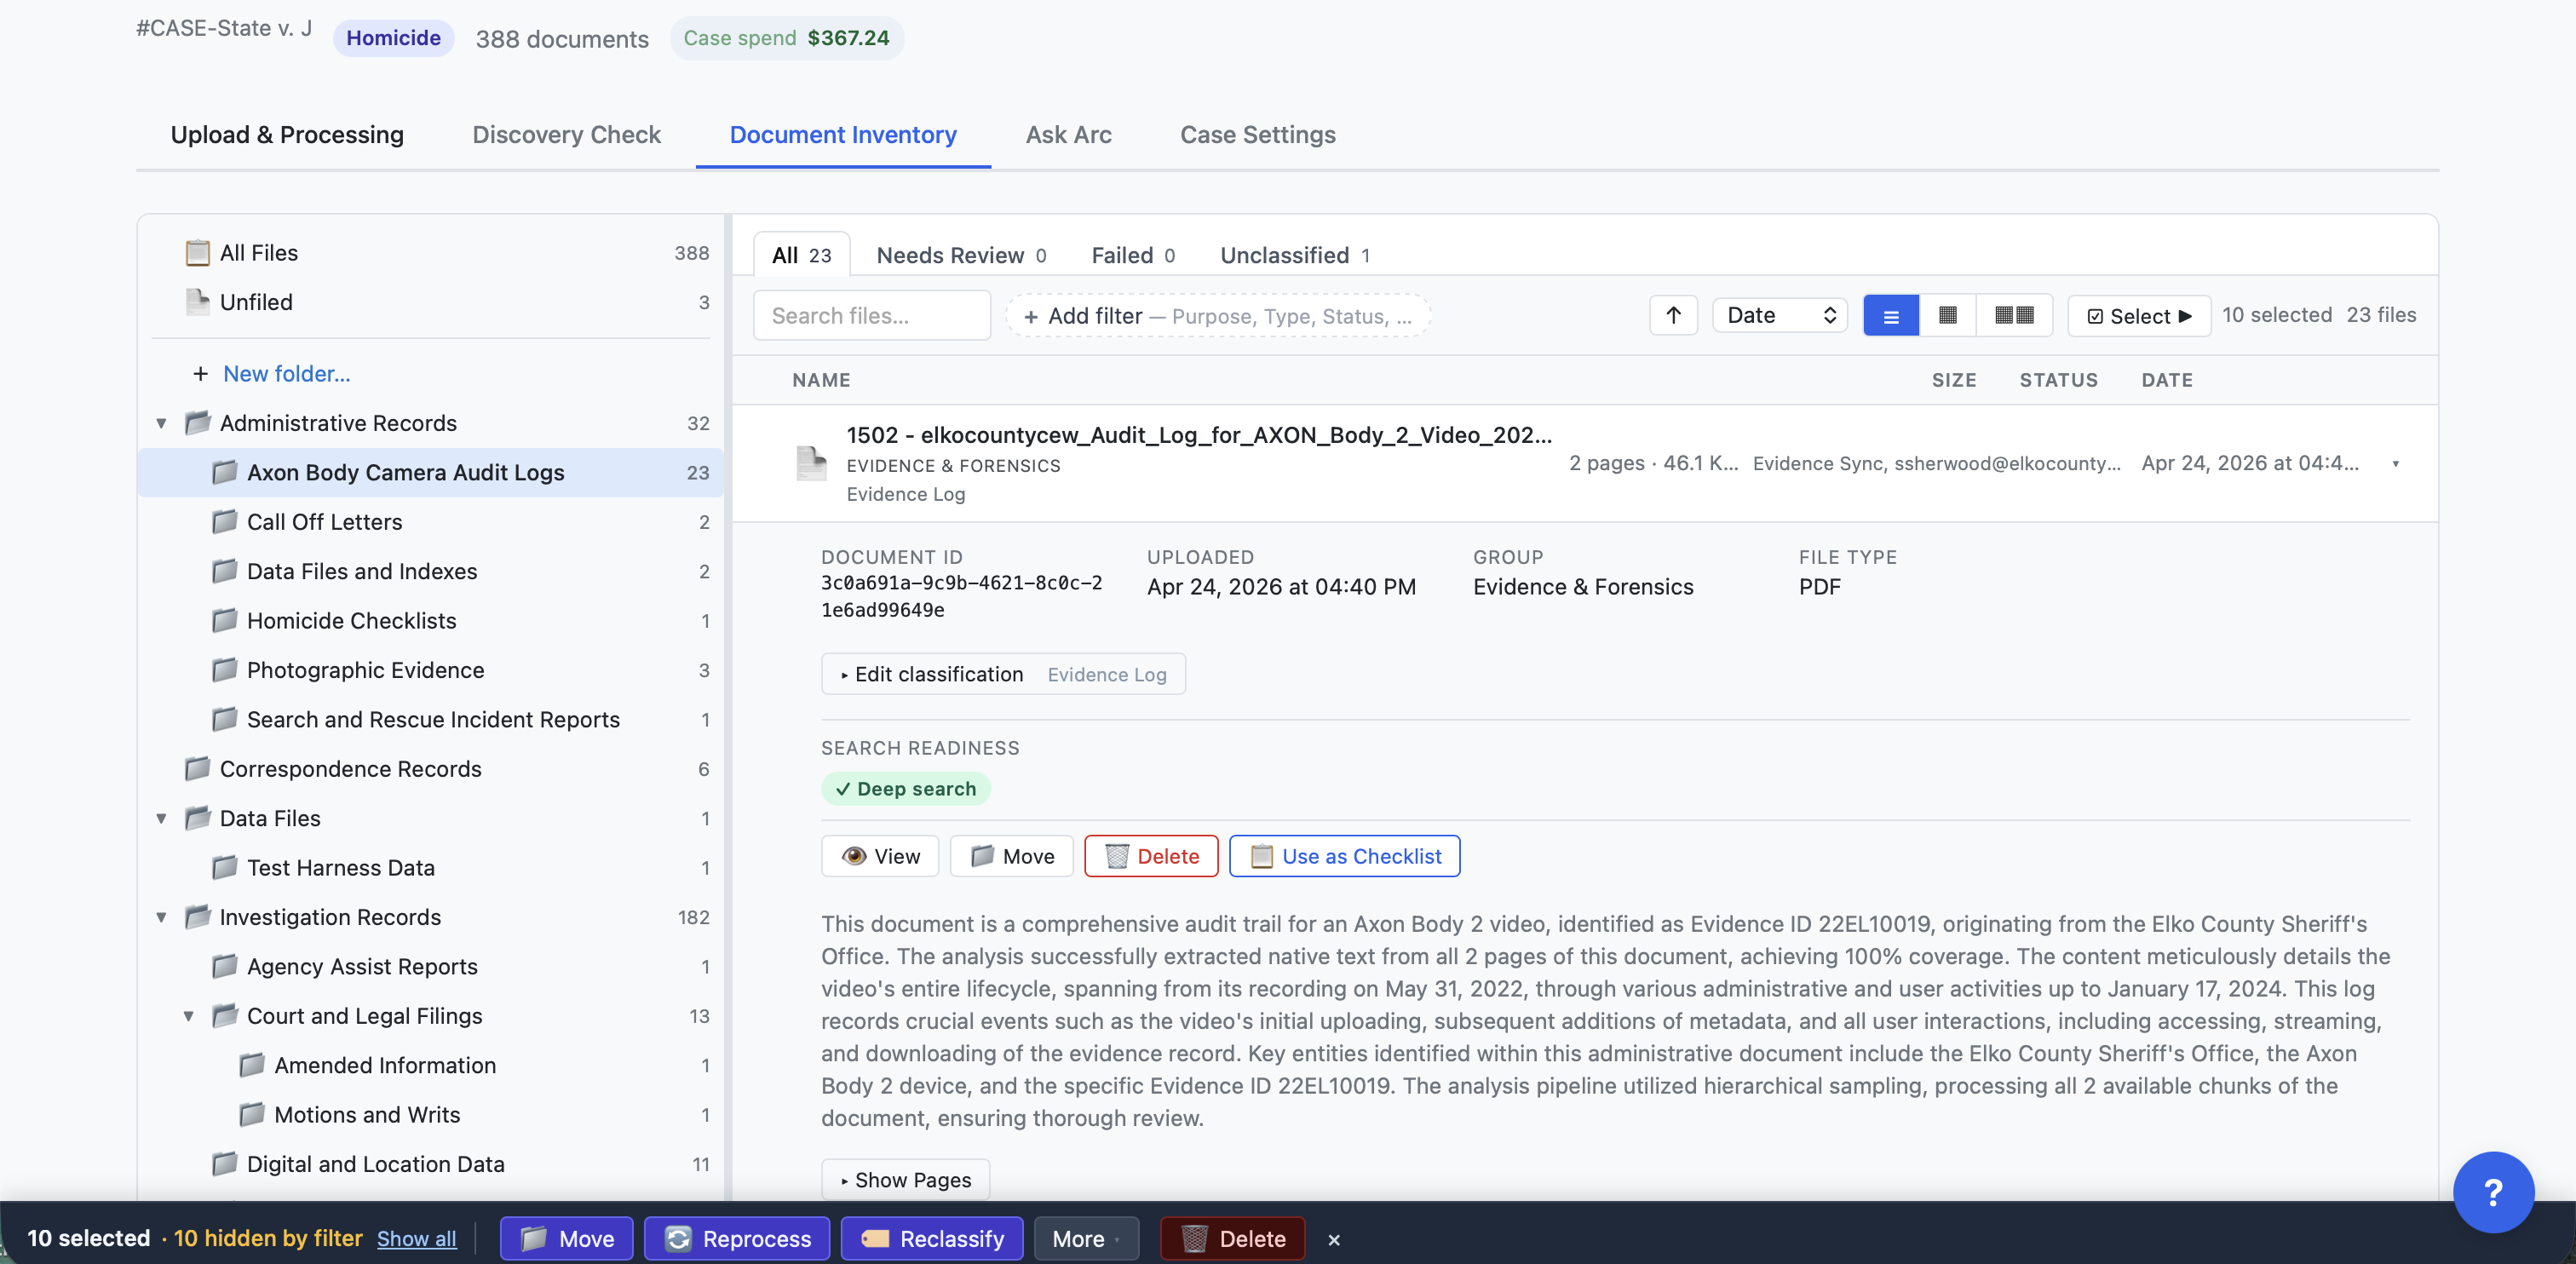
Take a look at your material to confirm it came through correctly. Open a handful of items of different kinds — a regular document or two, an audio or video transcript, and an image or photo — by clicking them in the Document Inventory.
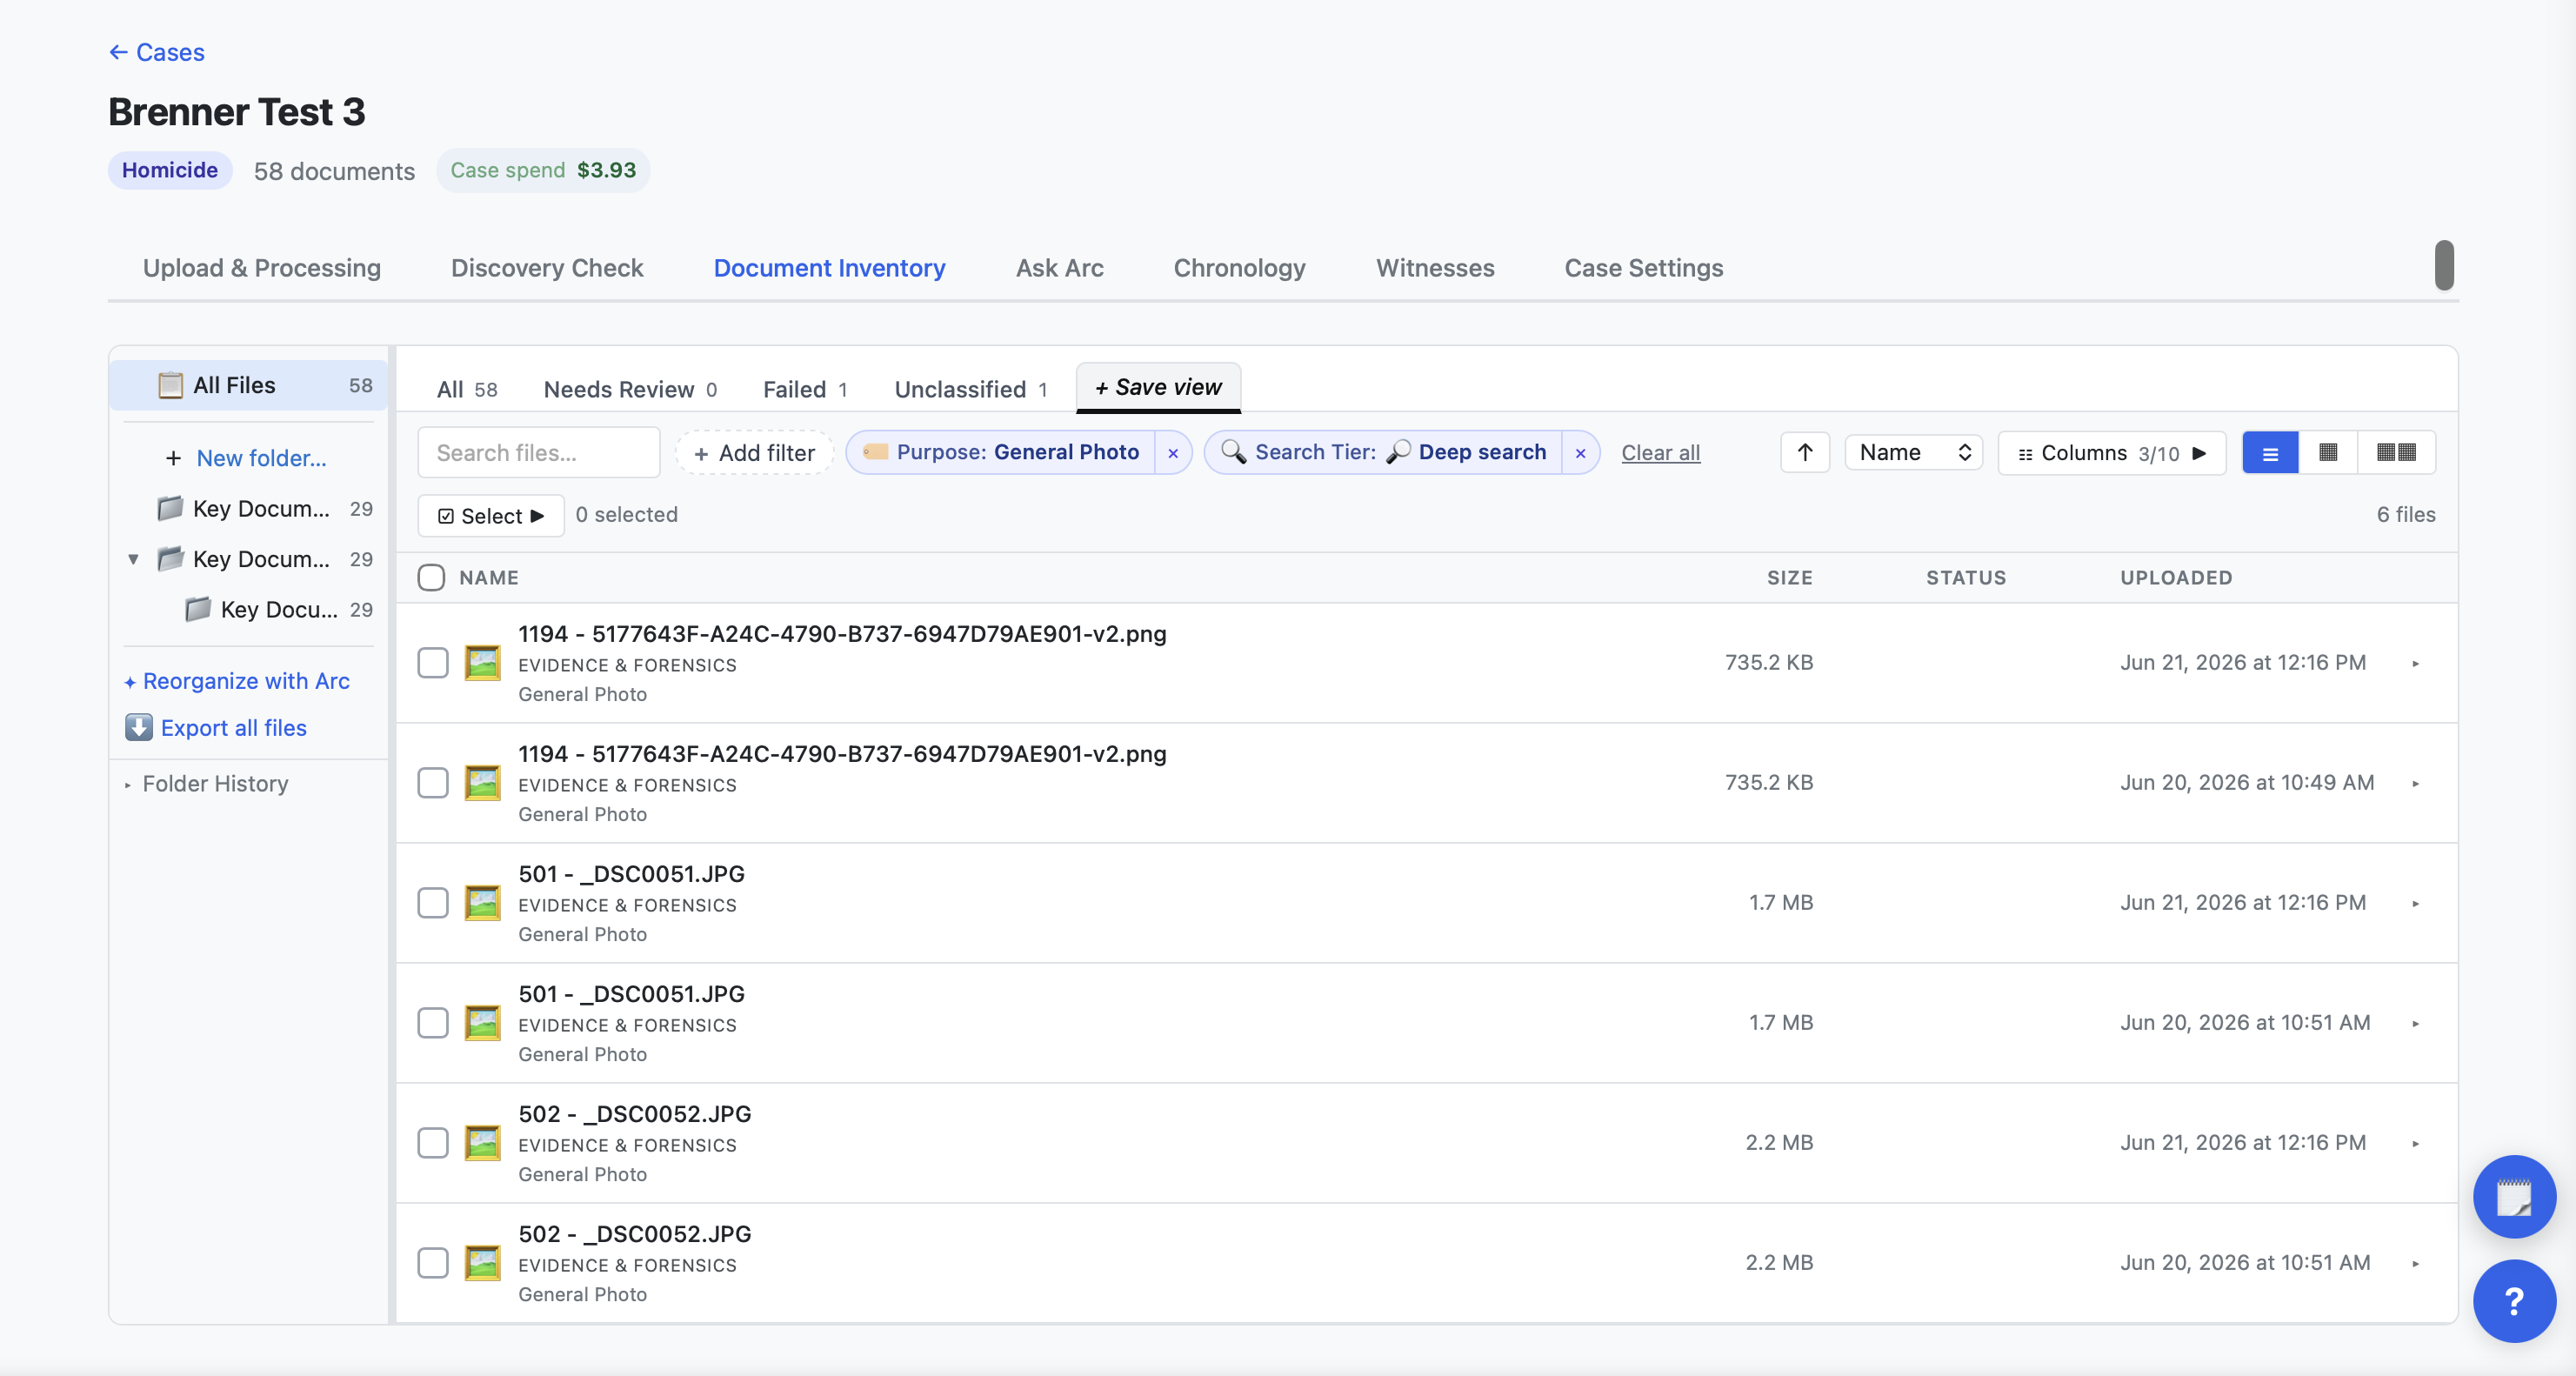
The Inventory is your command center for the case's files, and you can shape what it shows. Filter by type, folder, status, date, and more to narrow a large case down to just what you want; switch the columns or the layout to see the details that matter to you; and save a combination you'll come back to as its own view (tab) so it's one click away next time. Use these to slice the case however you work.
When you open an item, check that it looks right: pages in order, transcripts readable and roughly accurate, images right-side up and clear. The viewer shows the original alongside what ChargeStack extracted, so you can trust that what's on screen faithfully represents the original. For audio and video, the transcript sits beside the player; if you need speaker labels or fuller coverage, pick a higher-quality transcript from the source options there — you'll see exactly what you'd gain before anything runs.
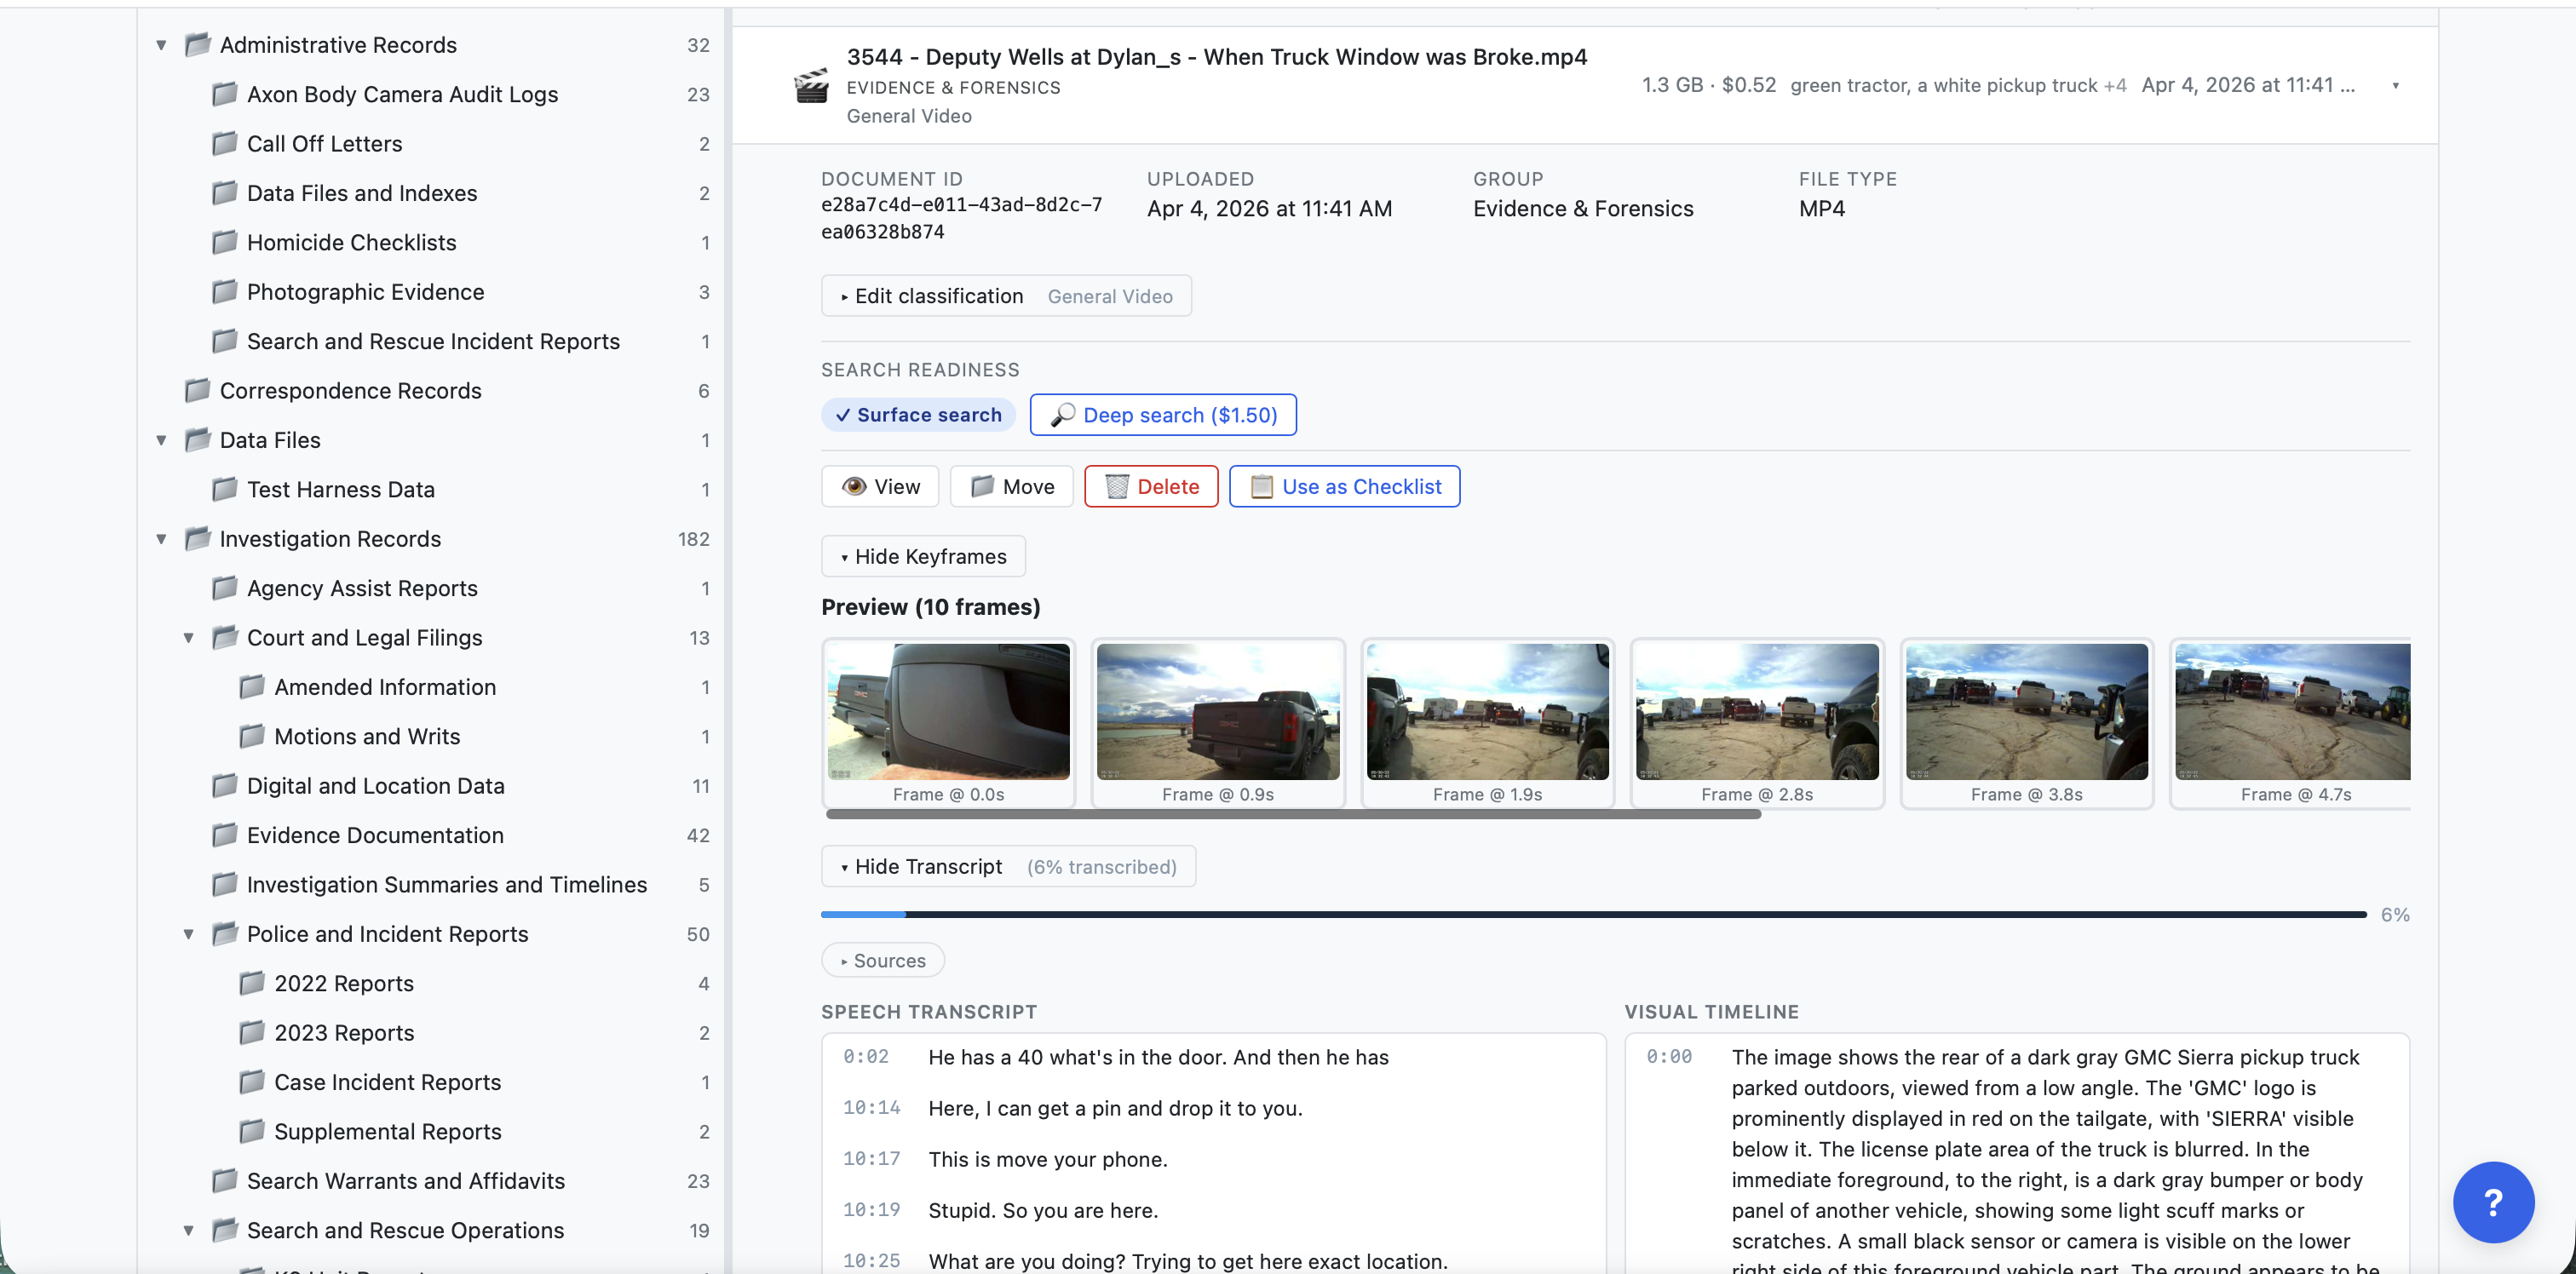
ASK ARC IFsomething looks wrong (a transcript seems off, an image is rotated or blurry, a document won't open), or you want Arc to pull up a specific document, point, or moment for you. (“Arc, show me where they talk about X.”)
Take notes as you review
As you go through the material, capture what stands out so your thinking stays next to the evidence instead of on a separate legal pad. Use the Notepad to clip a key admission, a date that matters, a passage to come back to, or a question for a witness — each clip links back to exactly where it came from.
Organize as you go. Keep clips in separate notebooks — one per witness, claim, or theory — and tag them so related clips group together; as you type a tag, ones you've already used suggest themselves, so your labels stay consistent. Tag filters and pins work across the whole case, so “show me everything tagged #alibi” is a single click.
Notebooks are shared with your case team by default, but you decide who sees each one: keep a notebook Private to just you, or Share it with specific colleagues — view-only, or let them edit too. When you're ready, export a notebook to a memo (copy it, or save it as Word or PDF), and Arc can help you pull your notes together.
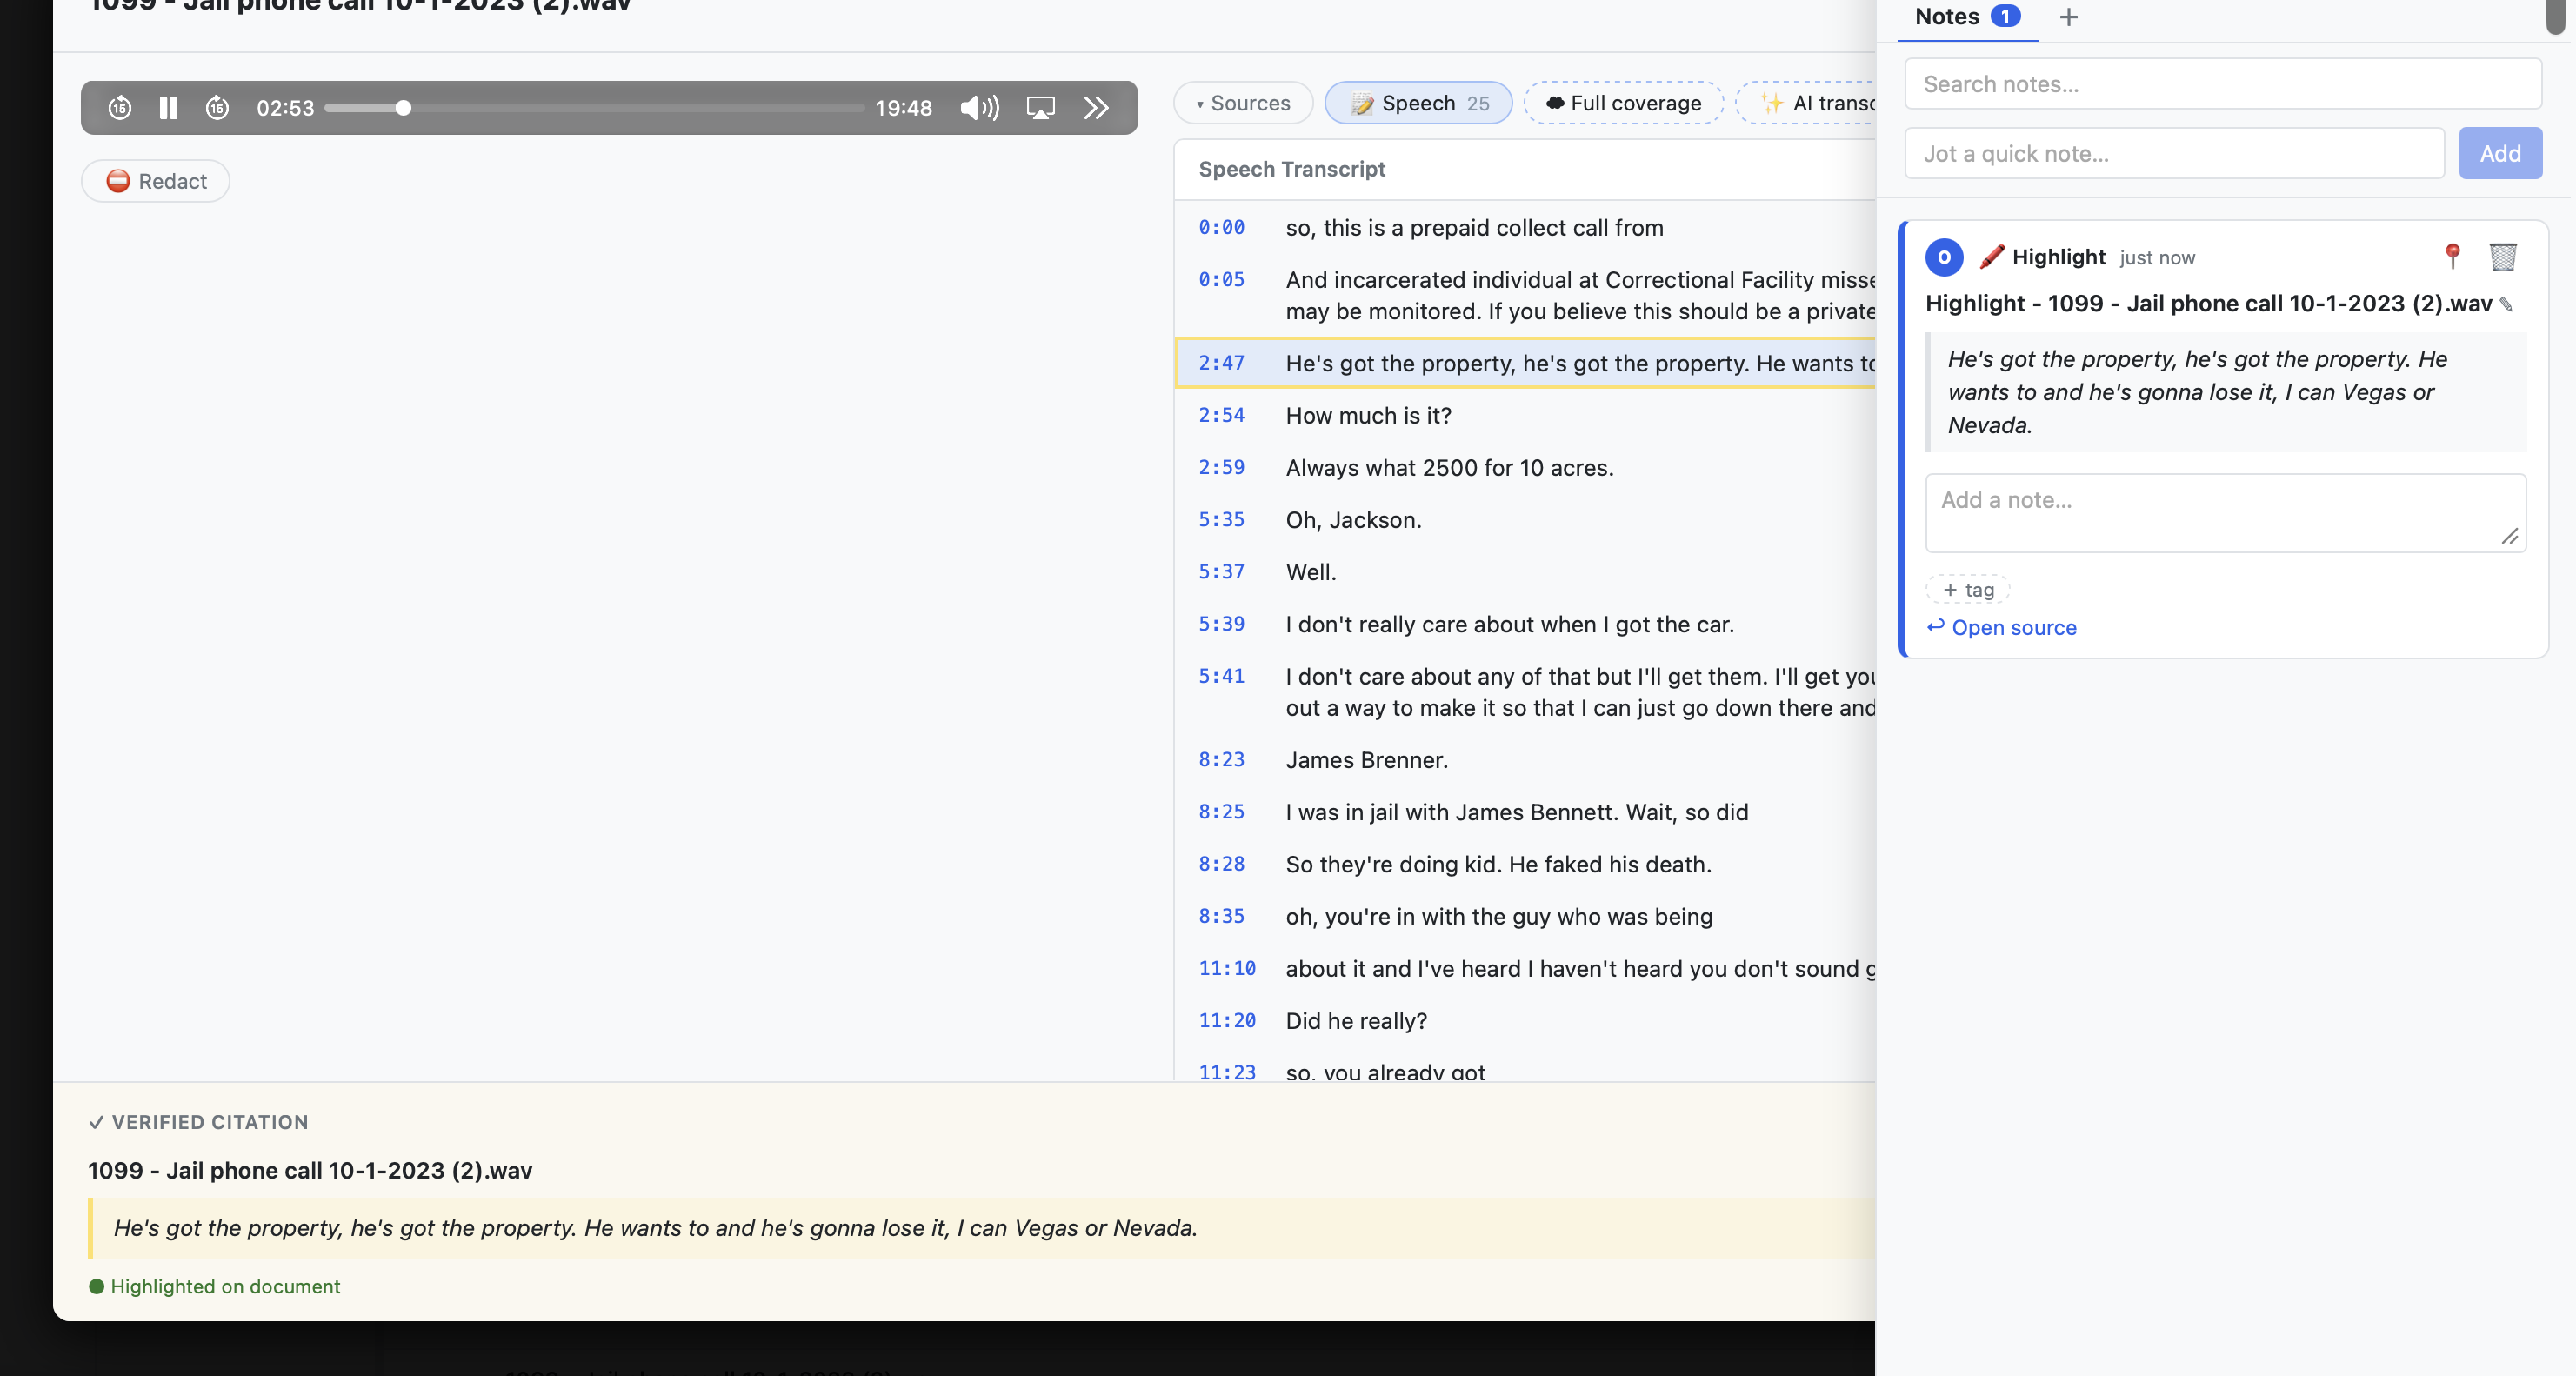
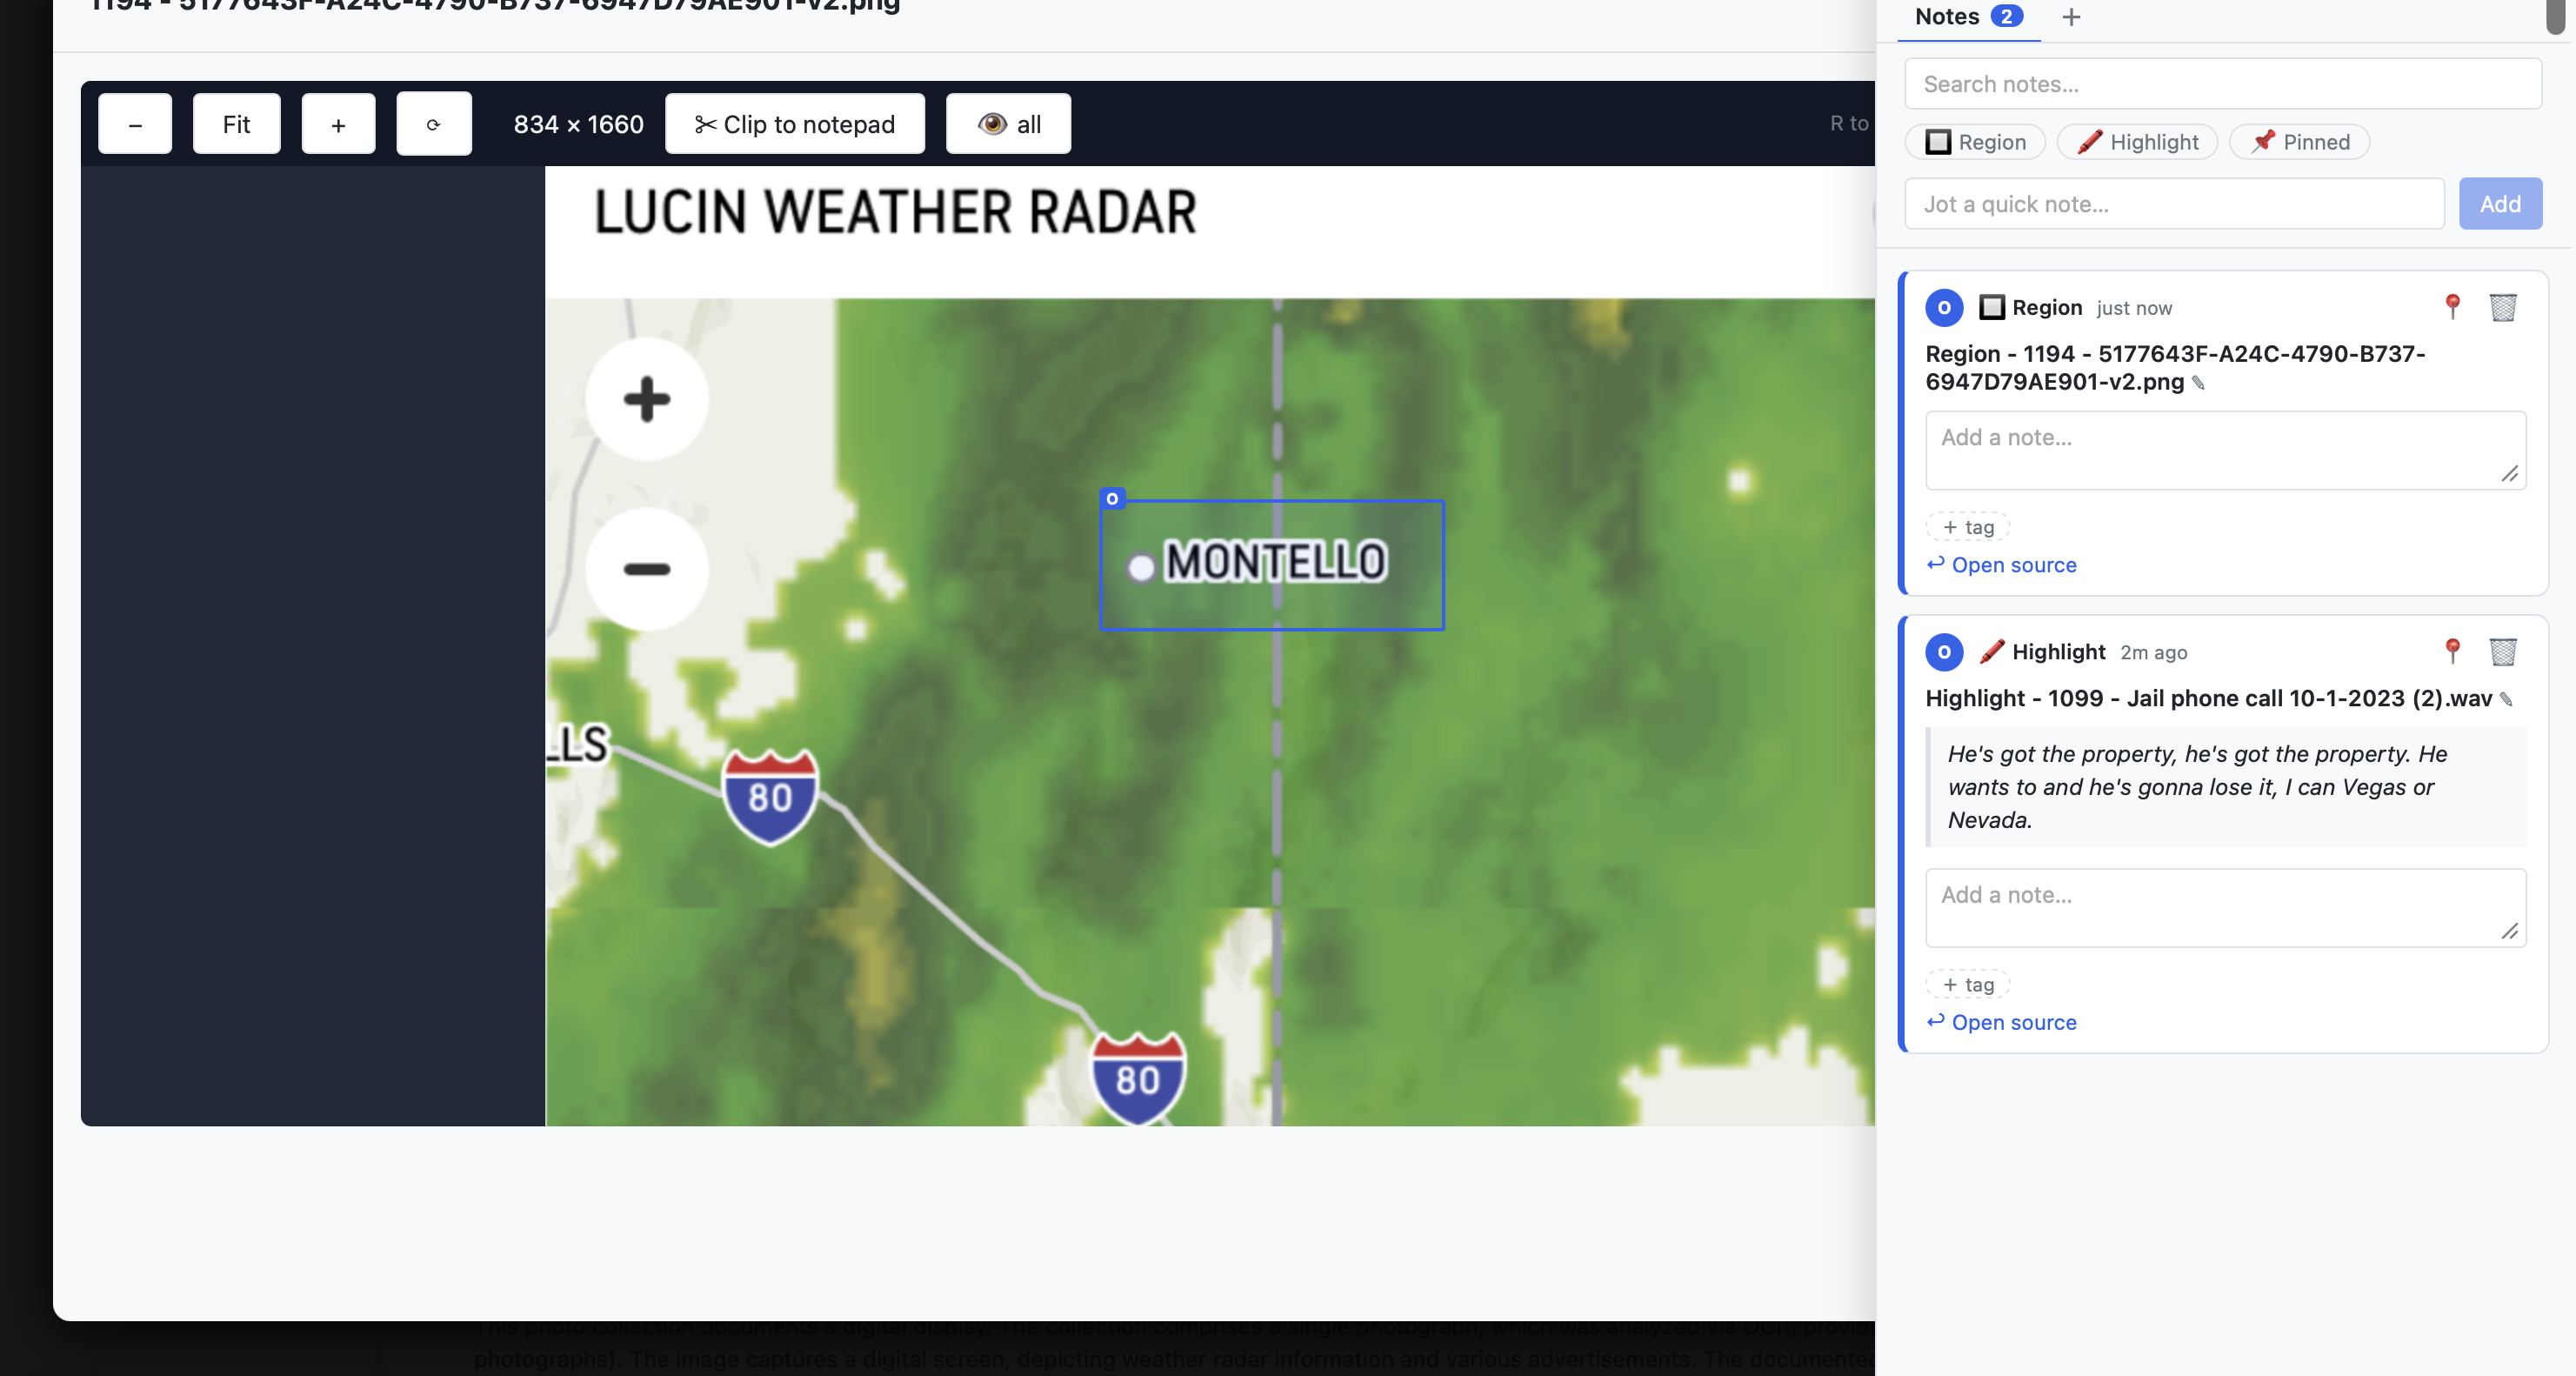
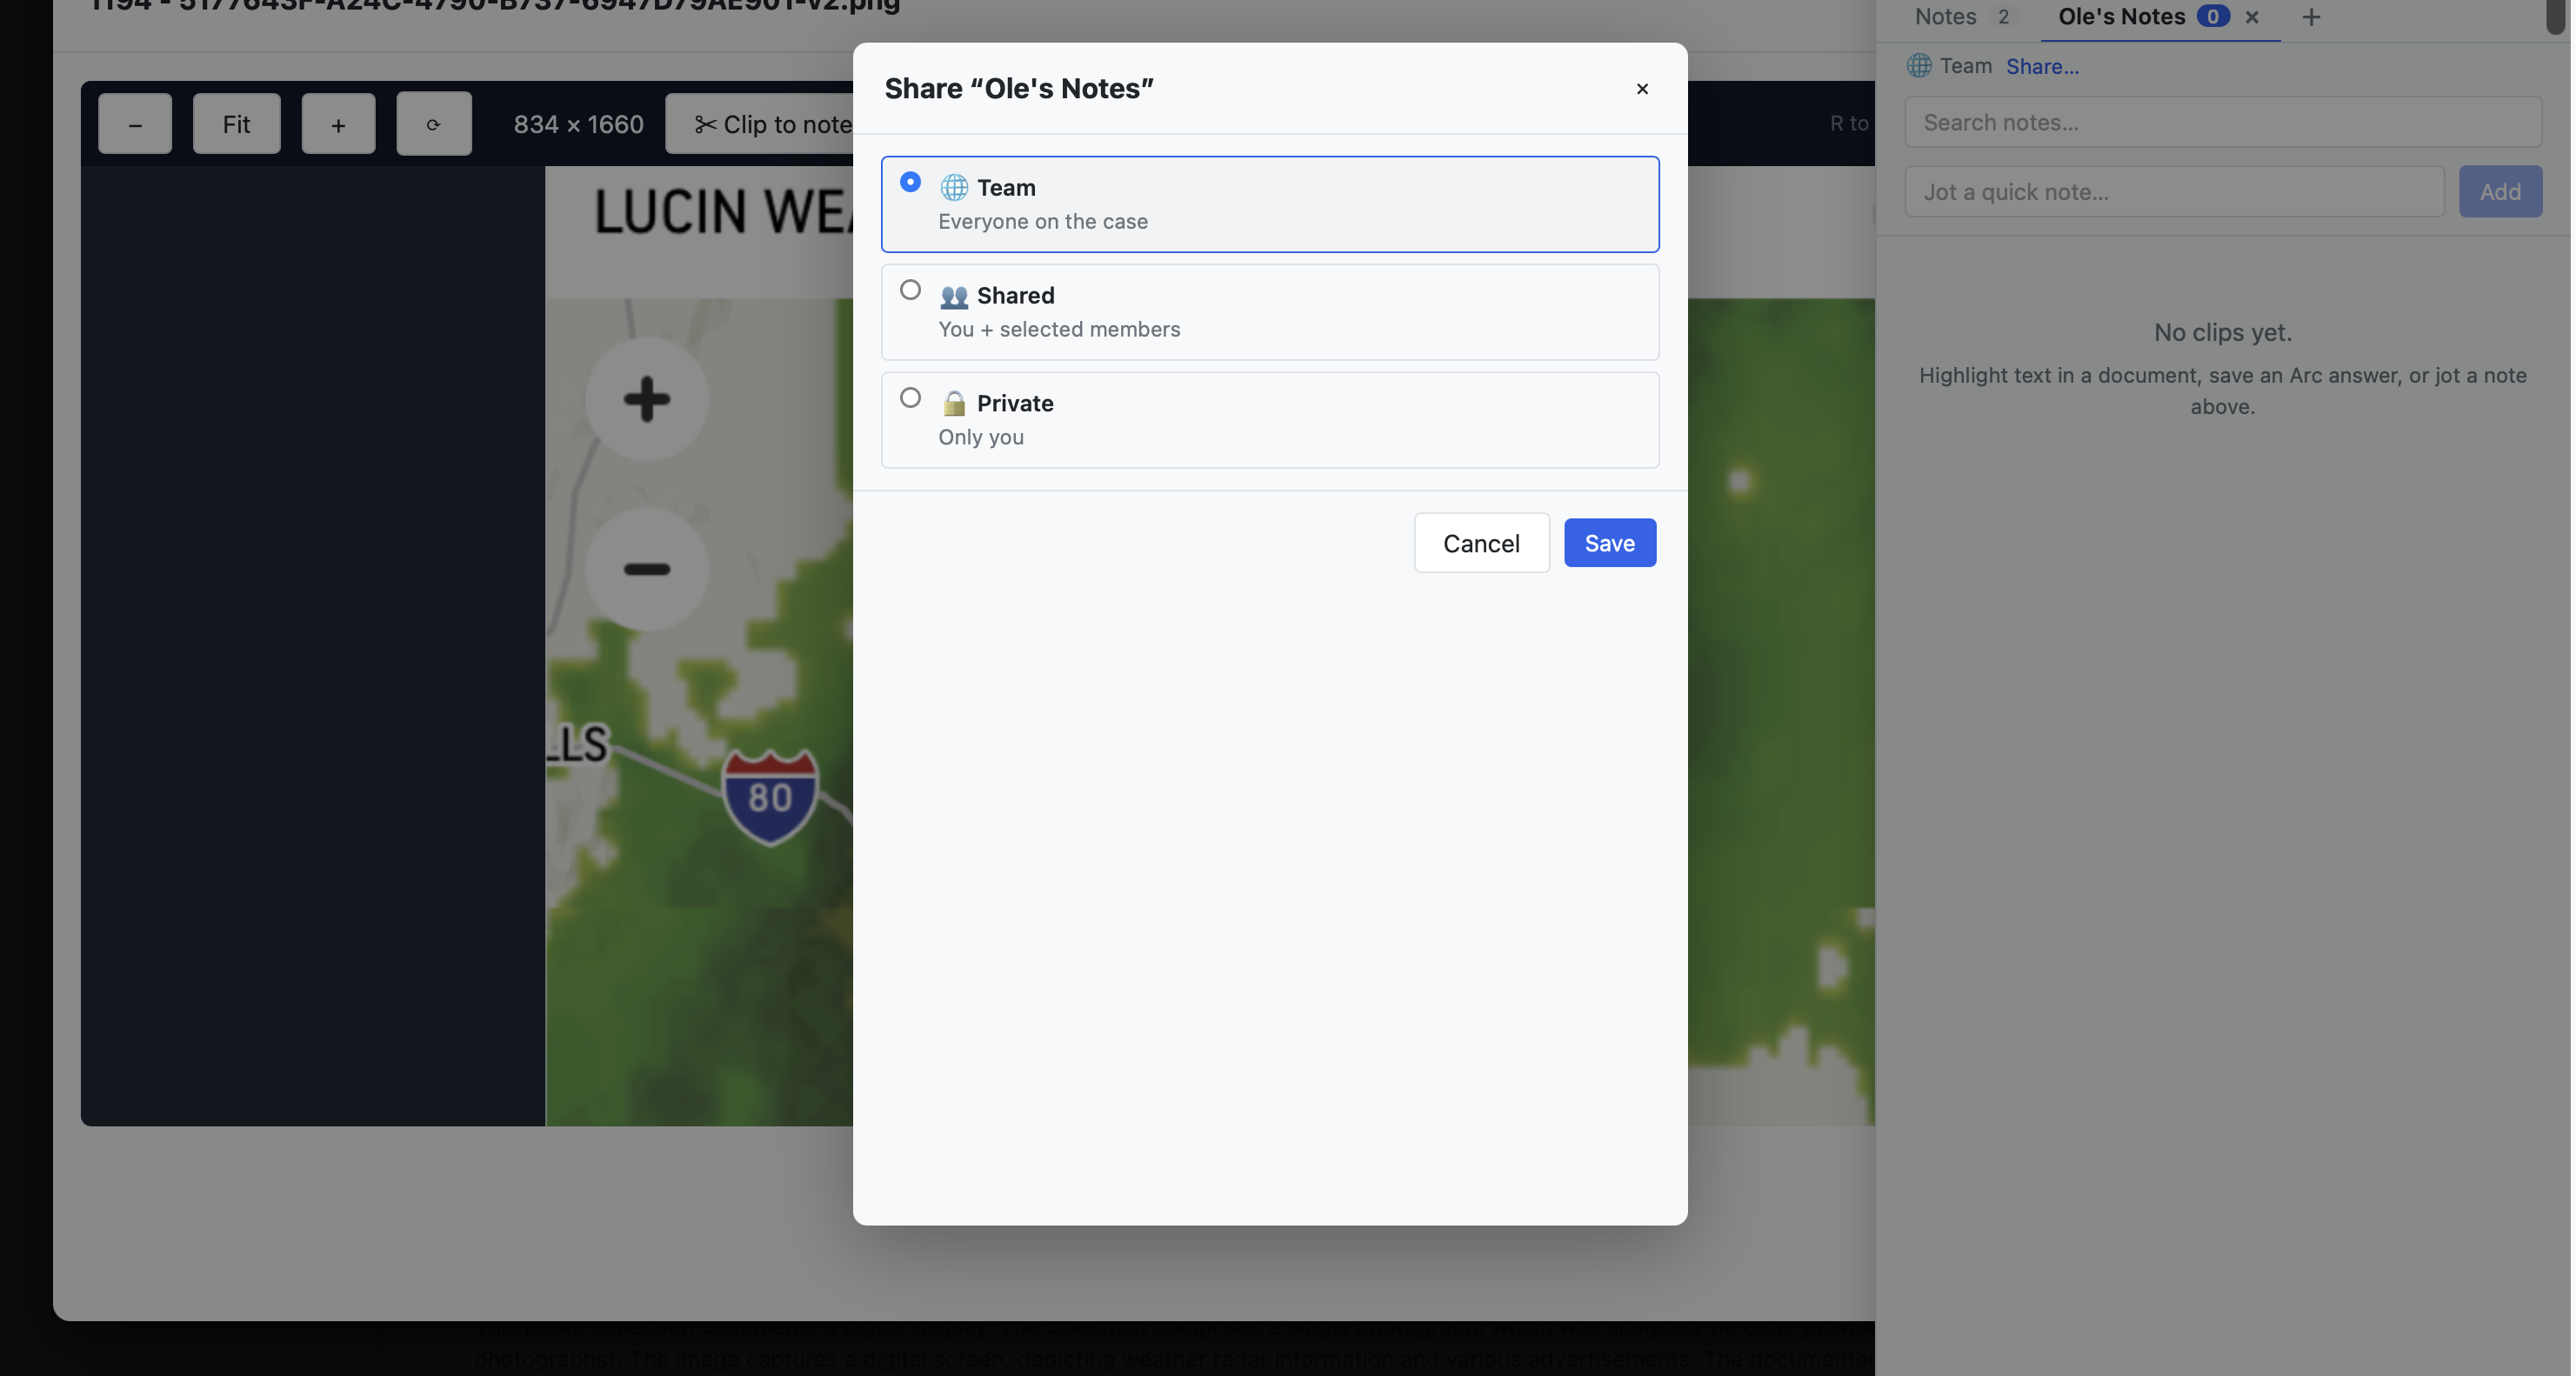
ASK ARC IFyou can't find where to add or review your notes, you want to share a notebook with a colleague, or you want Arc to help gather them. (“Arc, what have I flagged so far?”)
Find something specific
There are two kinds of search, and they answer different questions.
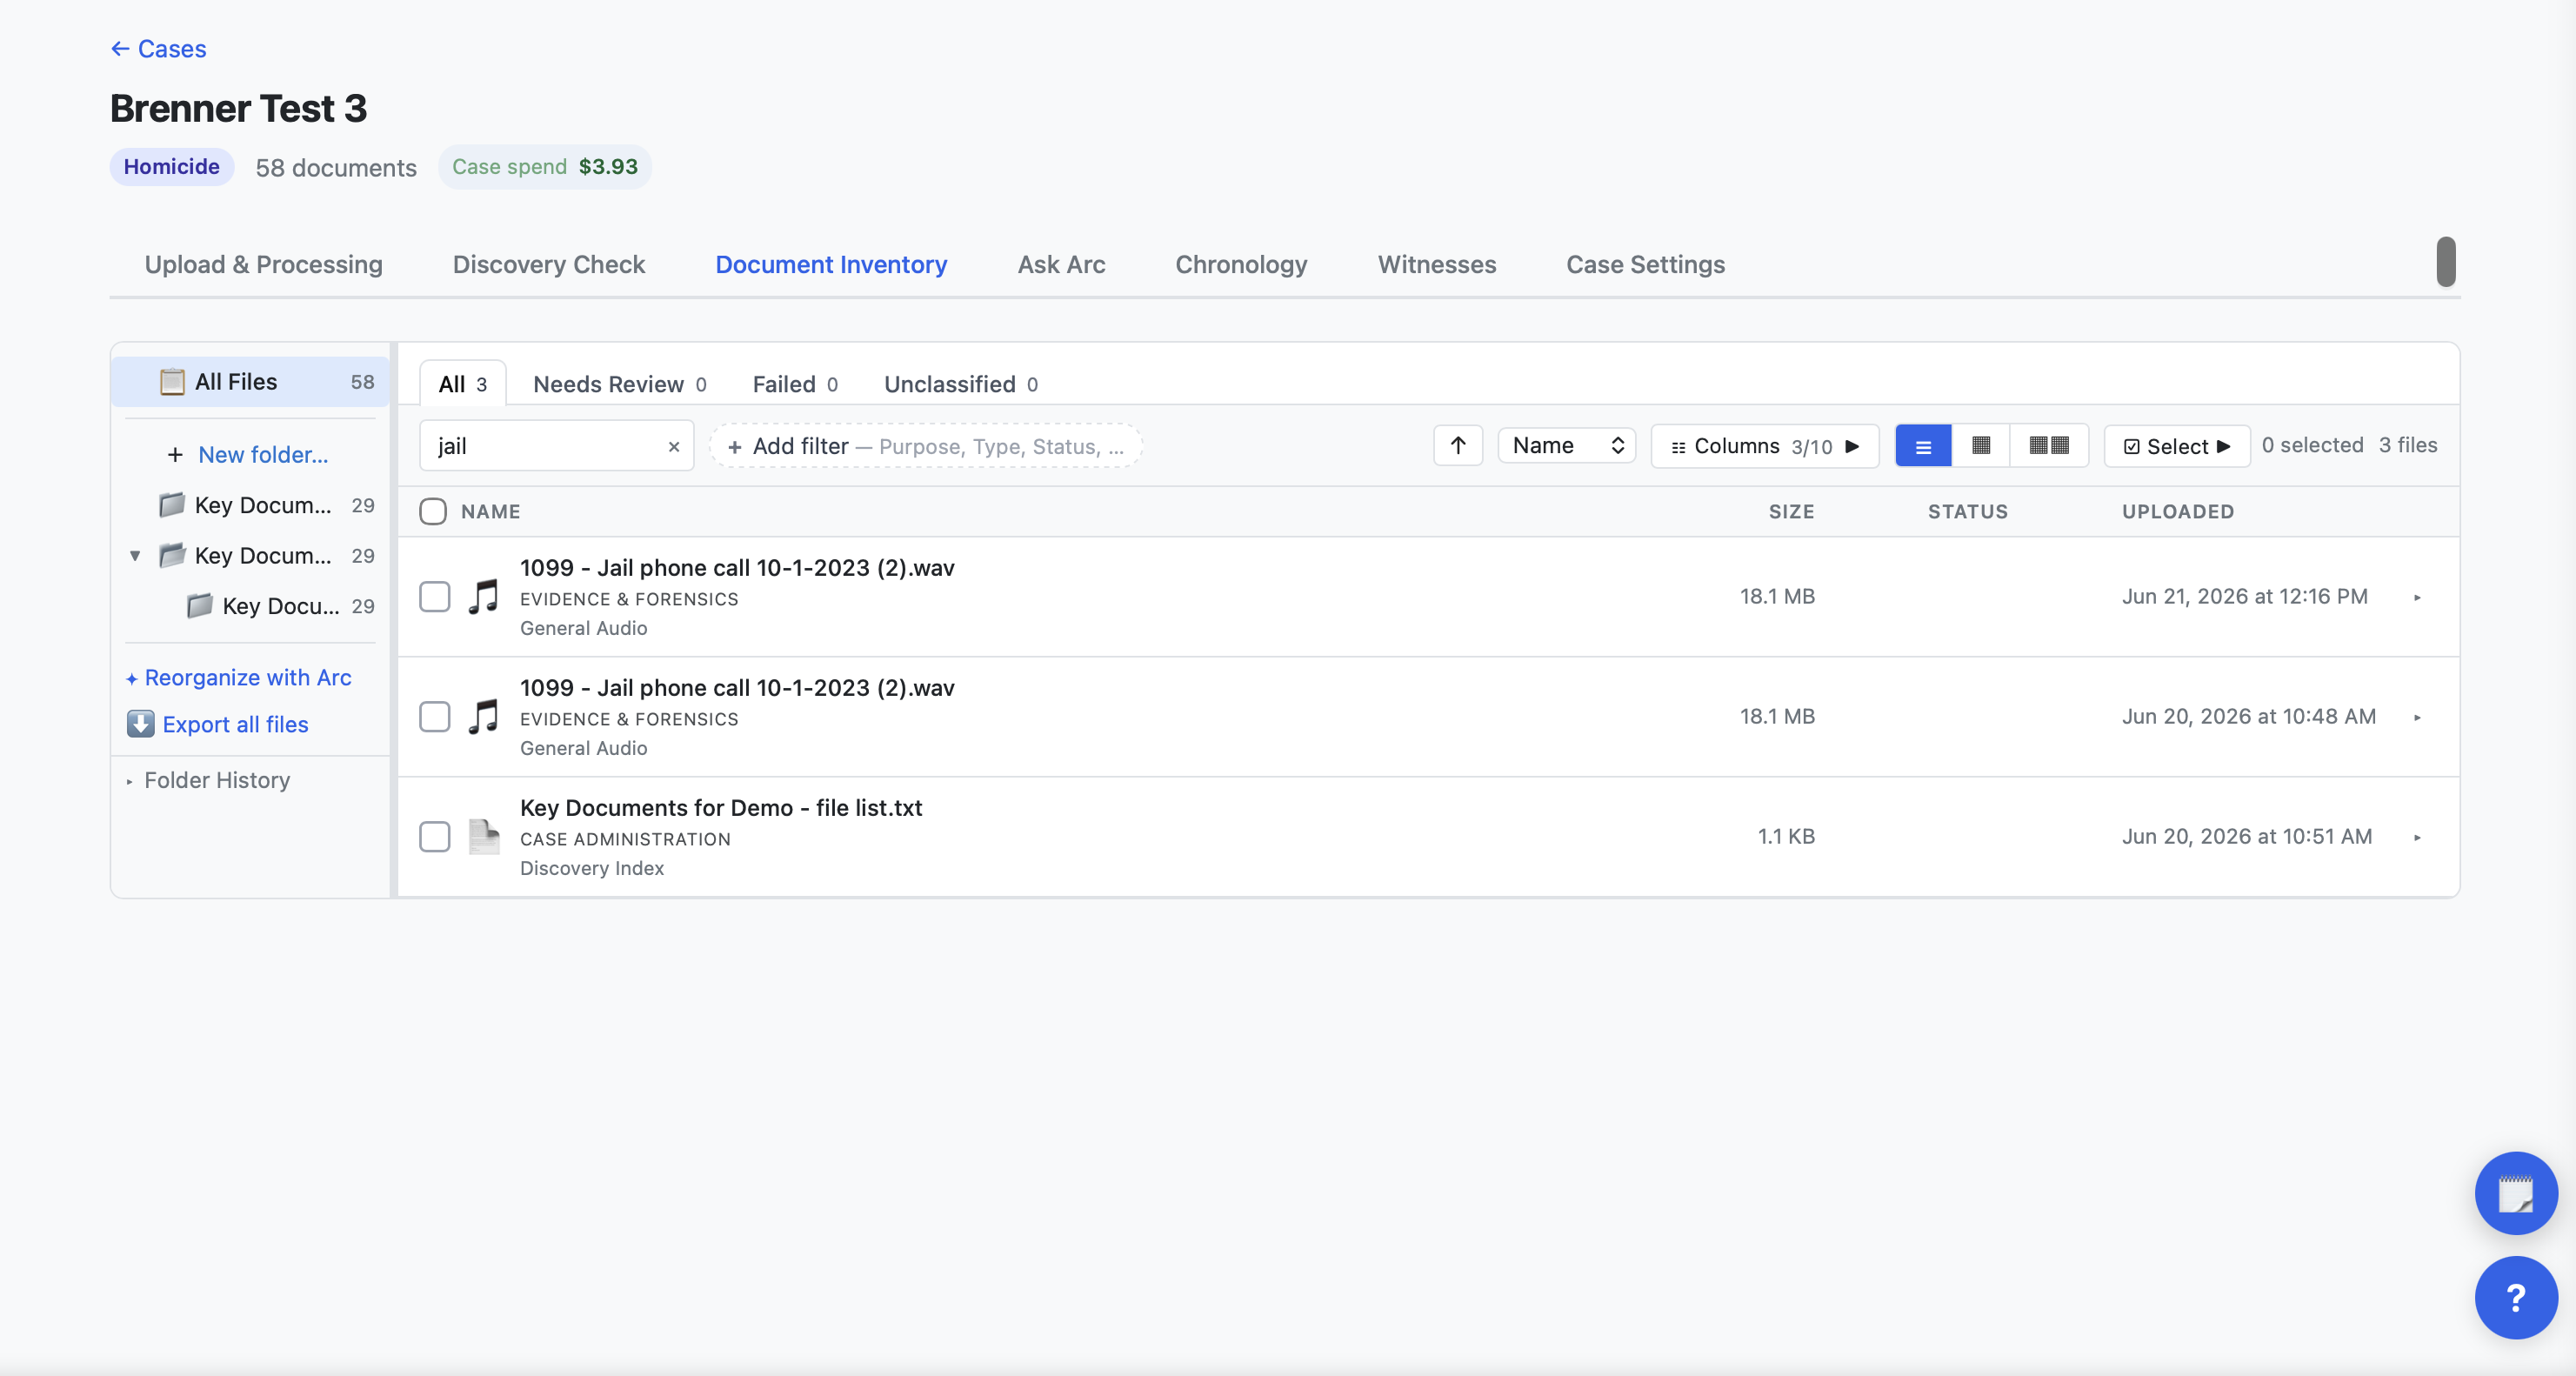
To find which documents mention something, use the search box in the Document Inventory. It looks across the whole case and returns the matching documents; click one to open it. This is how you answer “where does this name or term come up?” without opening files one by one.
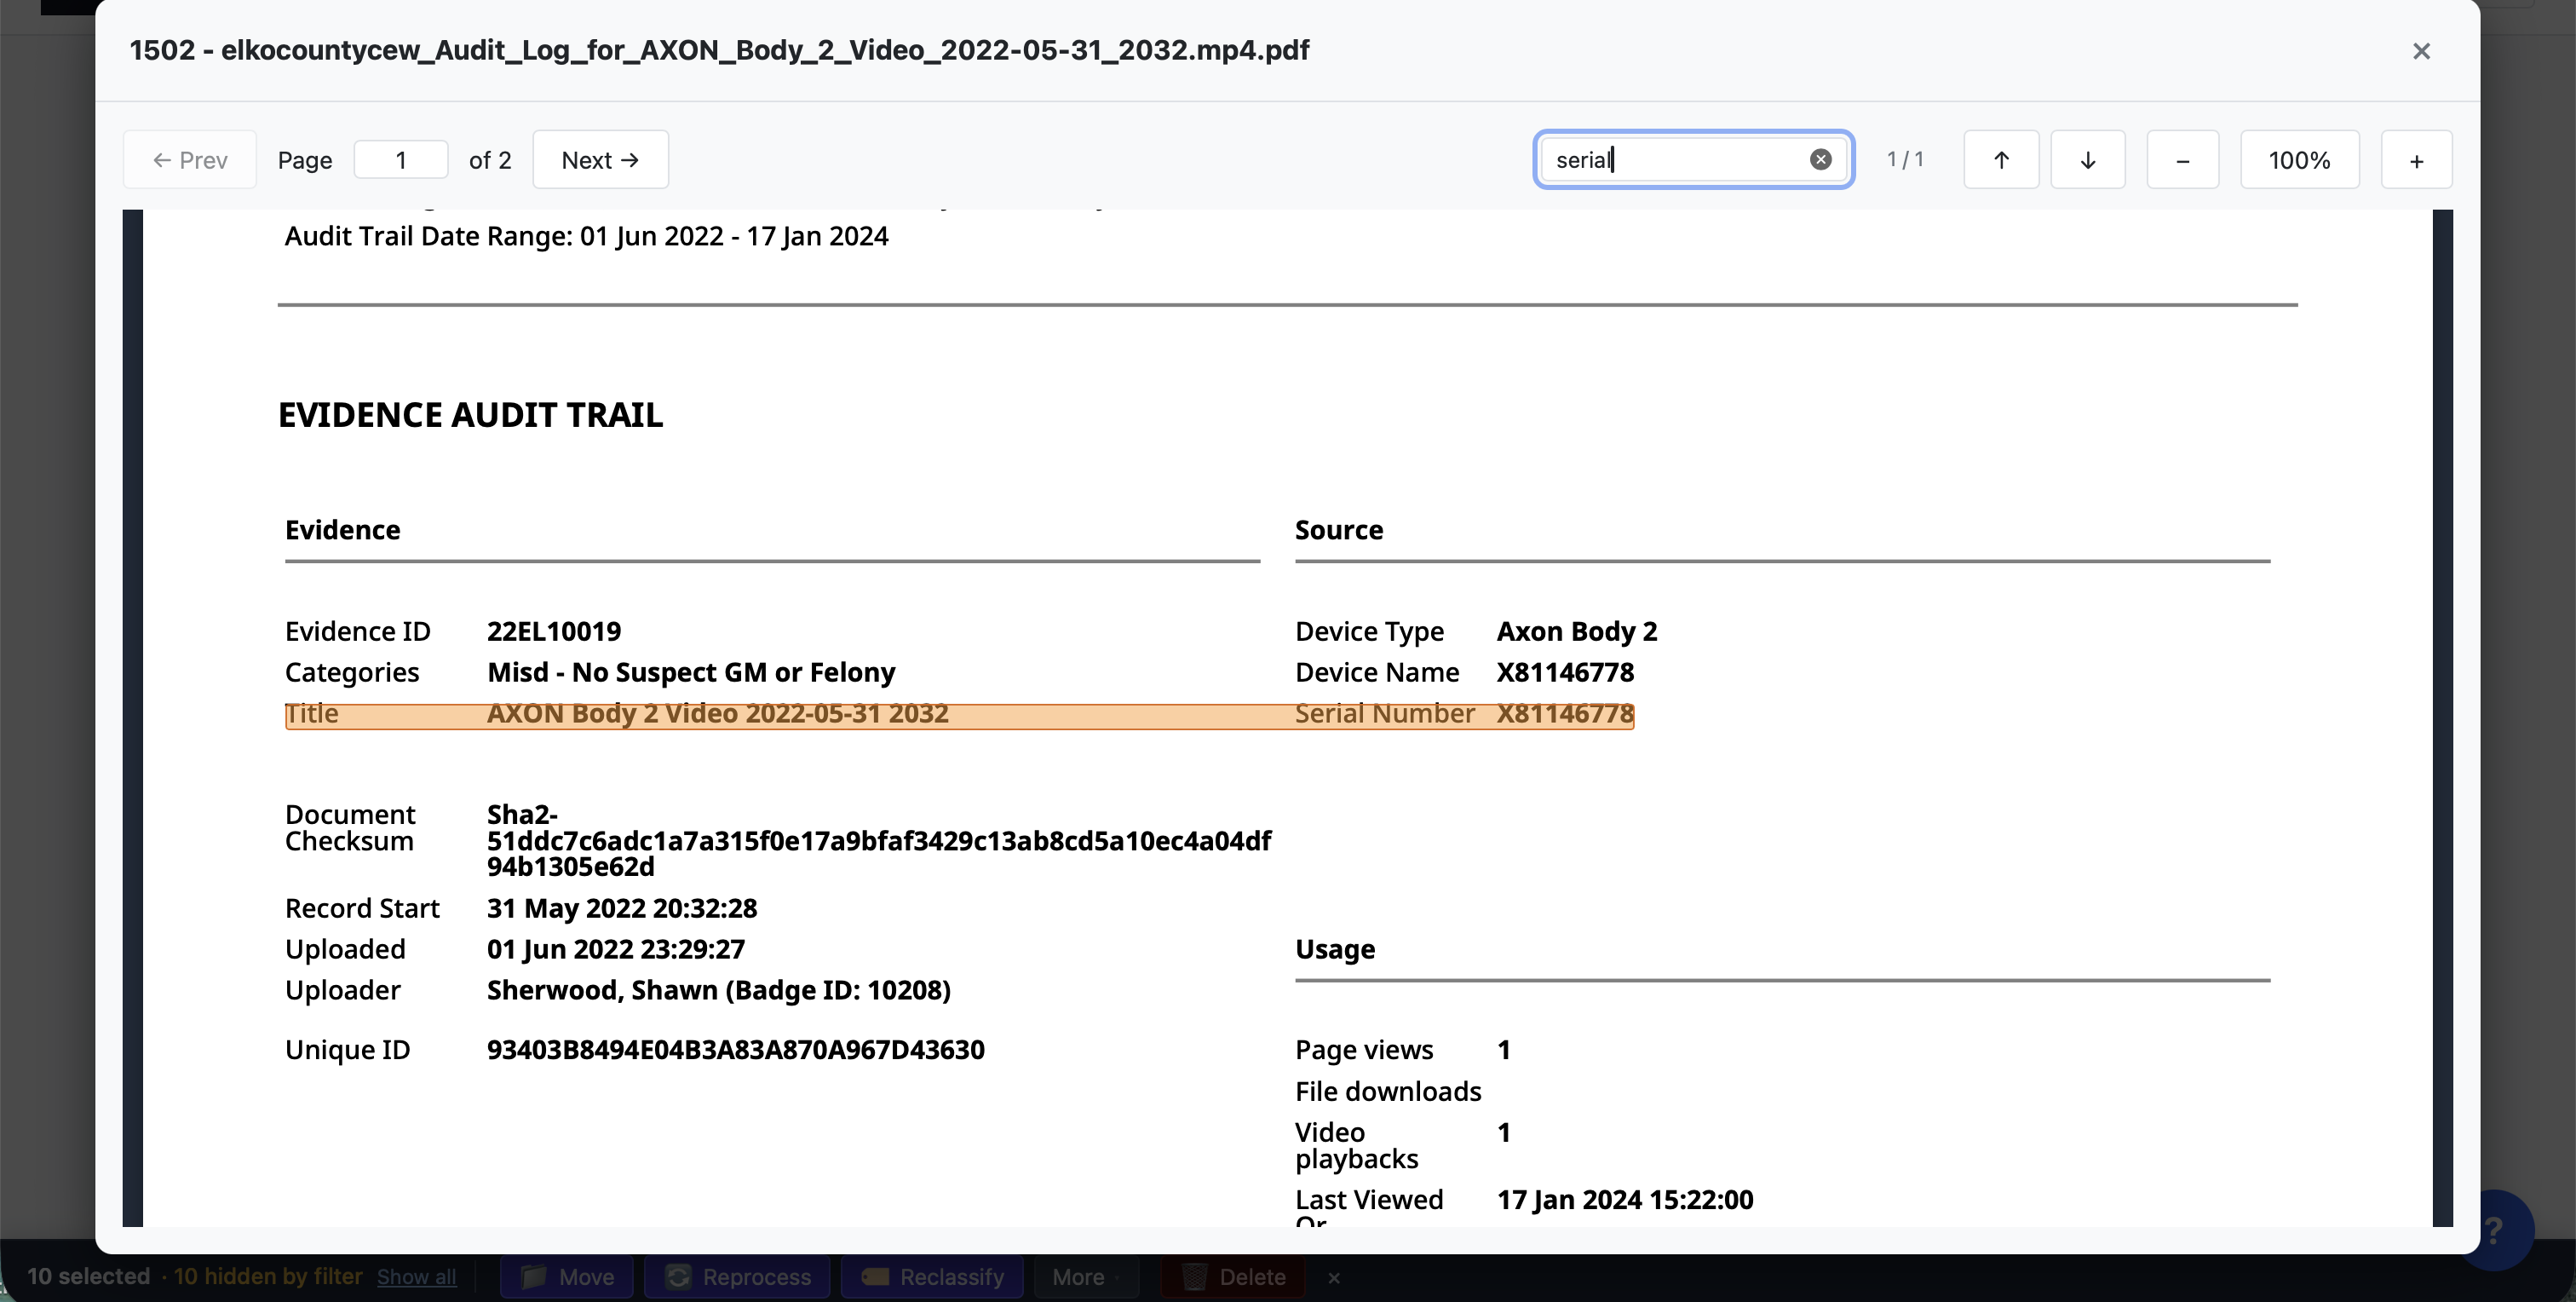
To find where something appears inside a document you already have open, use the search inside the viewer. It jumps you from match to match on the page — handy for landing on the exact line in a long transcript or report.
And if you'd rather describe what you're after than guess the exact words, ask Arc instead — that's the next step.
ASK ARC IFsearch doesn't surface something you're sure is there, or you'd rather describe what you're looking for in plain English.
Put Arc to work — ask real questions
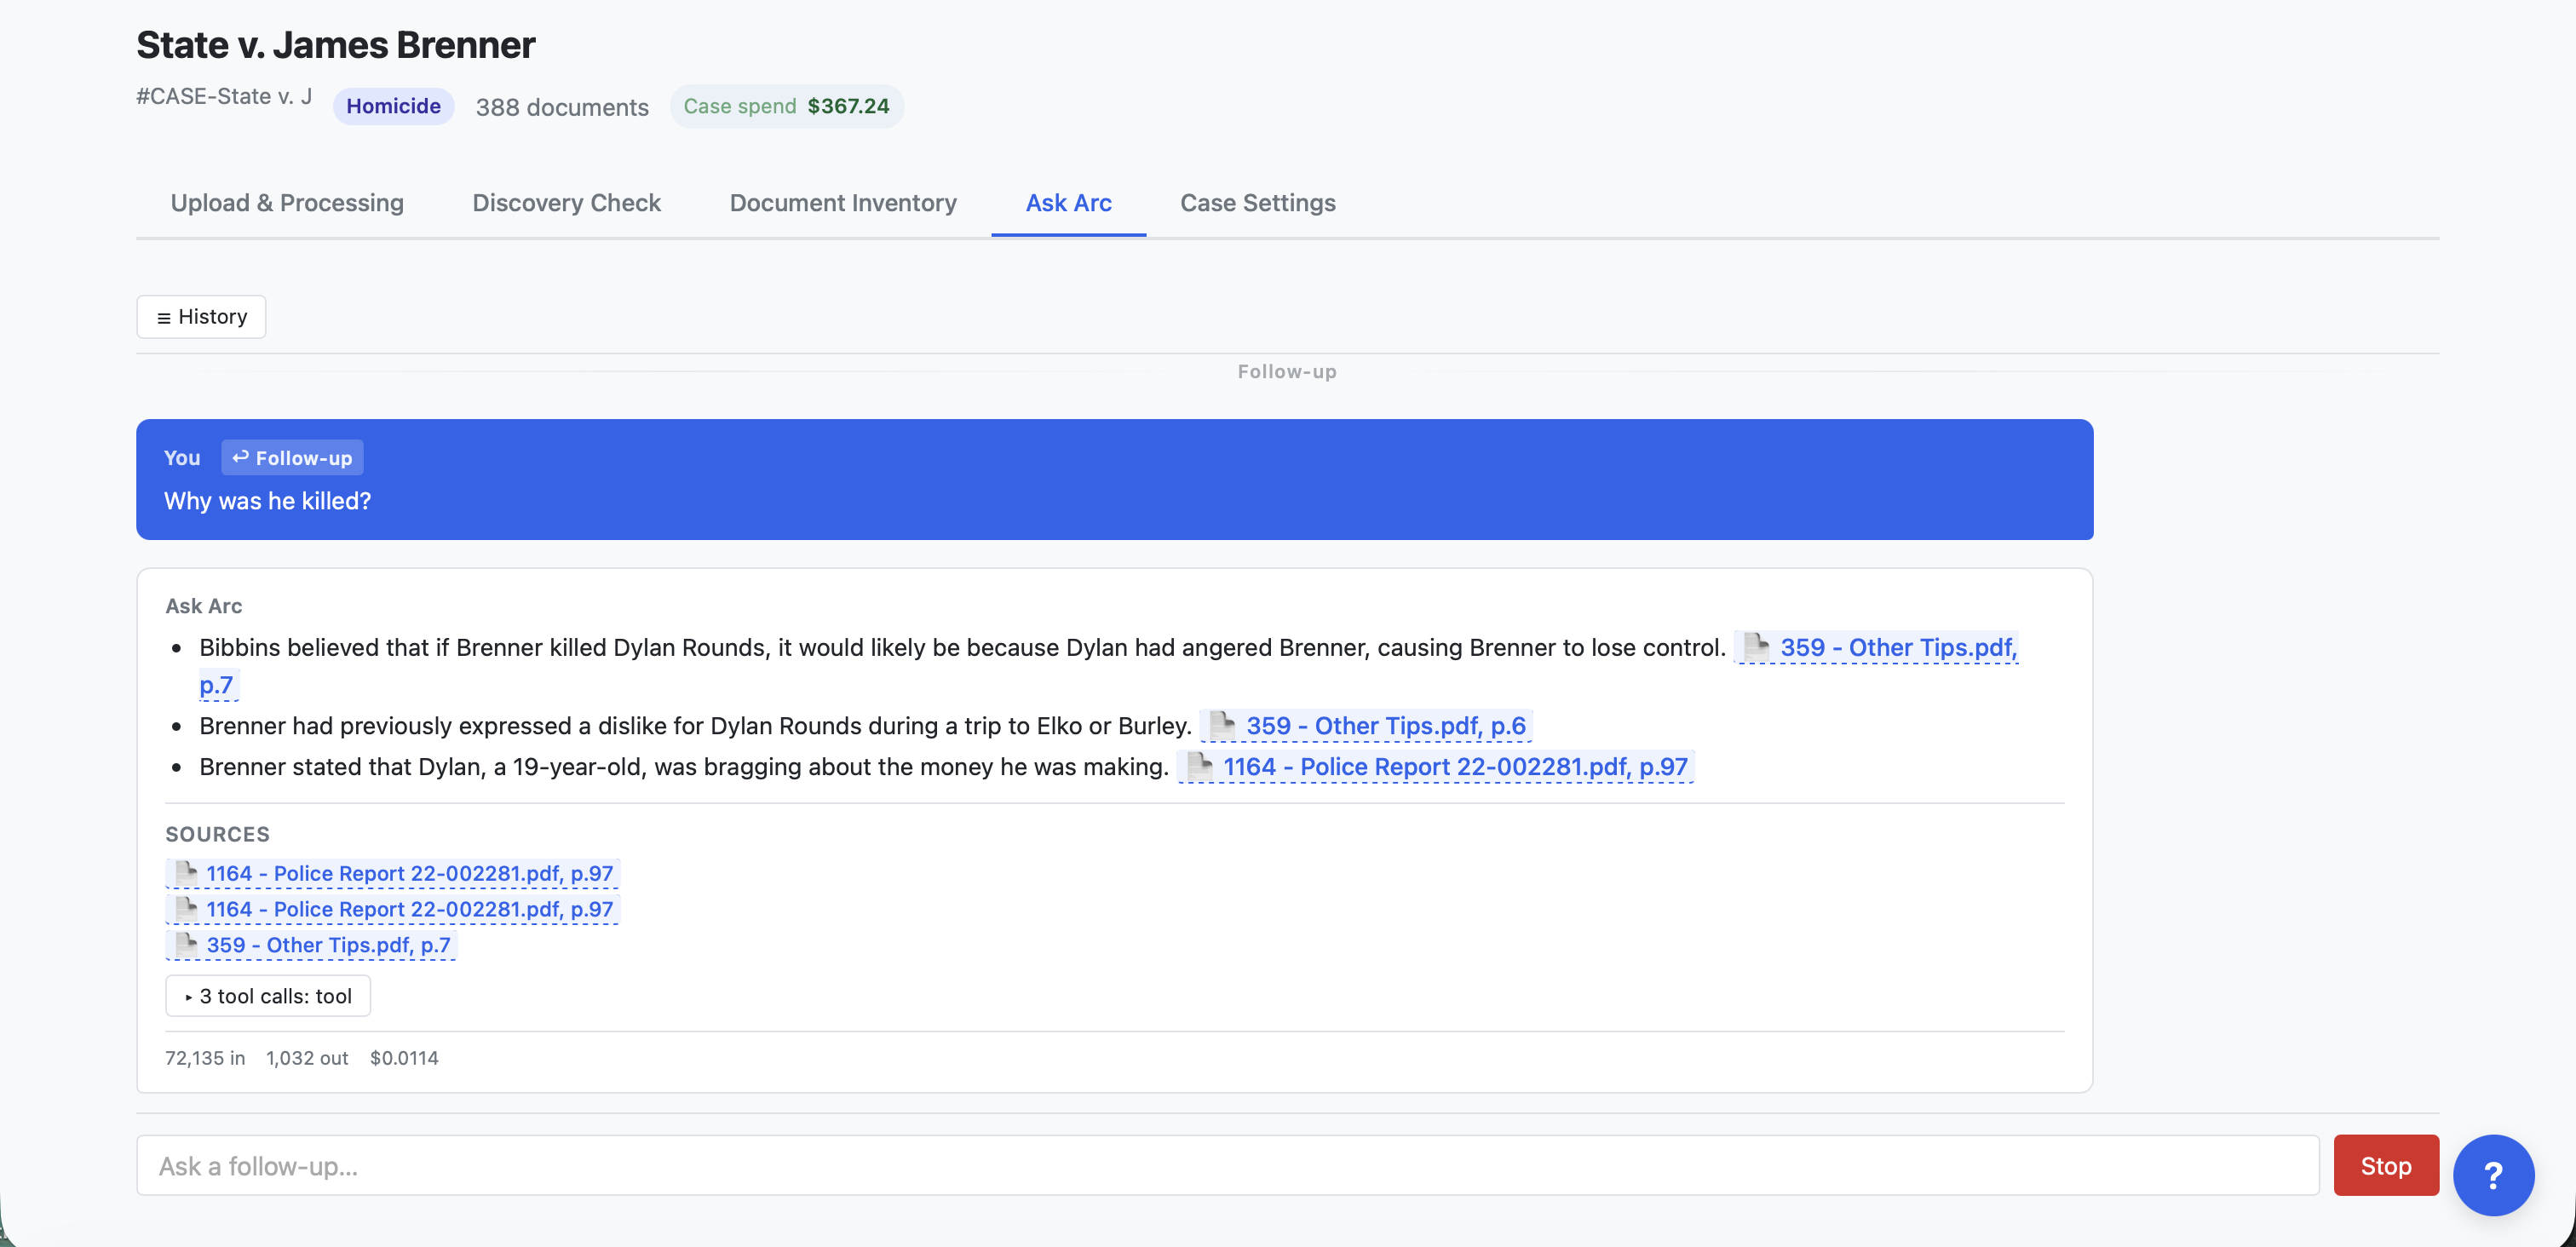
This is where Arc saves you an afternoon. Ask a substantive question about the case — “What does the defendant say happened that night?”, “Summarize the supplemental report.” Then check its work: every answer carries citations, and clicking one takes you to the exact spot it relied on. Push back, ask for its sources, or tell it to dig deeper.
A word on what to ask. Arc is powerful and can do a lot, but right now it's at its best with discrete, specific questions — ones with a findable answer in the record: “What did this witness say in his statement?”, “Was a subpoena issued for the neighbor?”, “Which documents mention case number 22-002281?”, “When was the search warrant executed?” Think of it as a fast research assistant you point at one thing at a time.
Where Arc is less reliable is broad, open-ended, build-it-all-for-me jobs — “assemble the entire chronology,” “organize my whole case.” Those are real needs, so ChargeStack has purpose-built tools for them (the Chronology feature in Step 10, and Organize with Arc back in Step 5). Reach for those for the big jobs, and use Ask Arc for the pointed questions along the way.
ASK ARC IFan answer seems thin or you don't trust it — ask Arc to show its sources or look again.
Build a chronology
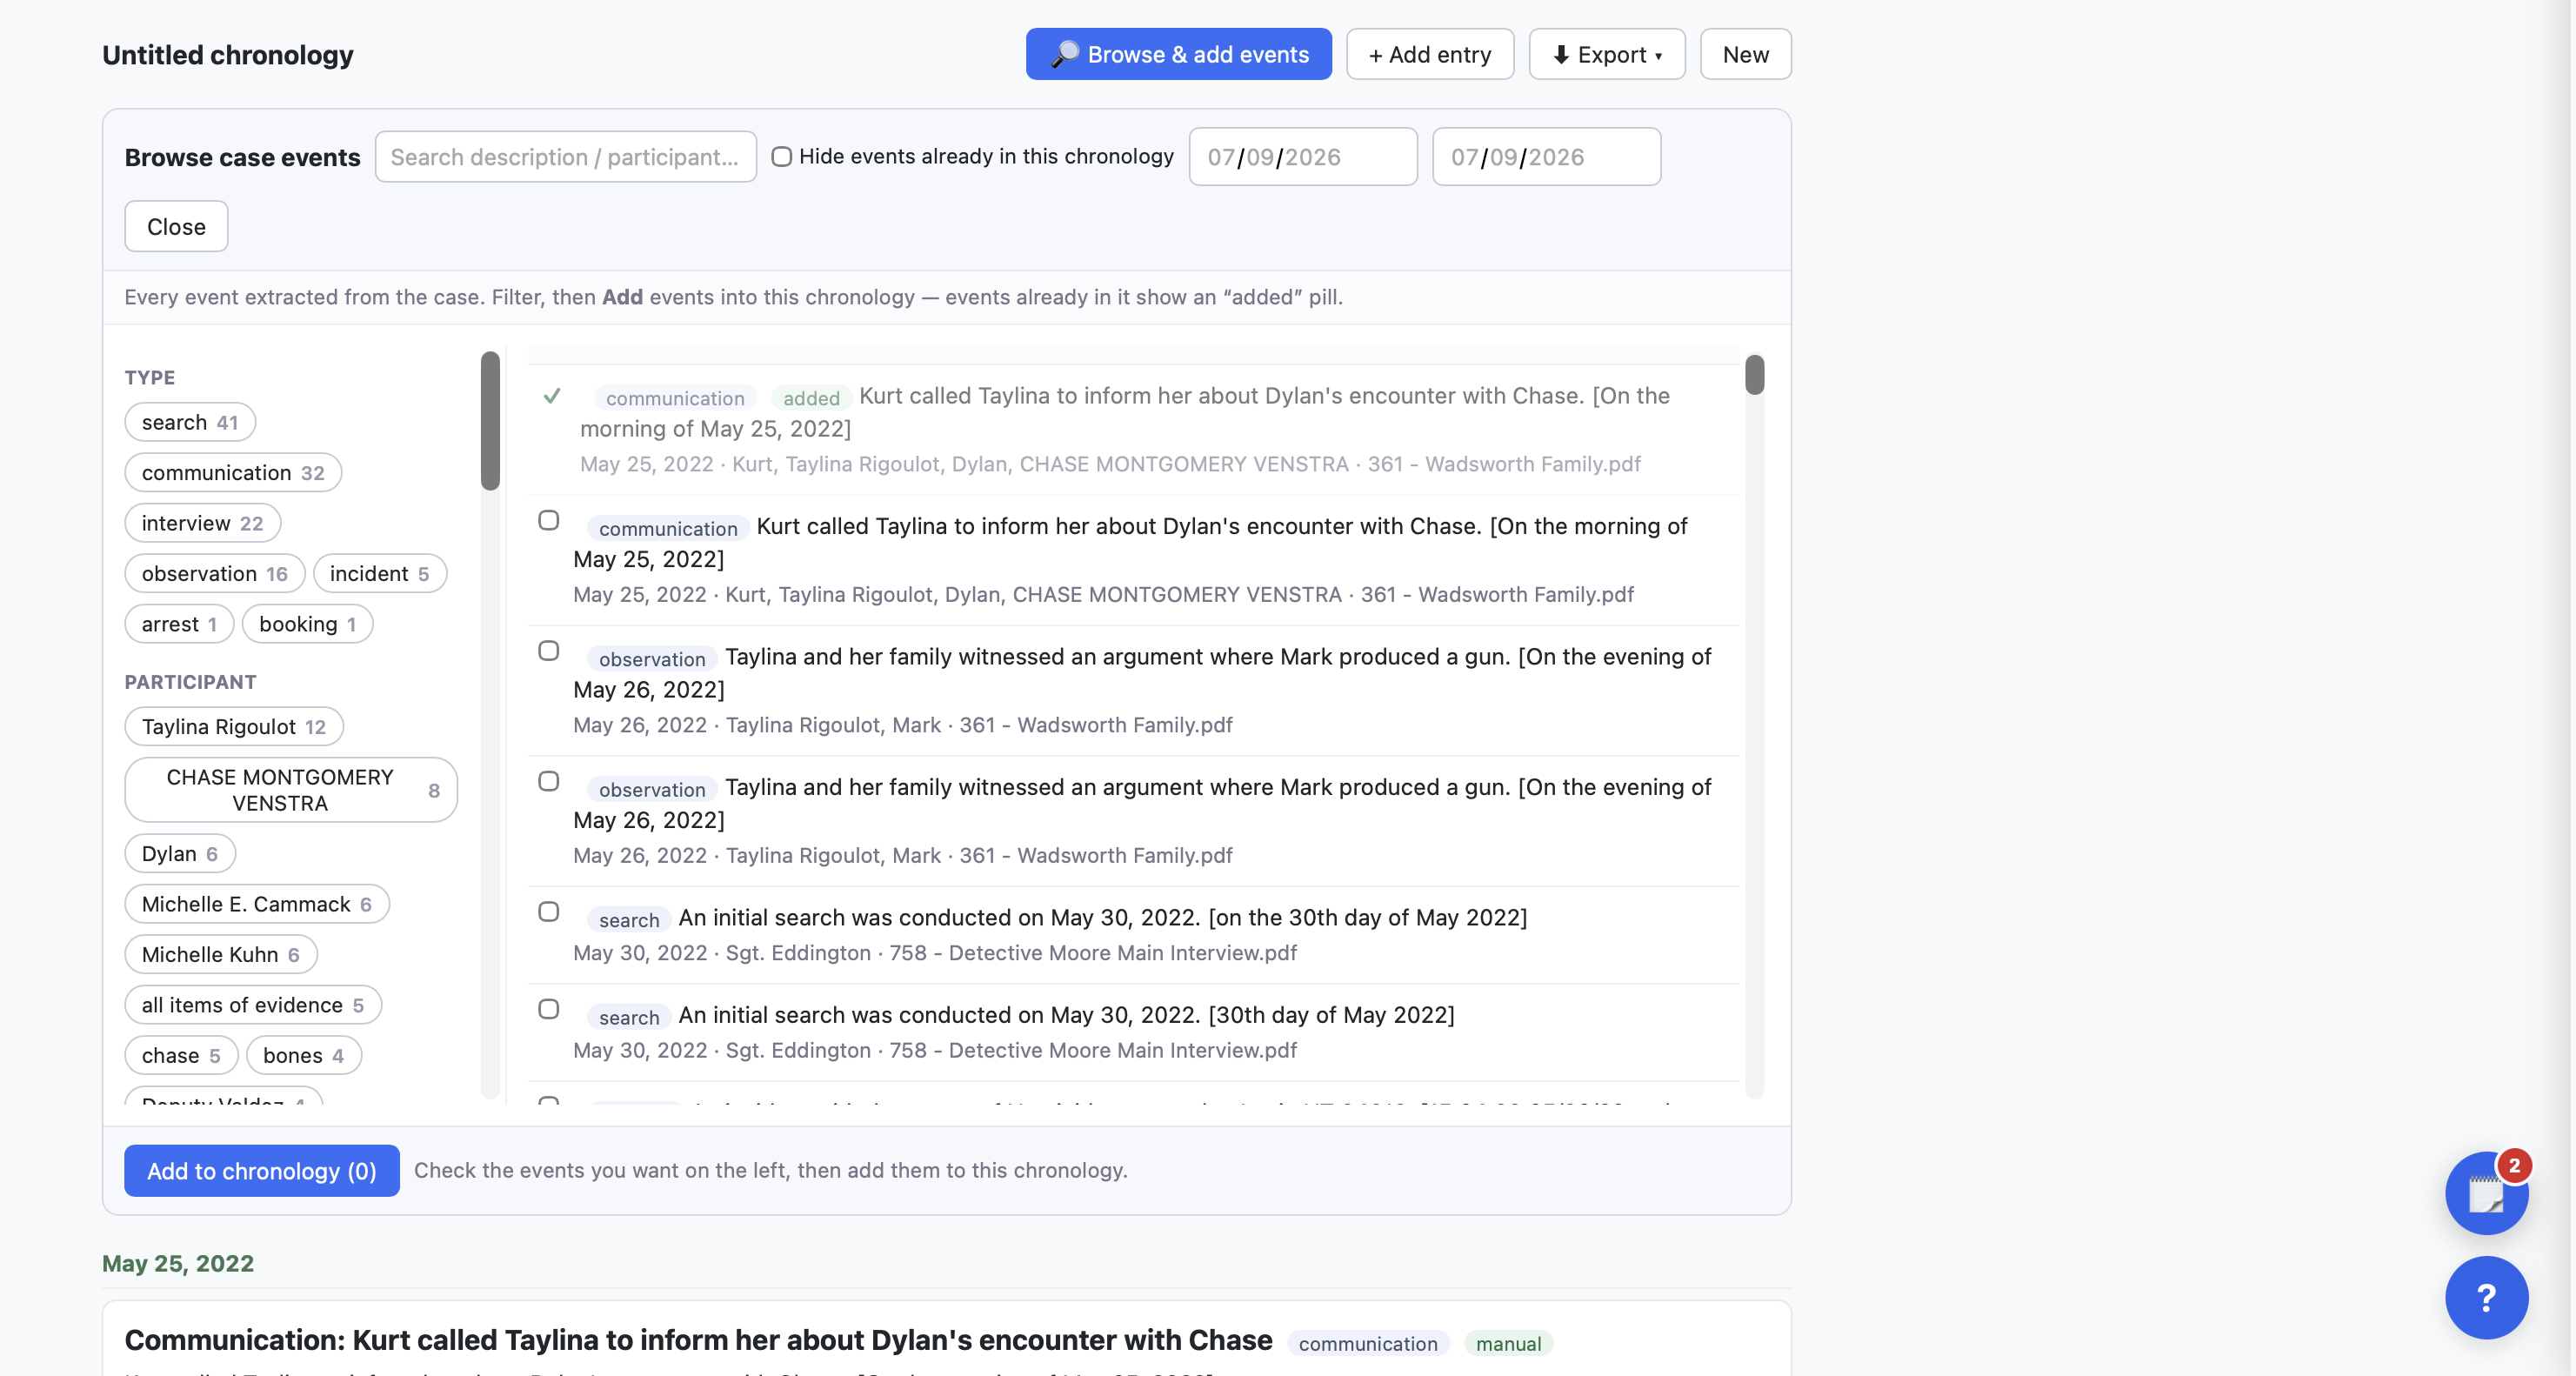
The Chronology tab turns the case's extracted events into a dated timeline you control — and there are two ways in. Describe what you need to ✨ Build with Arc (“a timeline of the central incident and everything that led up to it”) and Arc proposes a plan — what it would add, how many entries, what arrives undated — that runs only when you approve it. Or browse the events yourself (🔎 Browse & add events — filter by type, participant, or date) and pull in the ones that matter, plus anything you add by hand.
Either way, everything Arc drafts lands as a suggestion — nothing reaches an export without your accept. Undated events get suggested dates, each with the source quote it was found in; nothing is dated until you pick. Then shape the result: merge duplicate tellings of the same event, nest specifics under a broad episode (or let ✨ Organize into episodes do it), and export to Word, PDF, or CSV.
ASK ARC IFan entry needs work — ✨ Refine with Arc opens a conversation about just that entry and applies changes as a diff you approve; or ask “what events am I missing from this chronology?” in the build lane.
Meet the witnesses
While you worked, ChargeStack also gathered every person mentioned across your documents into the Witnesses tab — one card per person, each linked to their statements, the reports that mention them, and the events they took part in. Where the same person is named different ways in different documents (“Det. Garcia,” “the reporting officer”), the cards are already folded together wherever that's certain; where it isn't, the app asks instead of guessing.
The roster arrives built — clearly real, corroborated people are on the list from the start, so your job is the judgment calls: cull the noise, decide the handful the app held back as suggestions, and answer the “possible duplicate?” questions only a human can settle. Every merge is reversible. Click any person to read everything the case says about them — one evidence trail per person, cited back to the source documents, with an Arc-written evidence summary on demand and a 🕸 Graph view of their connections.
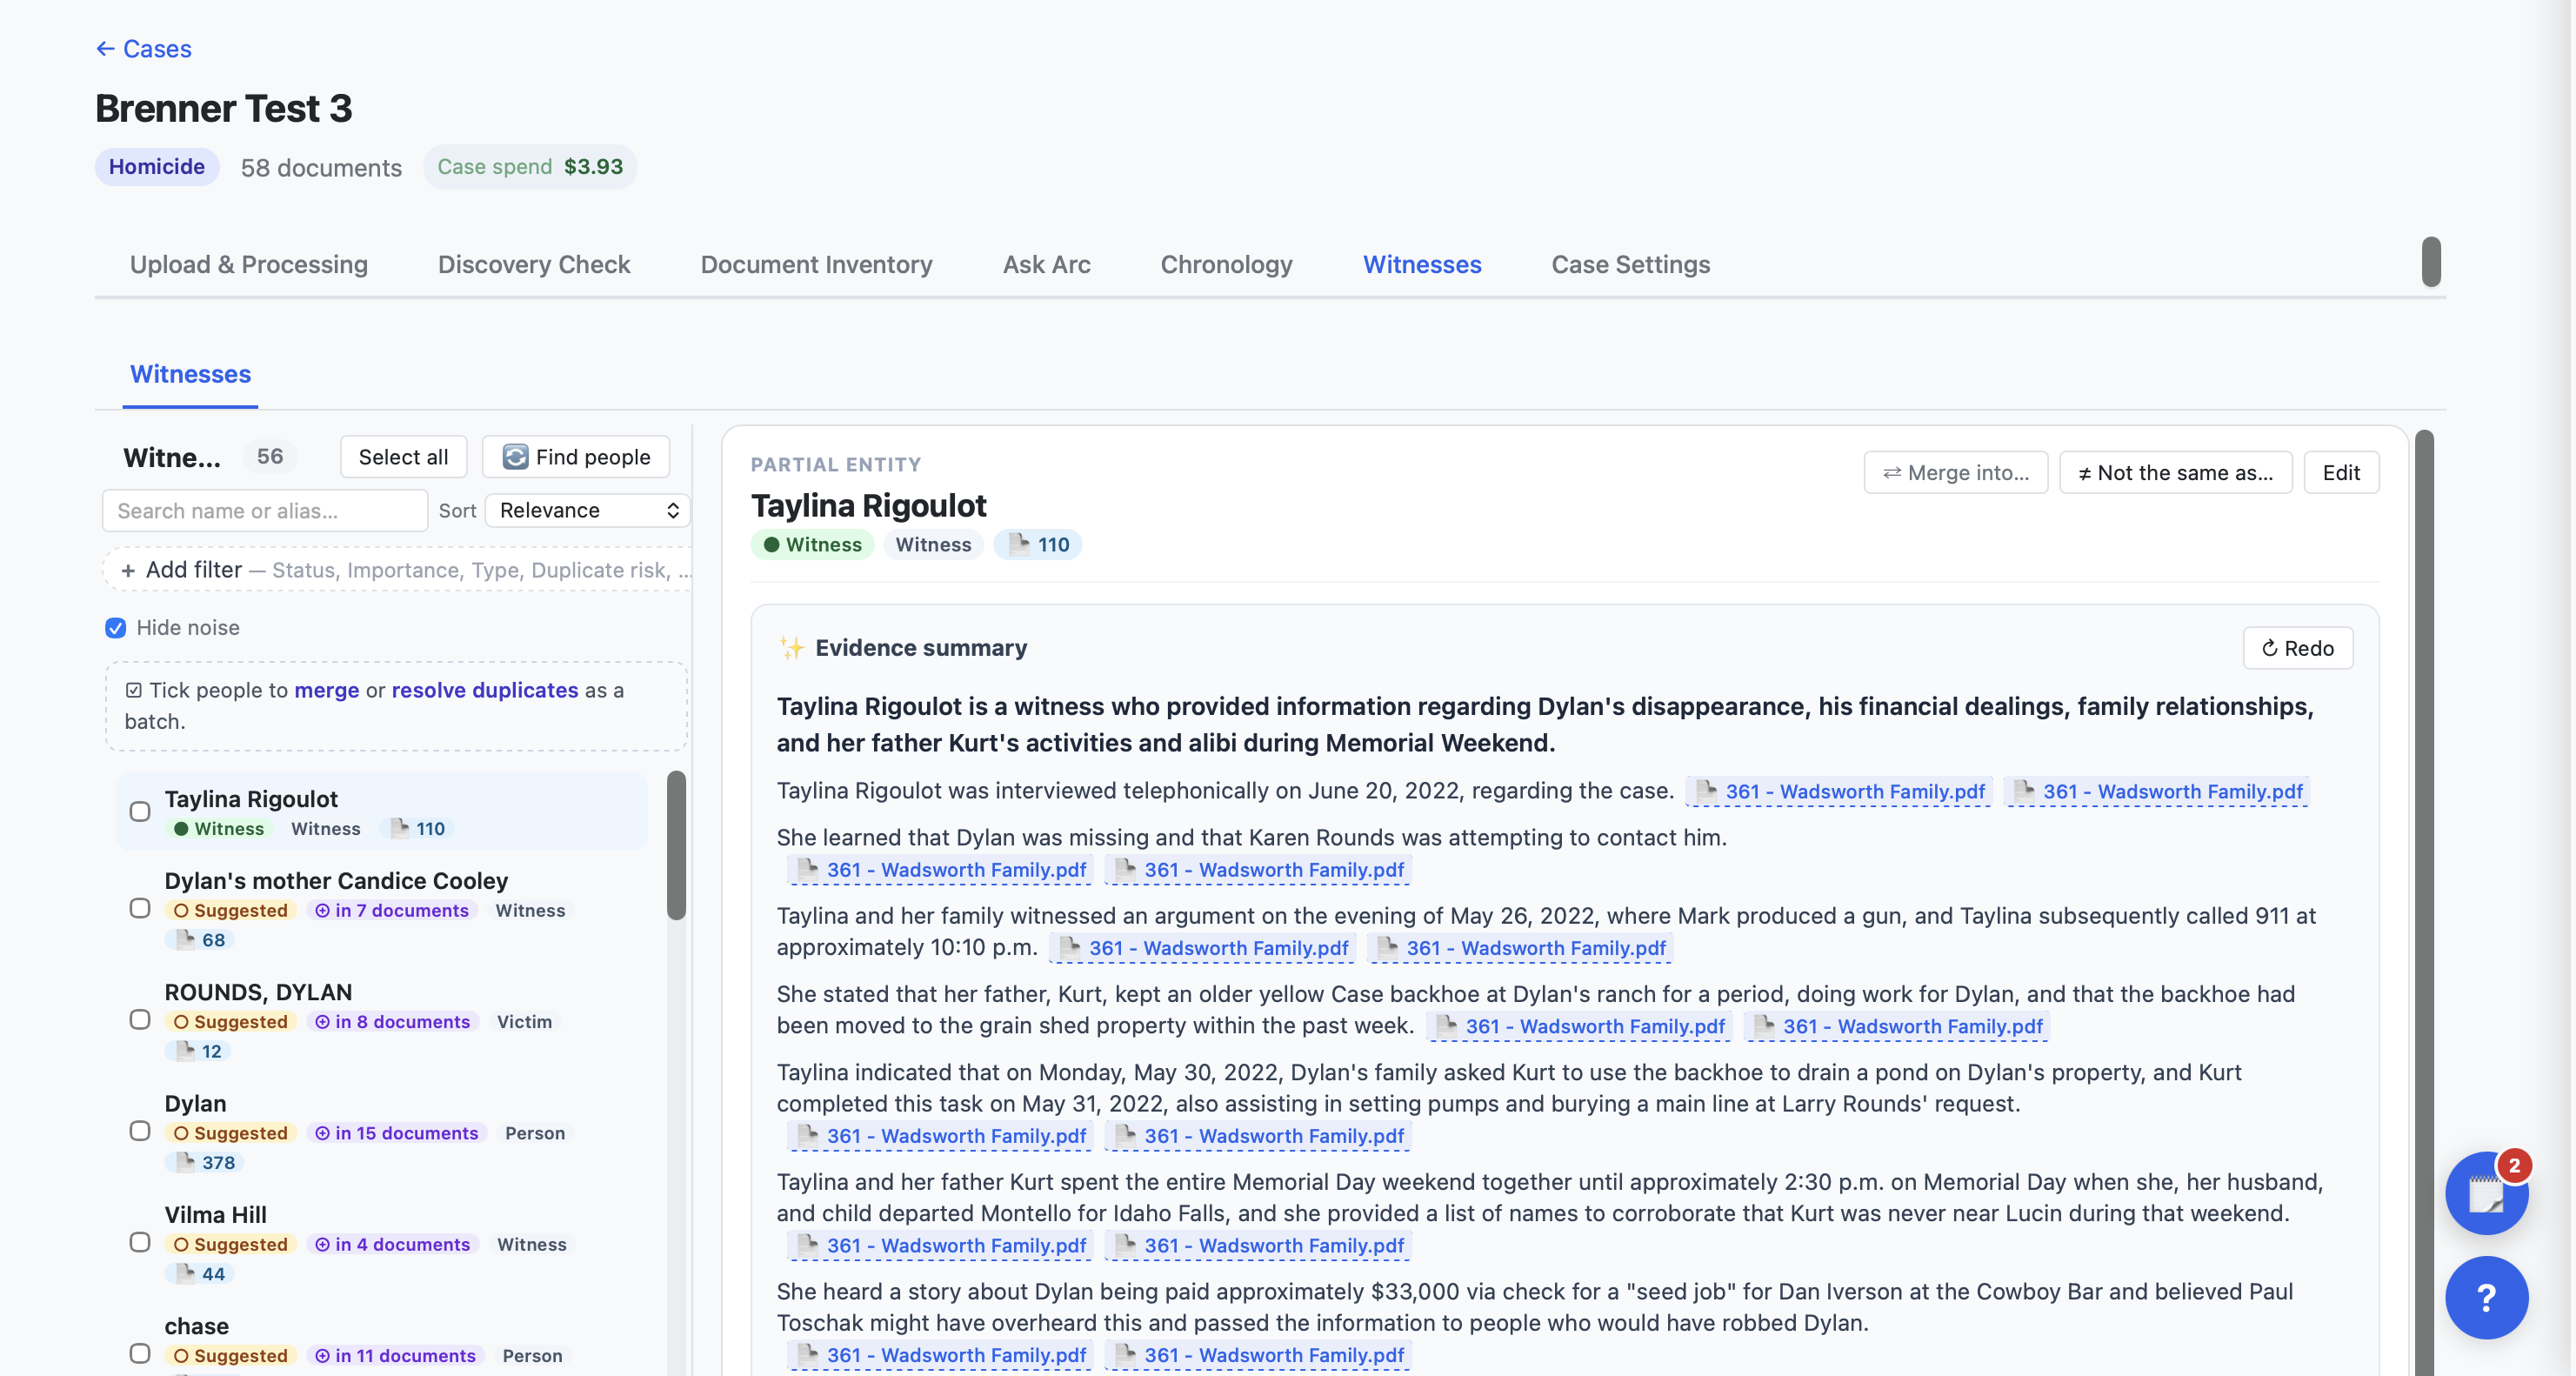
ASK ARC IFyou're not sure whether two cards are the same person, or one card seems to mix up two different people.
Cross-check the record
Cross-checks are where Arc shines, because they're discrete: point it at exactly two things and ask how they relate. Ask whether two names are the same person — “Are Candice Cooley and Candice Rounds the same person?” — and Arc checks the case's who's-who and tells you what the record supports. Or take two related documents — two reports of the same incident, a statement and the report that quotes it — select them in the Document Inventory, click Set chat scope, and ask what they share and where they differ. Work through the case one pair at a time and you come away with the conflicts actually worth following up.
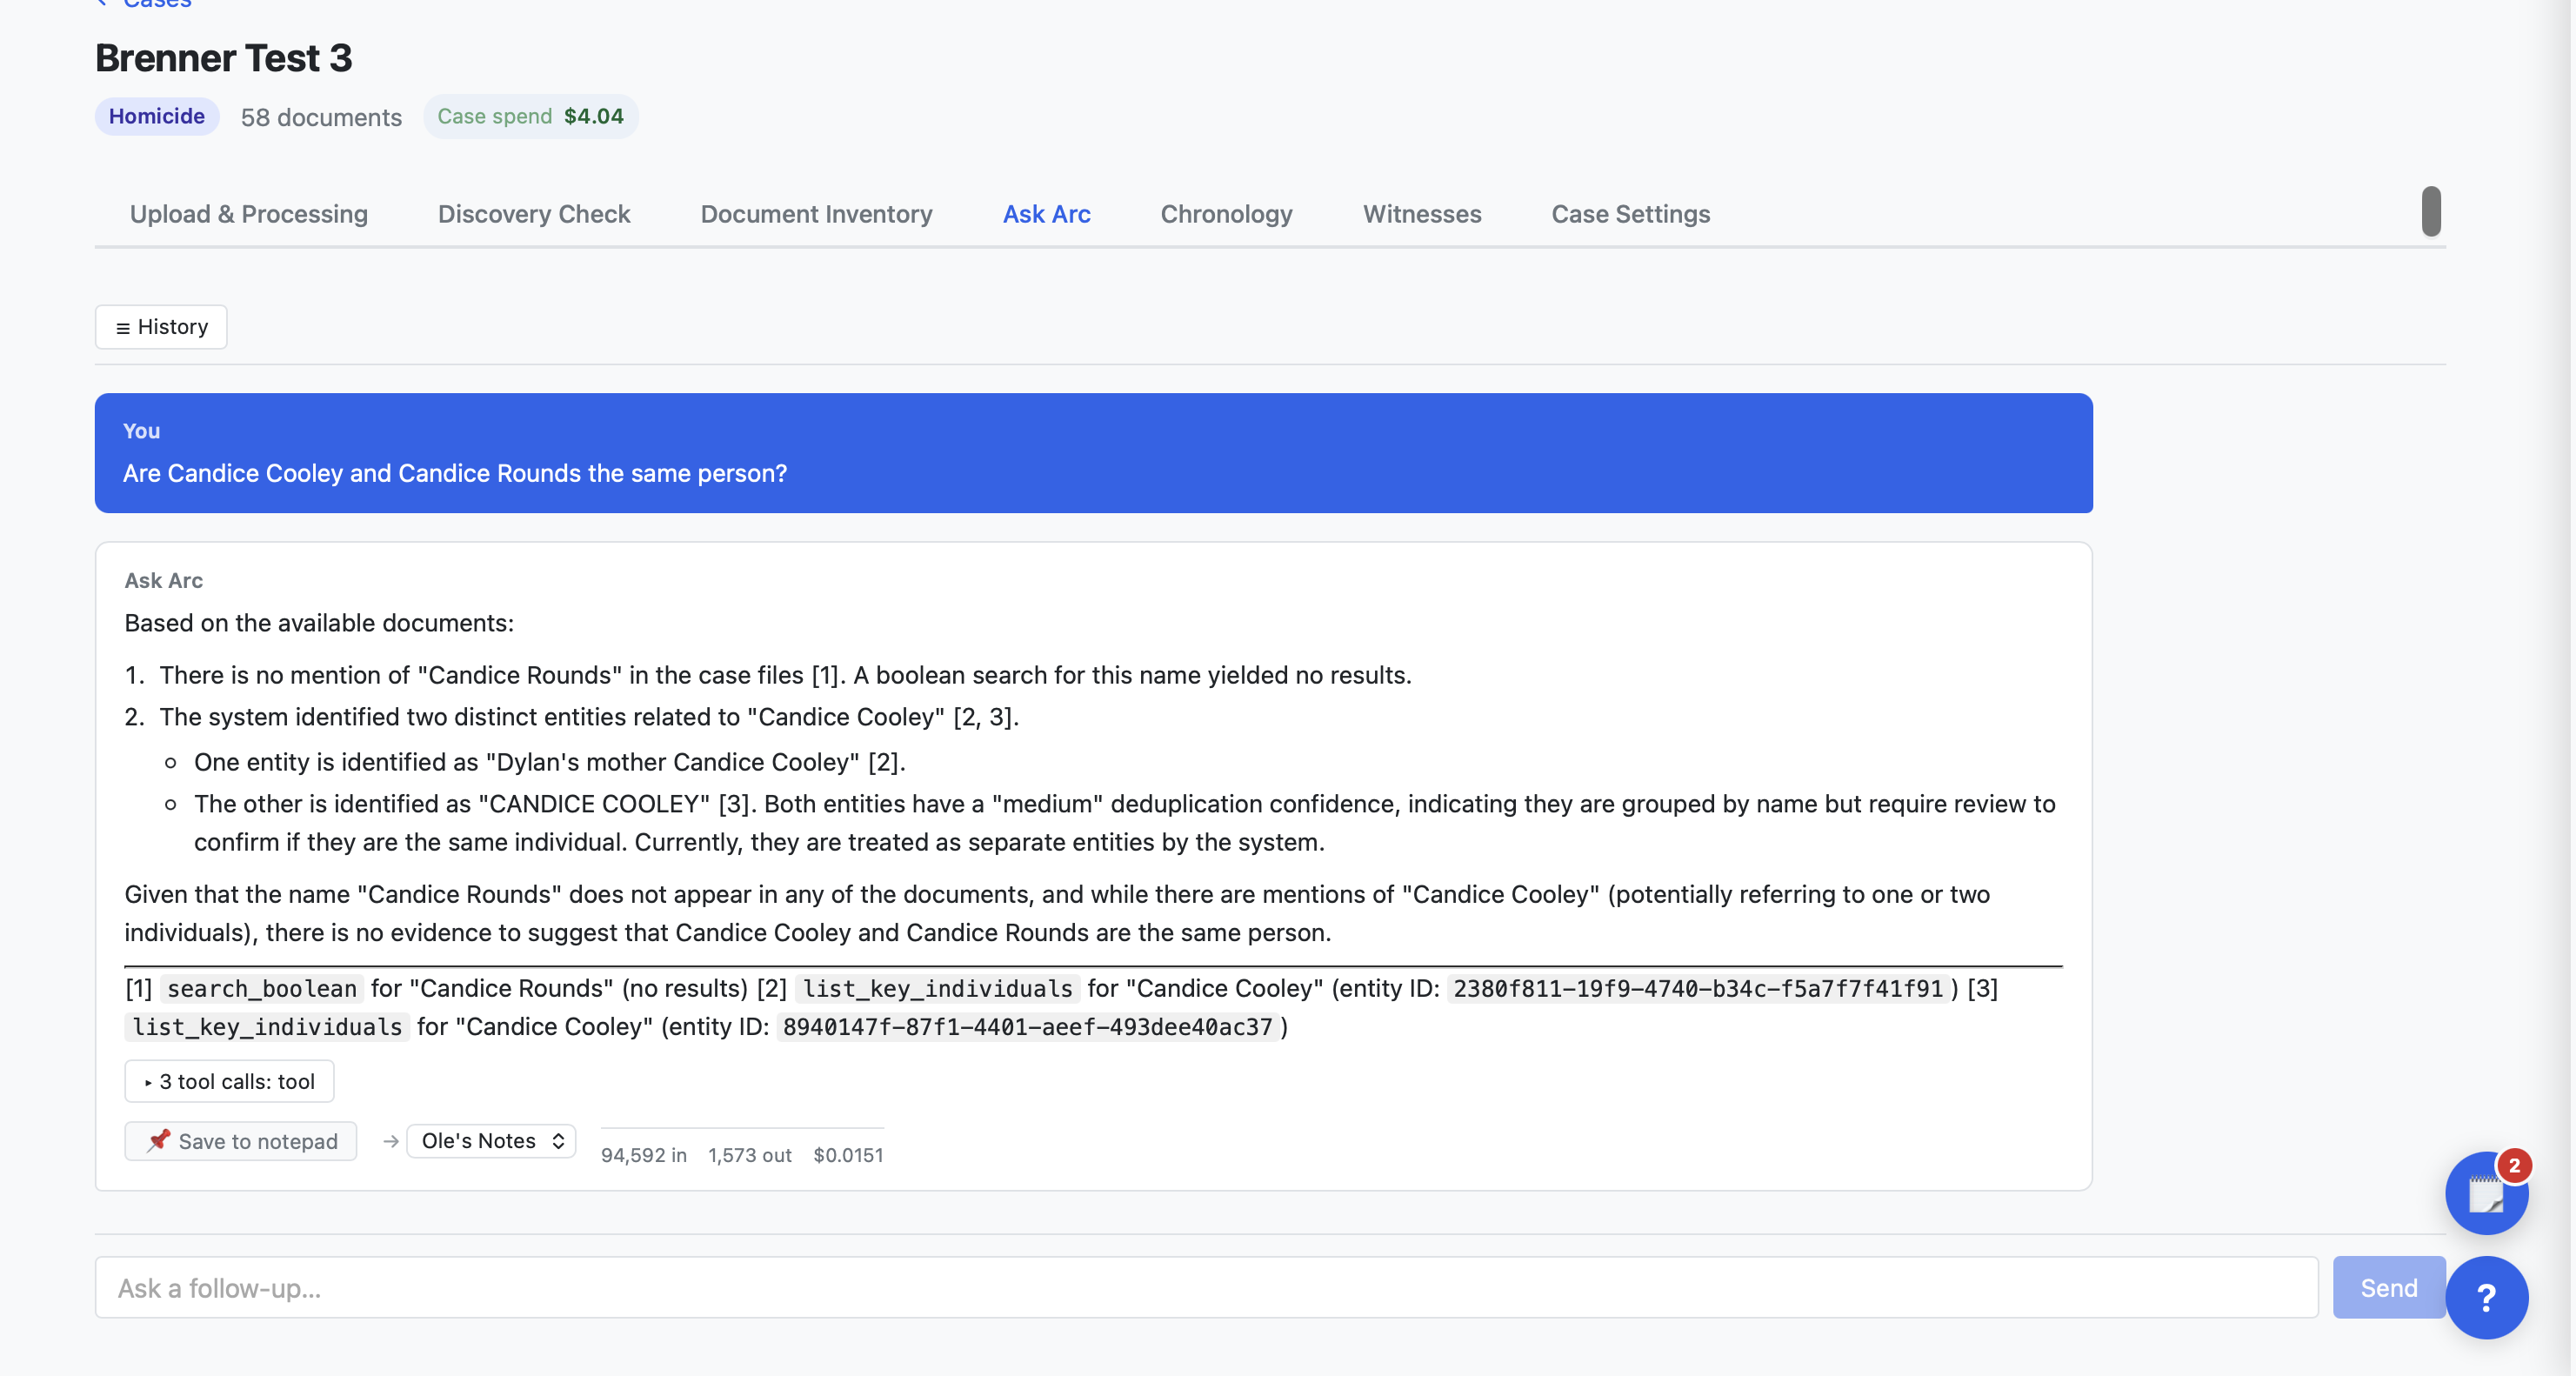
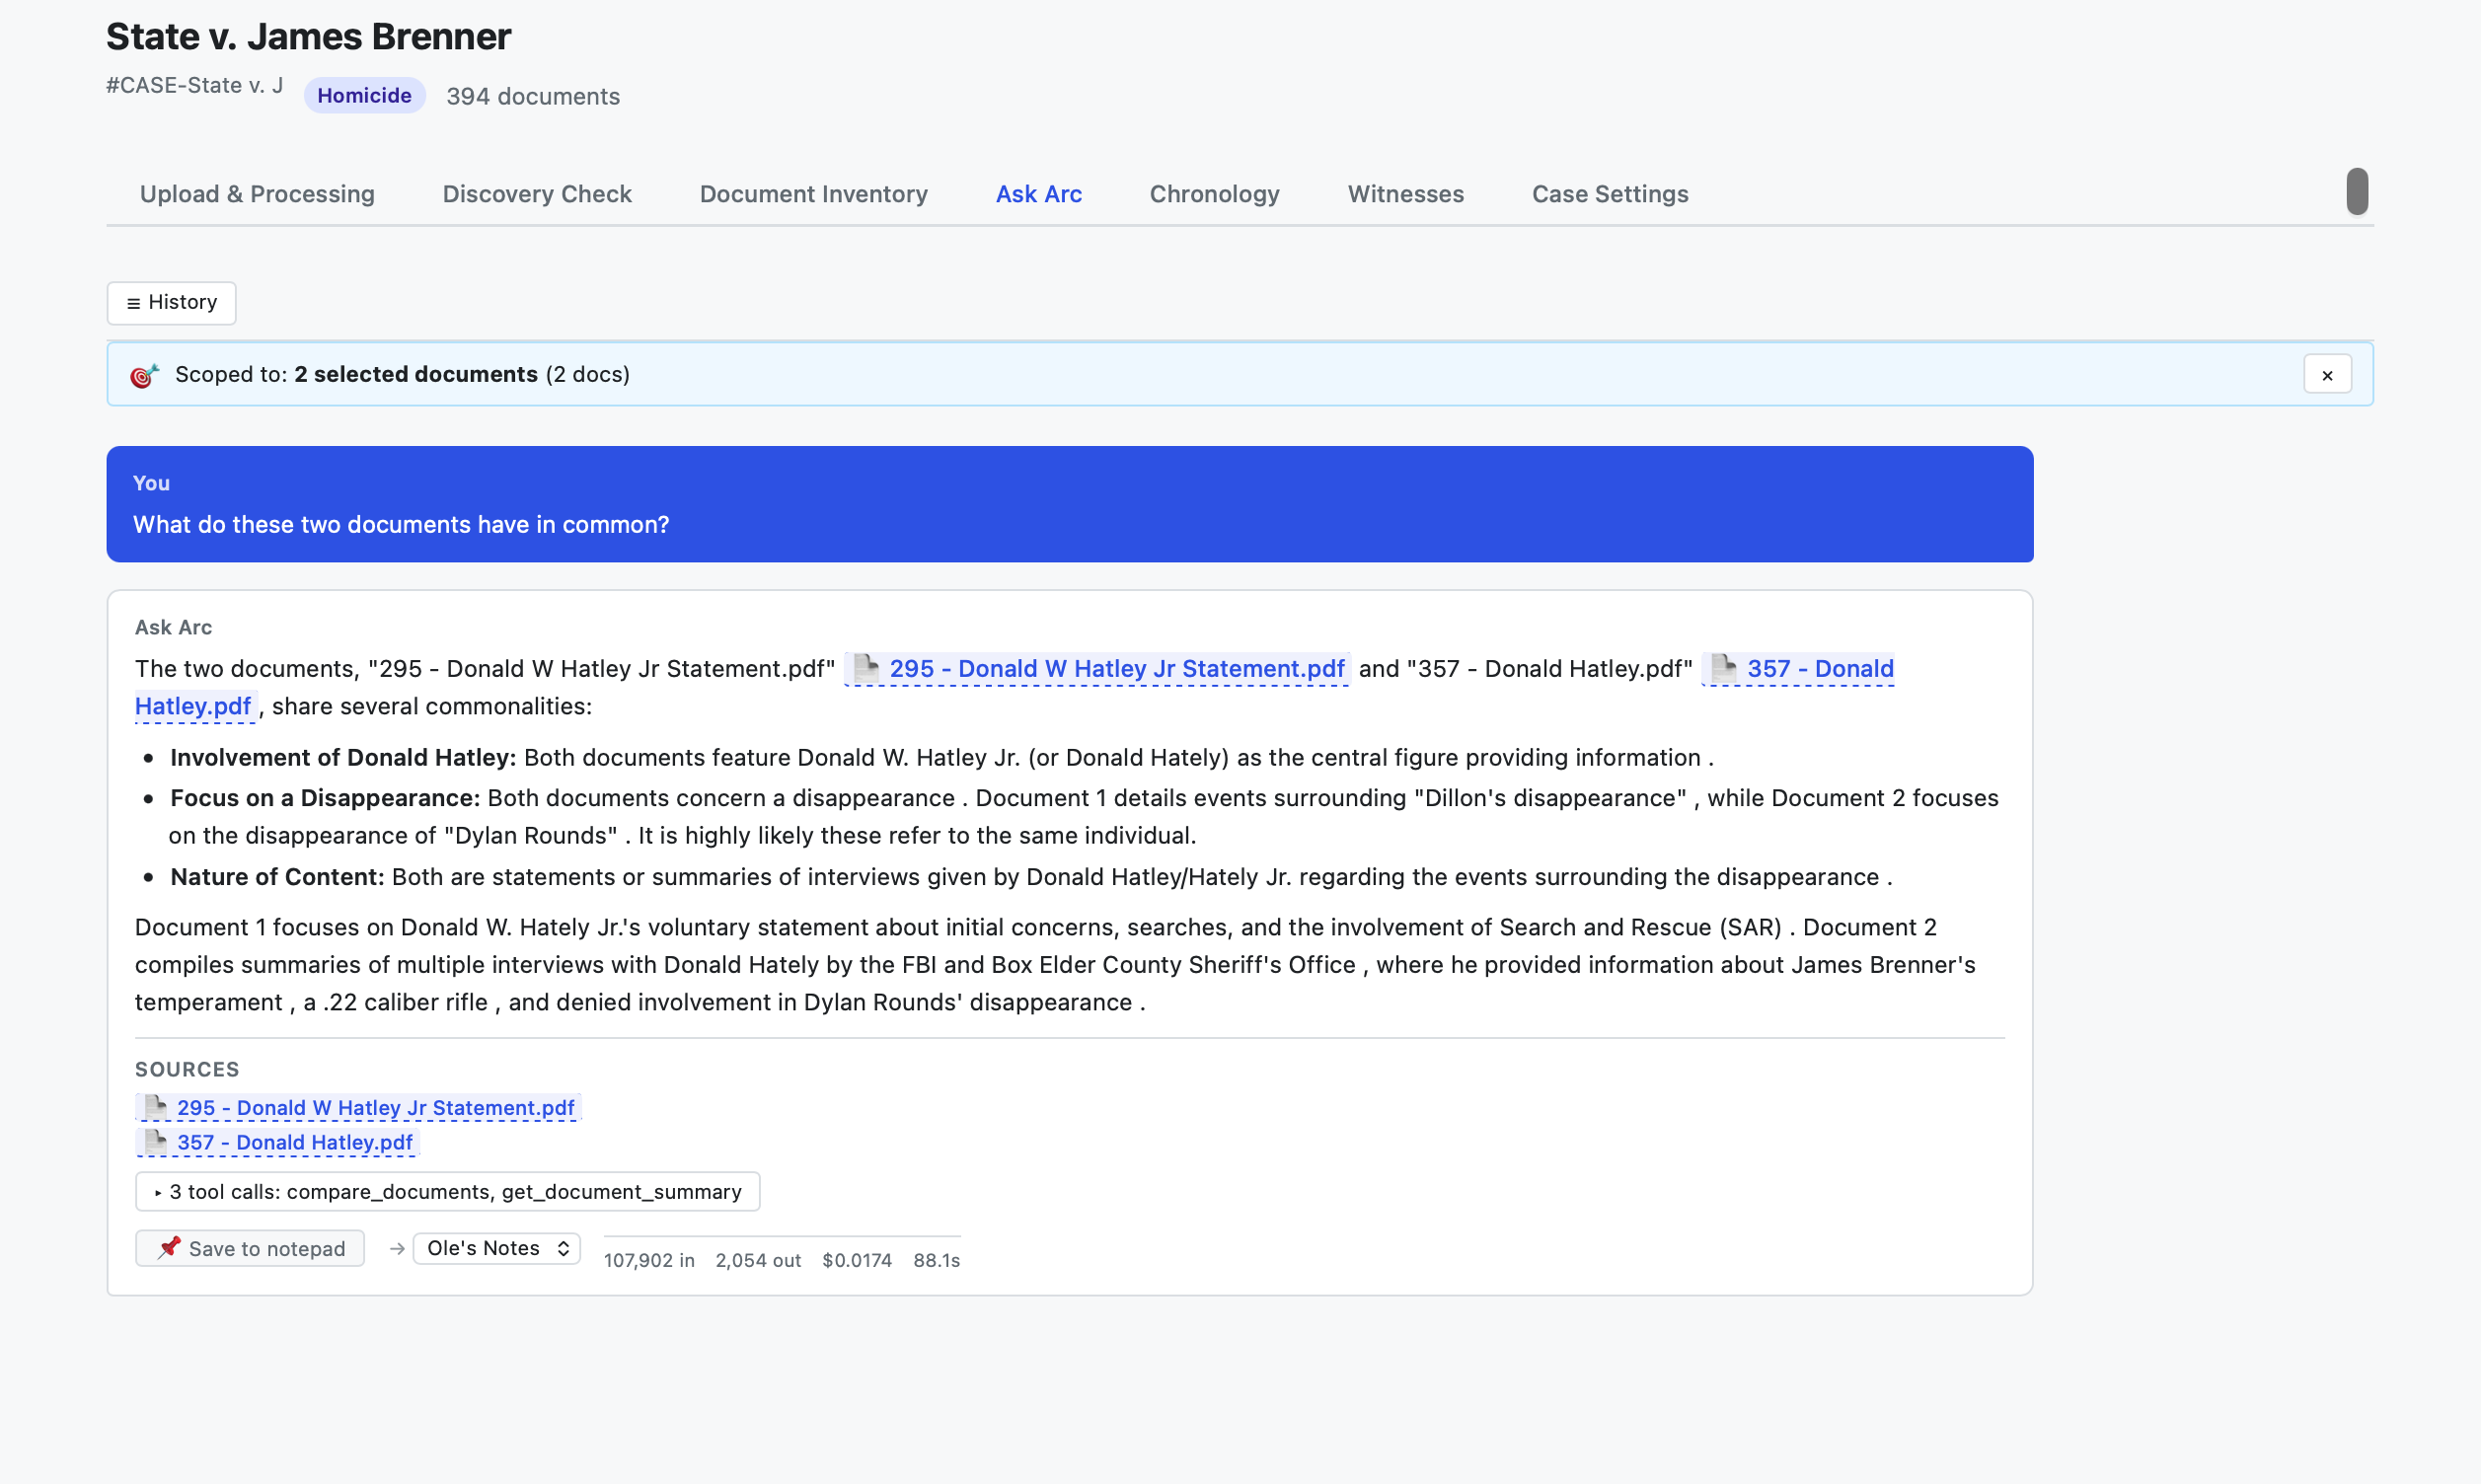
ASK ARC IFtwo people in the Witnesses tab look like they might be the same, or two accounts of the same event don't line up.
Ask Arc what's missing
Beyond a checklist, Arc can read the content itself and tell you whether you appear to be missing any major evidence or documentation. Ask it to look across everything you've uploaded, then read its answer critically — does it line up with your own sense of the case? Push back or ask follow-ups. This works best when you make it concrete: “The reports reference body-worn cameras — do we have the footage itself?”, “Every interview mentions a 911 call — is the recording here?”
(This is Arc's read of the content — distinct from the structured, item-by-item Discovery Check you ran in Step 4.)
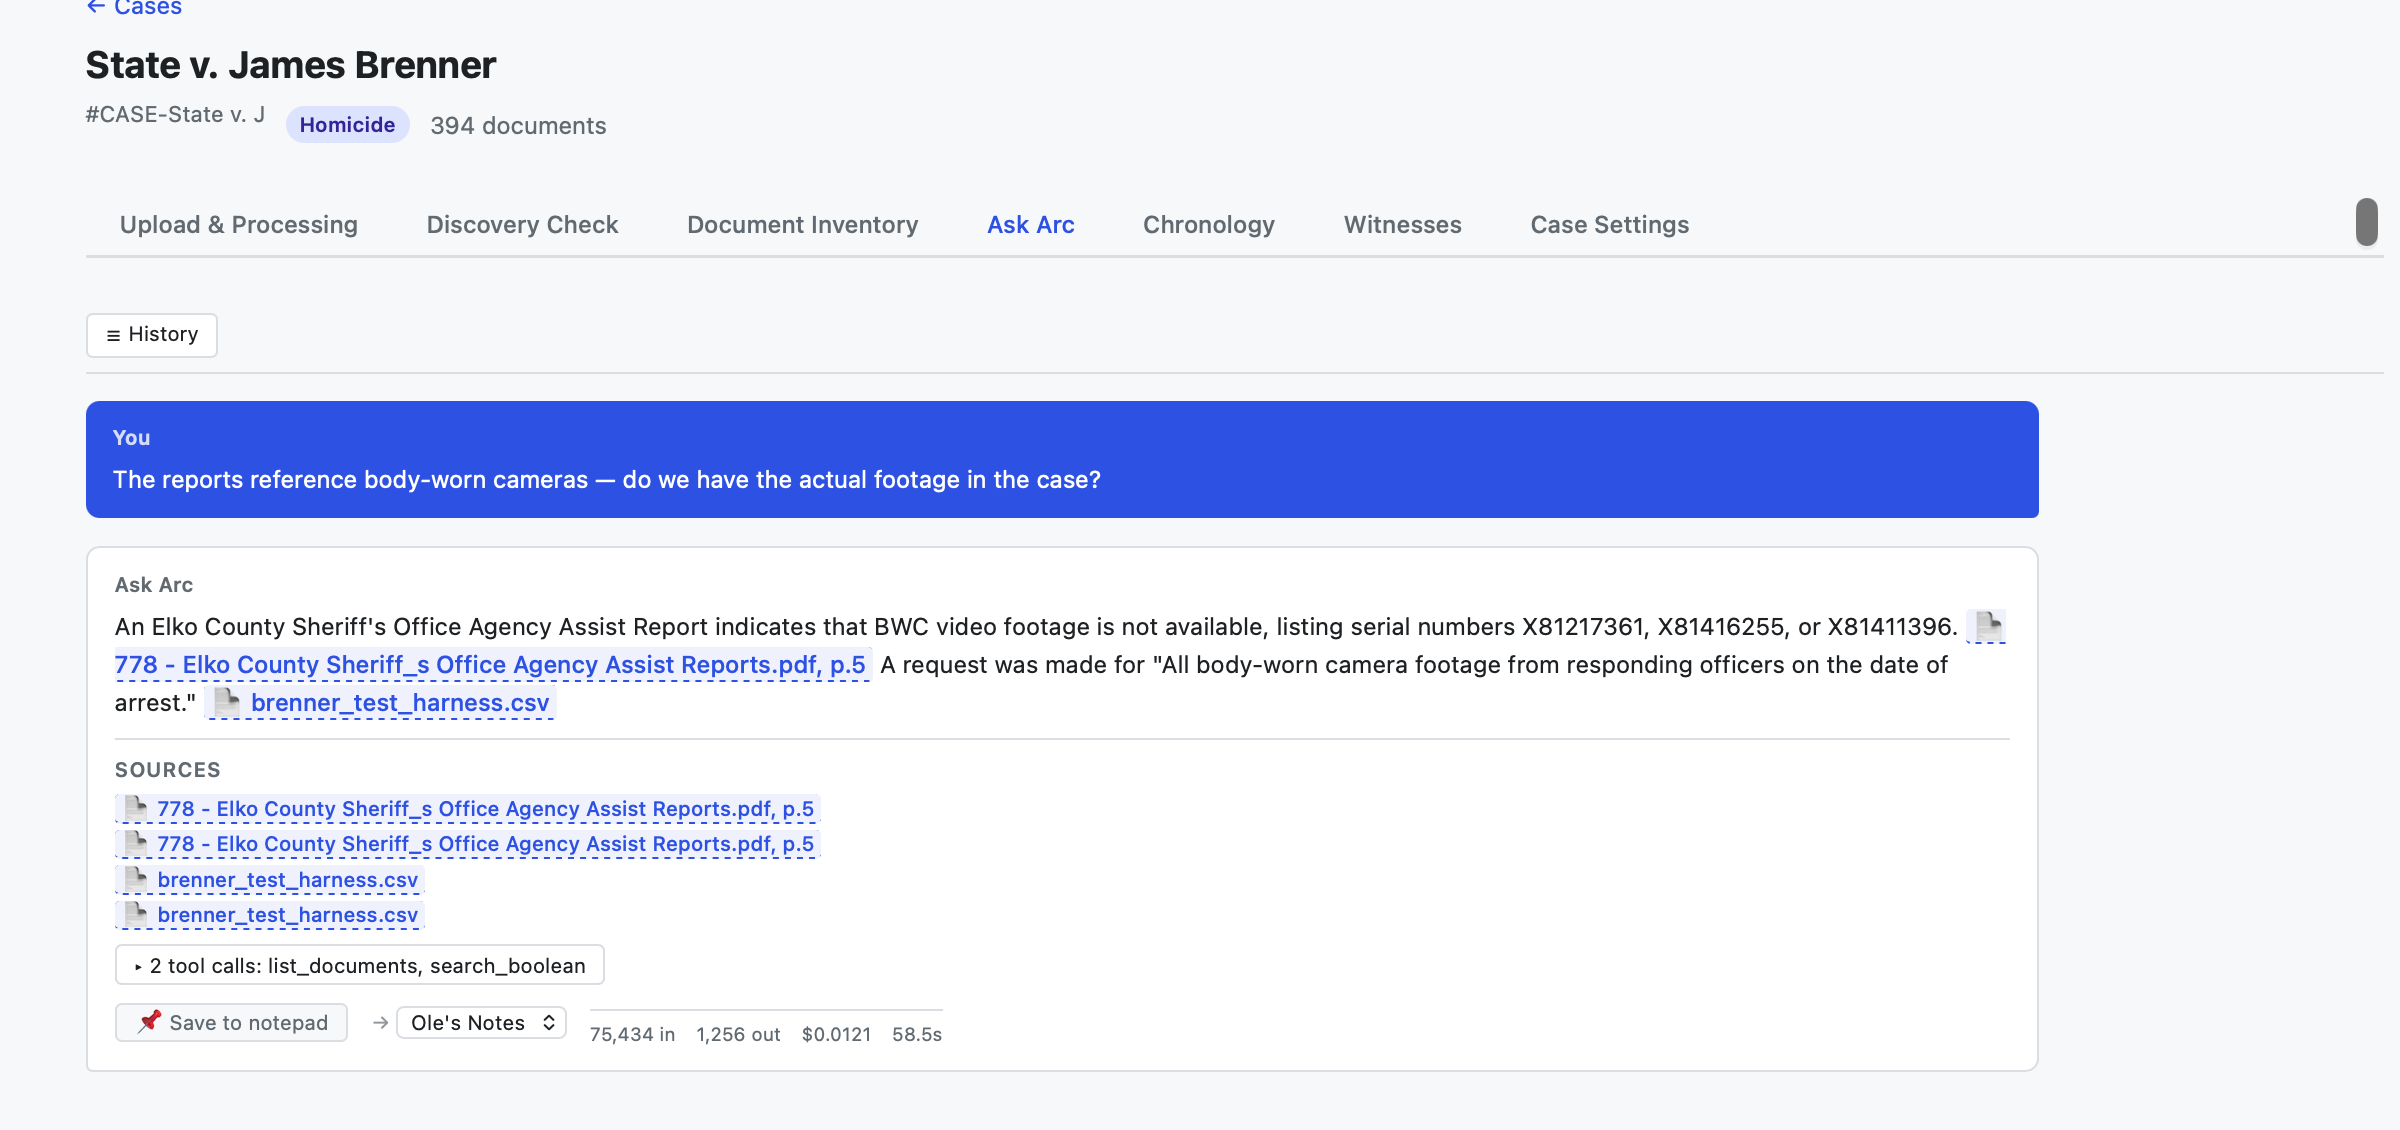
ASK ARC IFyou want Arc to explain WHY it thinks something is missing, or to focus on a category (medical records, witness statements, financials).
Research sentencing outcomes
With the case understood, the next question is often “what is my client actually facing?” The Sentencing workspace (in the top navigation) is a research tool over tens of thousands of historical Montana sentencing outcomes, built from public Department of Corrections records — searchable by statute, county, judge, or defendant.
There are two ways in. Ask is a conversation: type a question in plain English — “What is the typical term for felony theft in Missoula County?”, “How has this judge sentenced this offense before?” — and Arc queries the dataset and answers with the numbers, often with a table of the underlying records. Browse is a filter-first table of the whole dataset: pick a county, judge, or statute and the other filters narrow to what's available within your selection; click any row to see every charge on that docket, and export the filtered set to CSV for your own analysis.
The same dataset is also available inside any case — ask Arc “what's the typical sentence for the charge my client is facing in this county?” right in the case chat, and it queries sentencing records alongside your case documents.
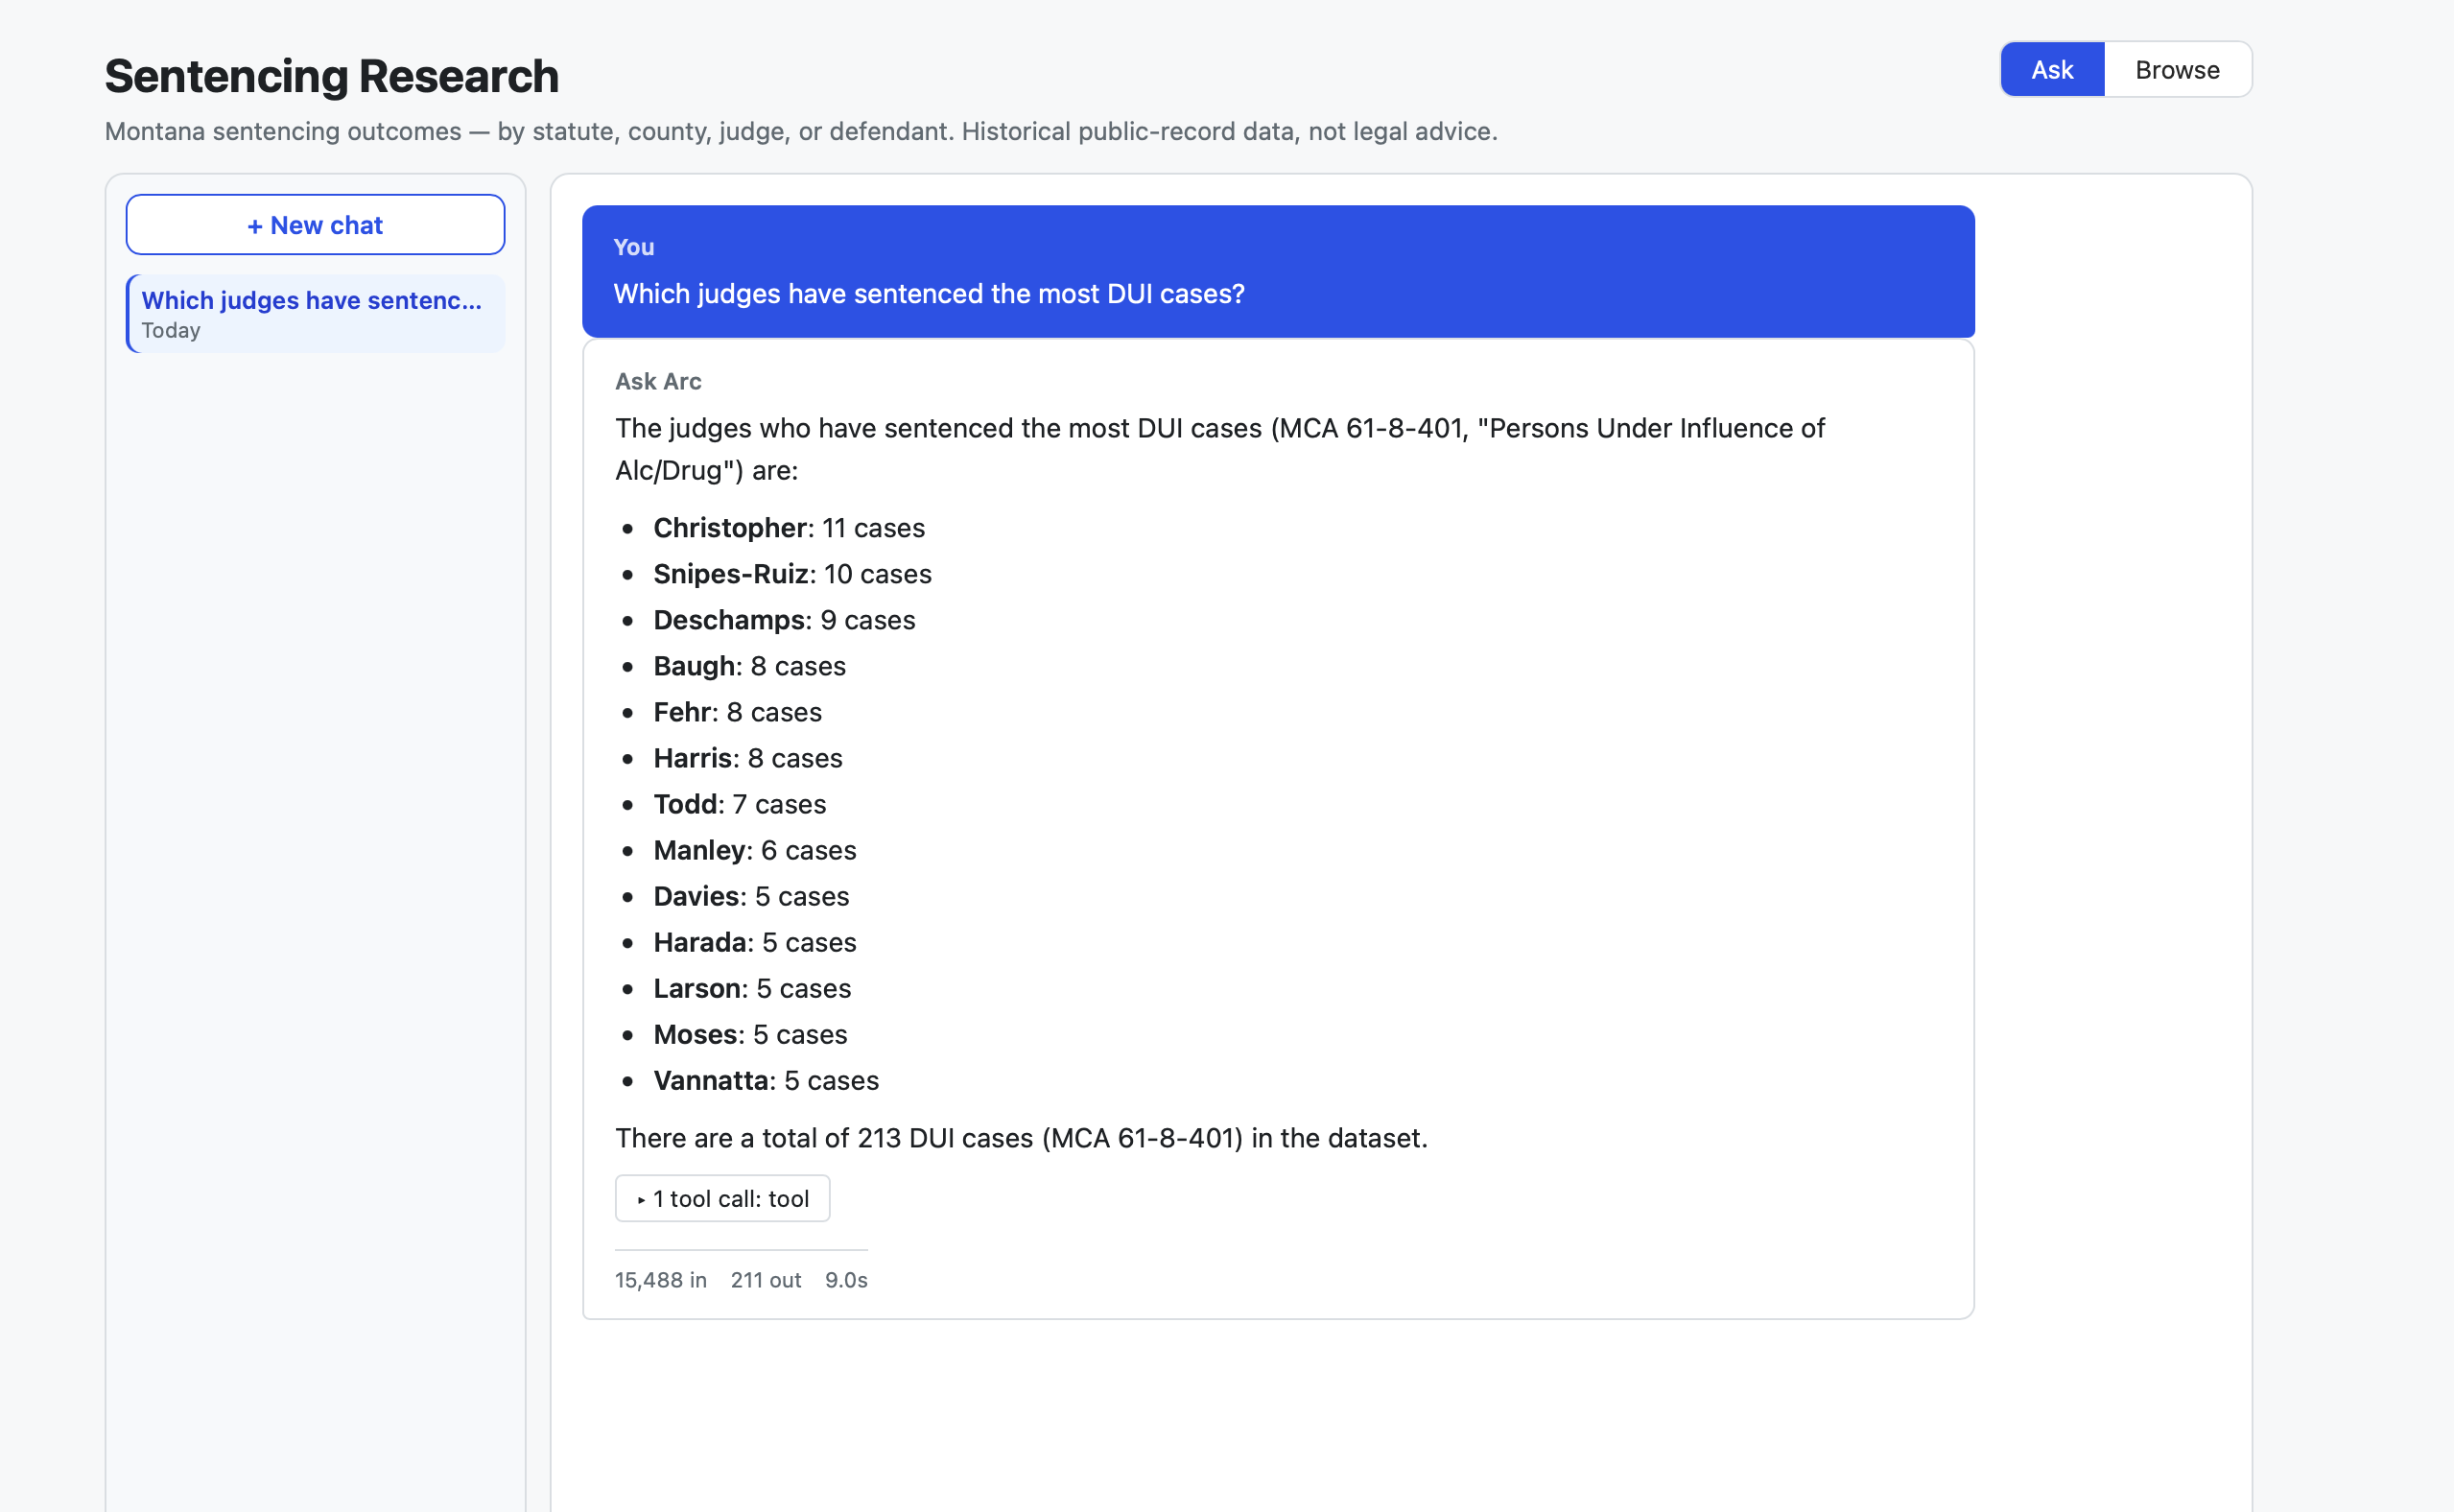
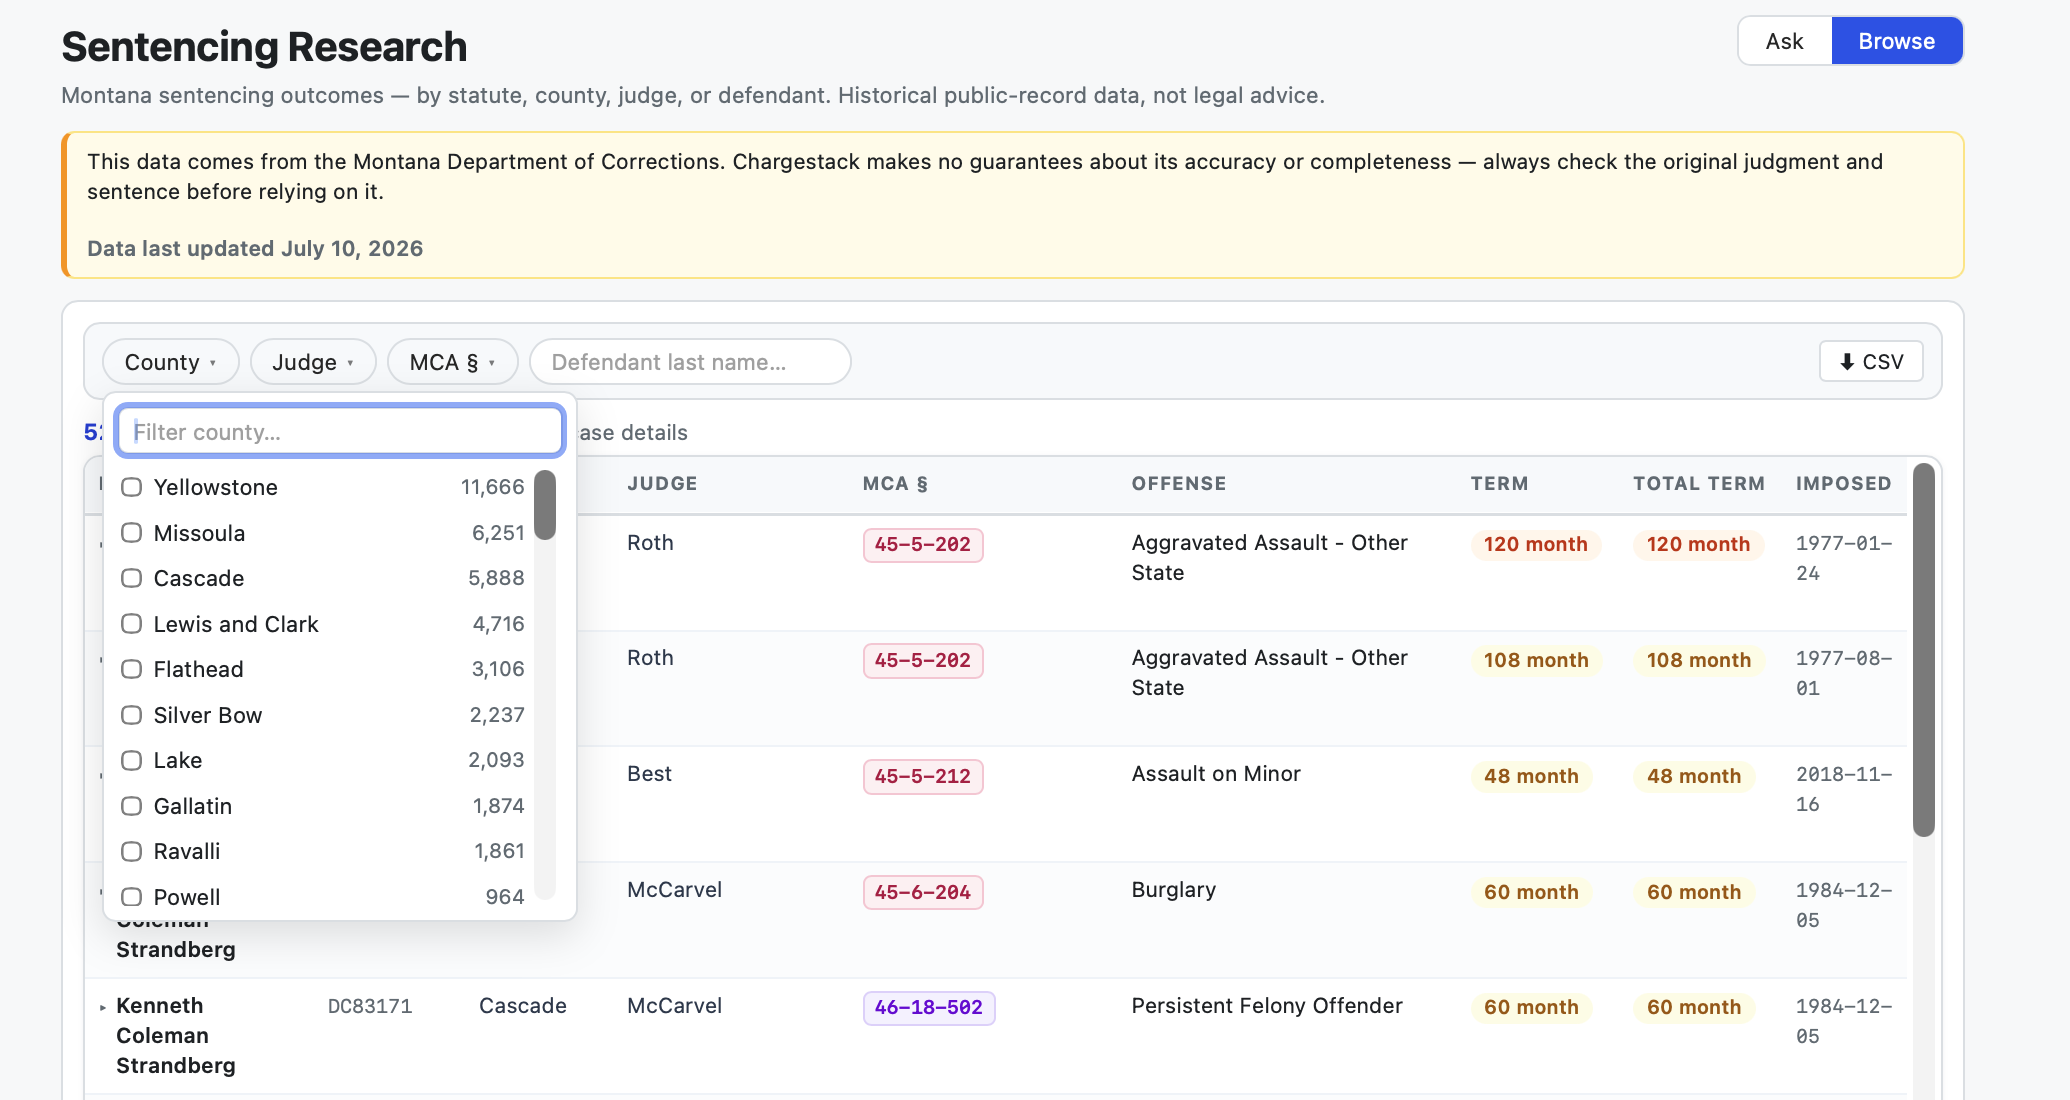
ASK ARC IFyou're not sure how to narrow the numbers (by county, judge, or statute), or a result doesn't match your sense of local practice. (“Arc, show me the distribution instead of the average.”)
Redact sensitive content (audio & video)
Before sharing, you can hide sensitive moments in an audio or video file and produce a clean copy — without ever touching the original. Open an audio or video item and use the redaction tools to cover the parts that shouldn't go out: for audio, silence or bleep a stretch; for video, black out or blur part of the picture. Mark a stretch by dragging on the waveform, then fine-tune it to land on the exact words — type precise start and end times, nudge them with the arrow keys, or snap an edge to wherever the player is paused. When the moments are marked, have the app produce the redacted version.
What you get back is a separate, redacted copy — your original stays intact — so you can play both and confirm the sensitive content is genuinely gone (silent or blacked out), not just hidden behind a box.
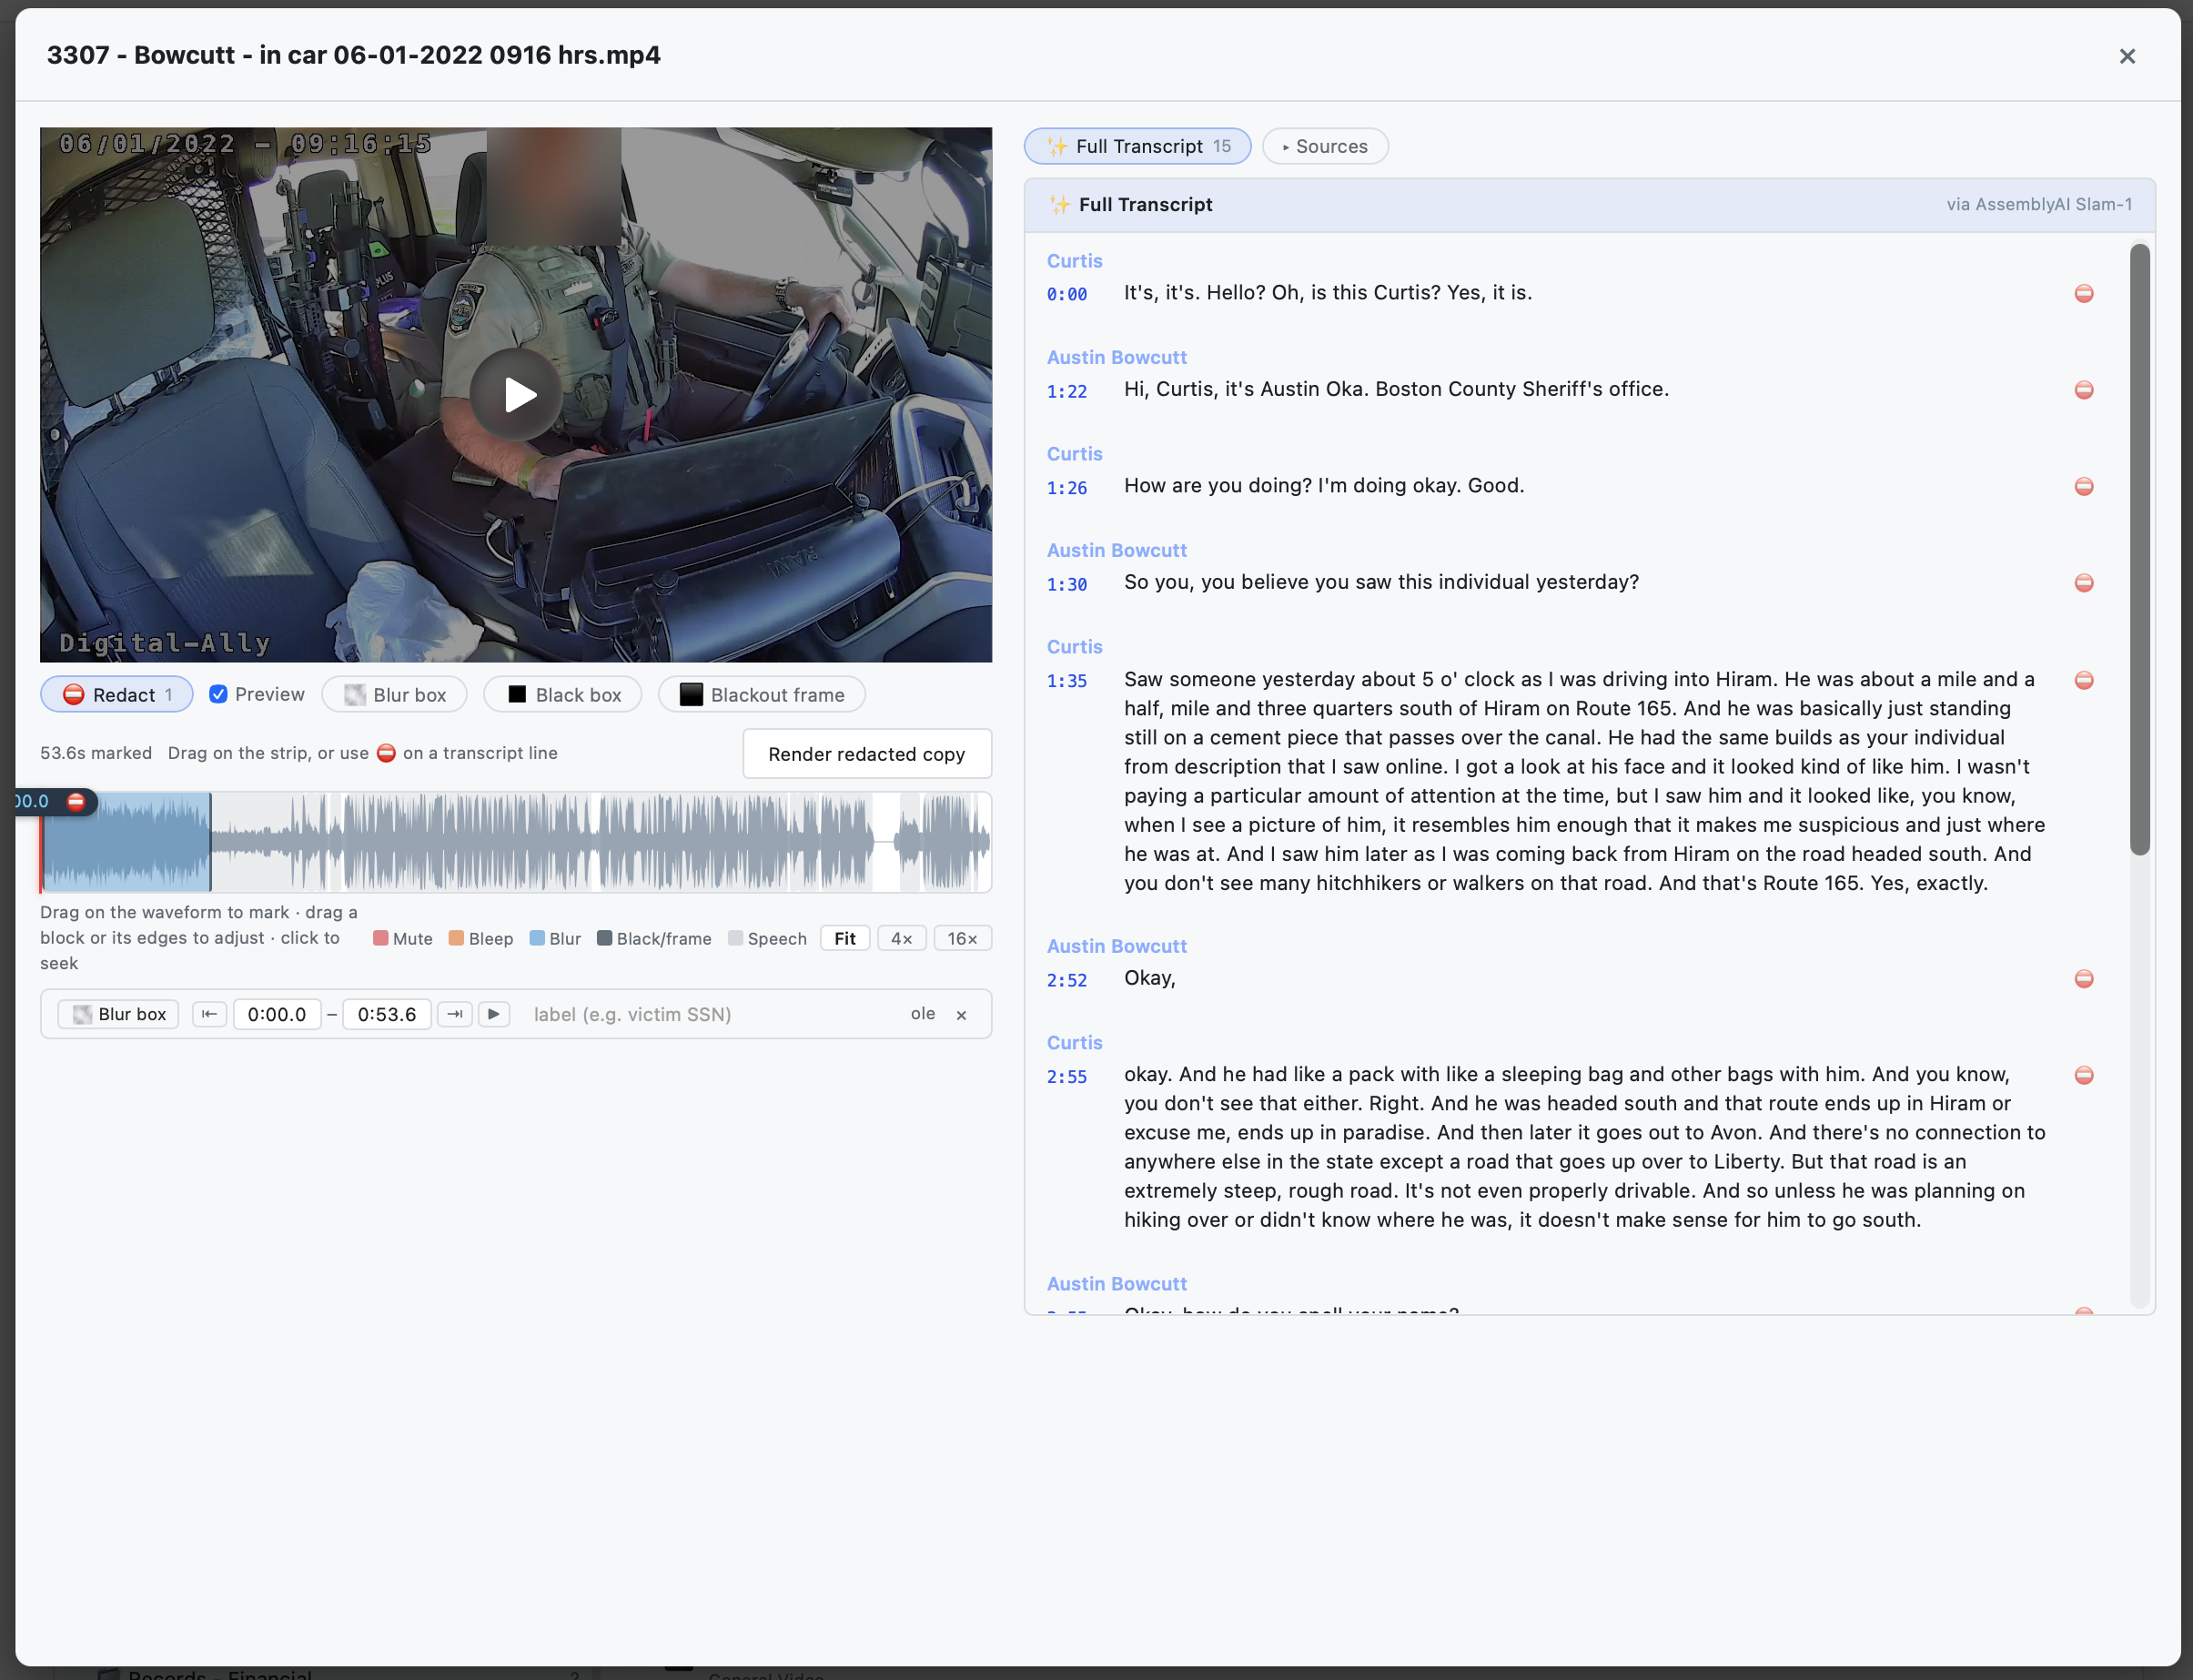
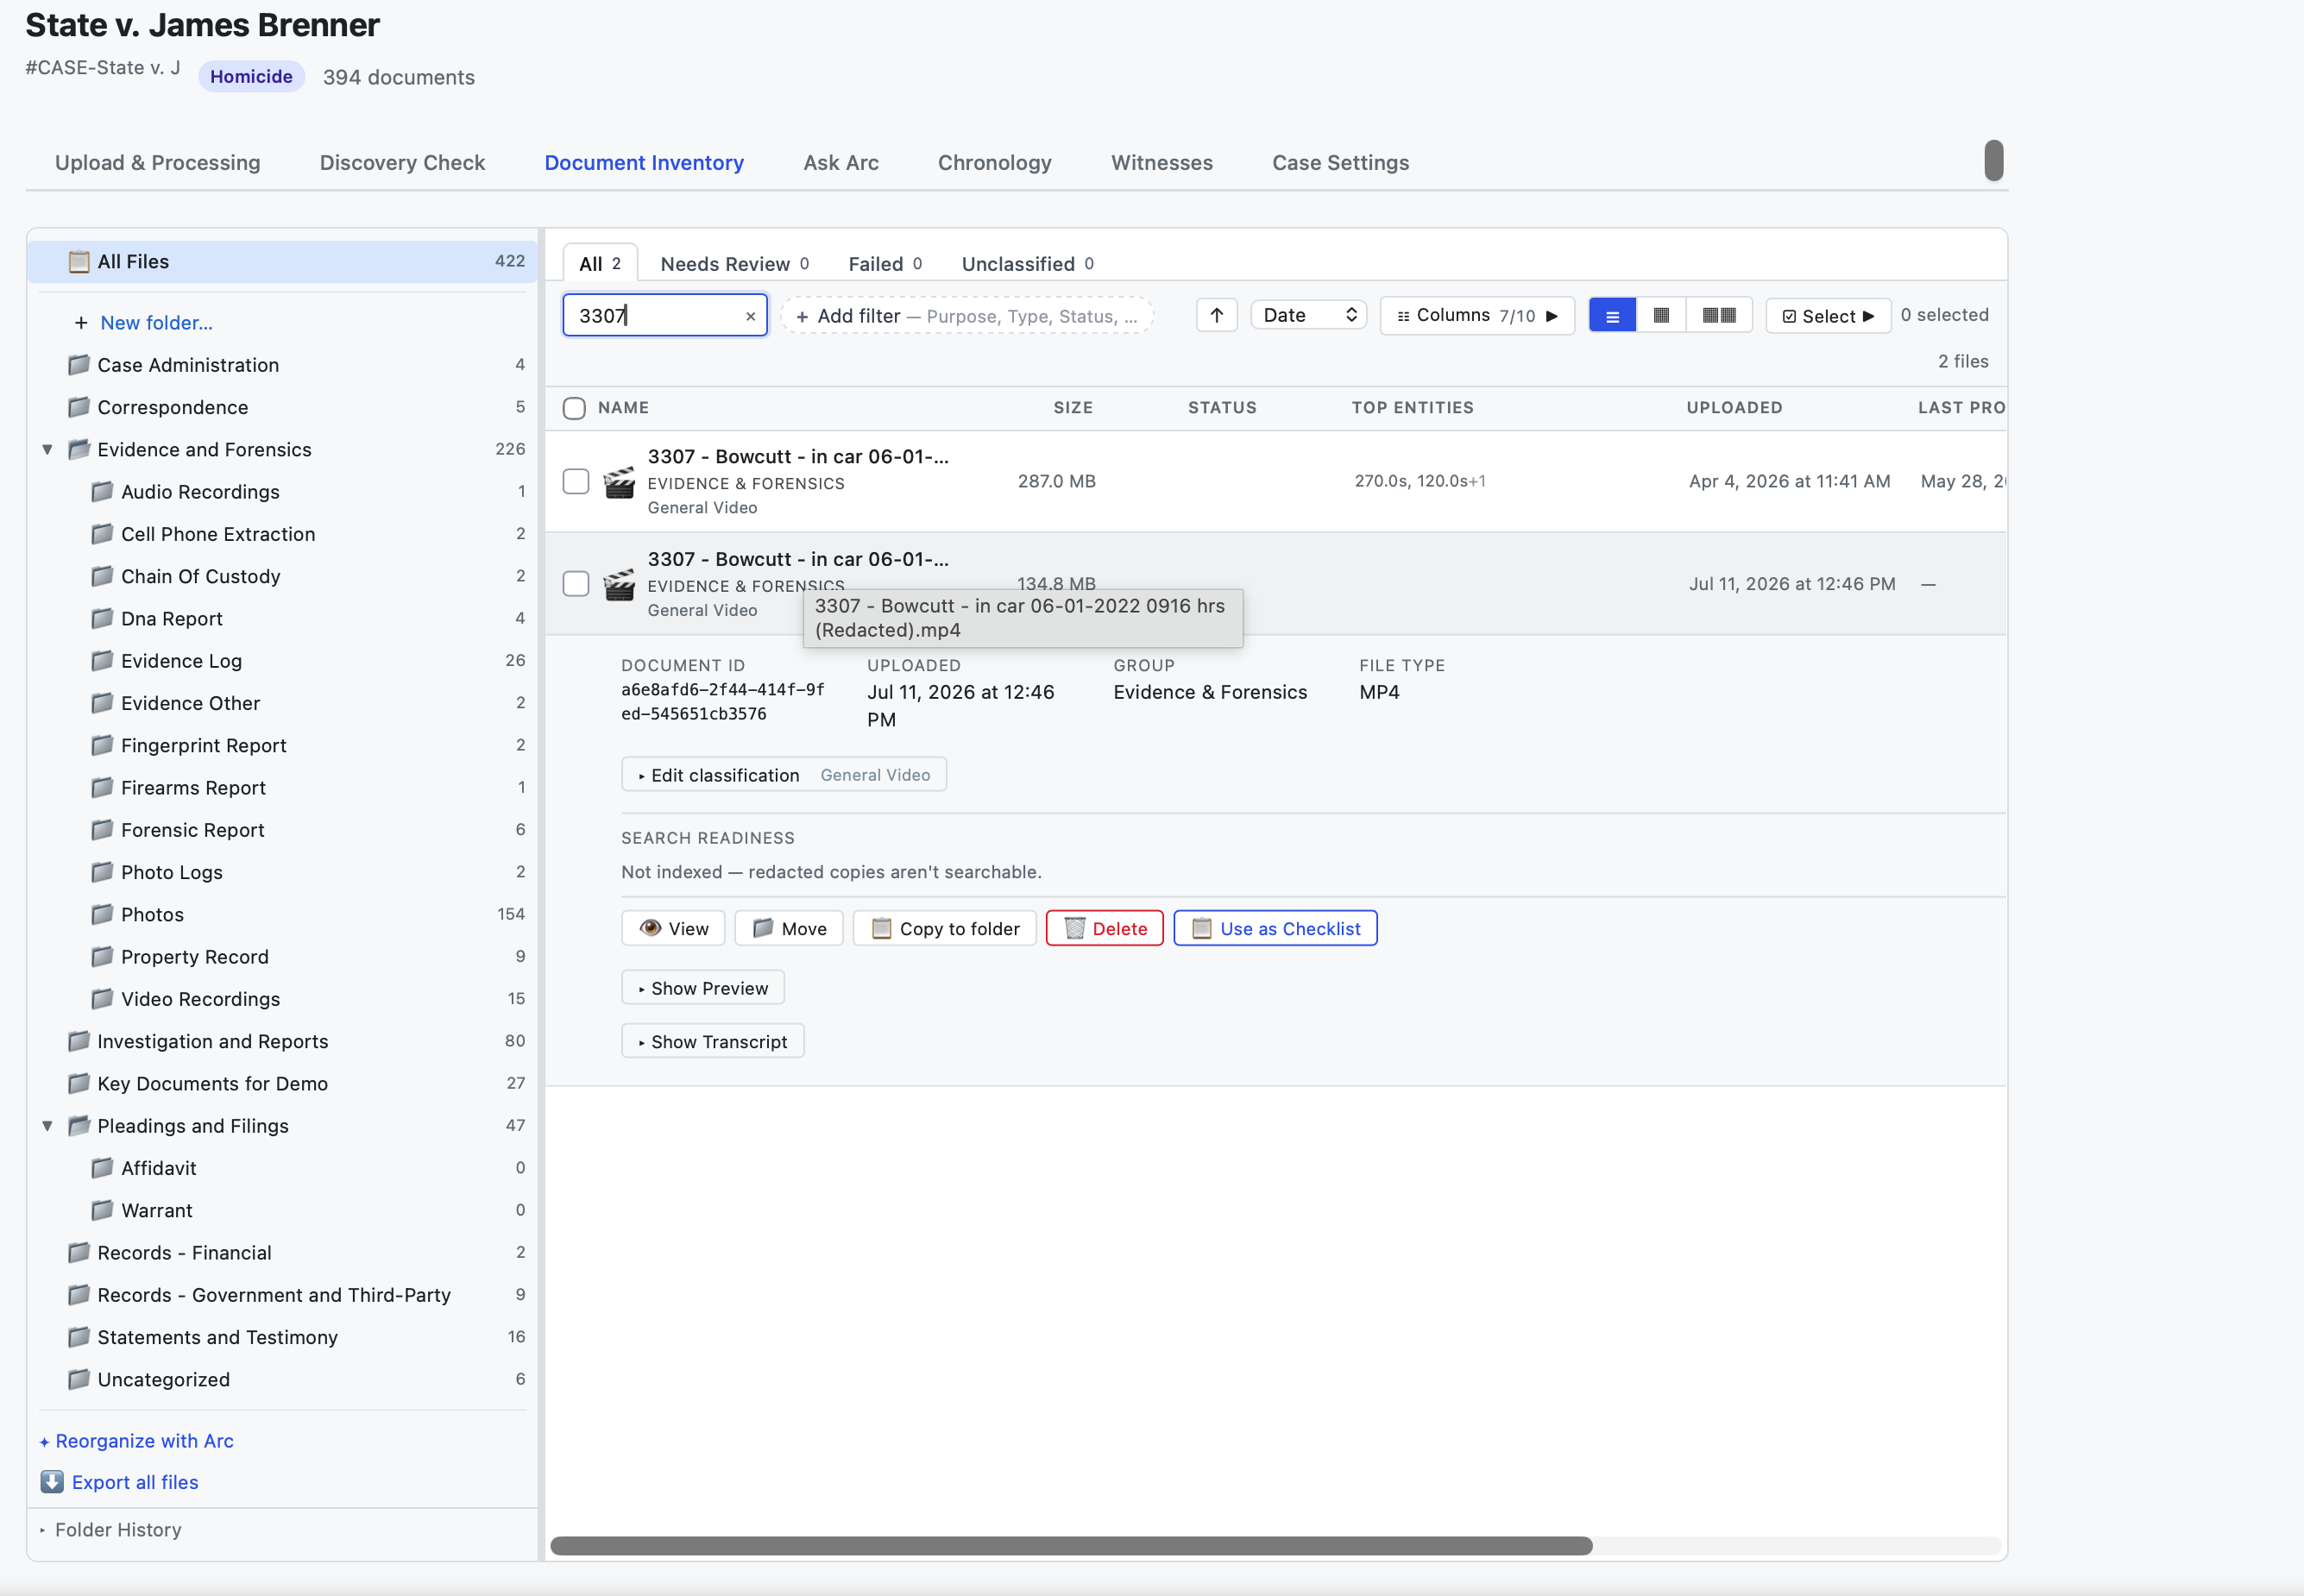
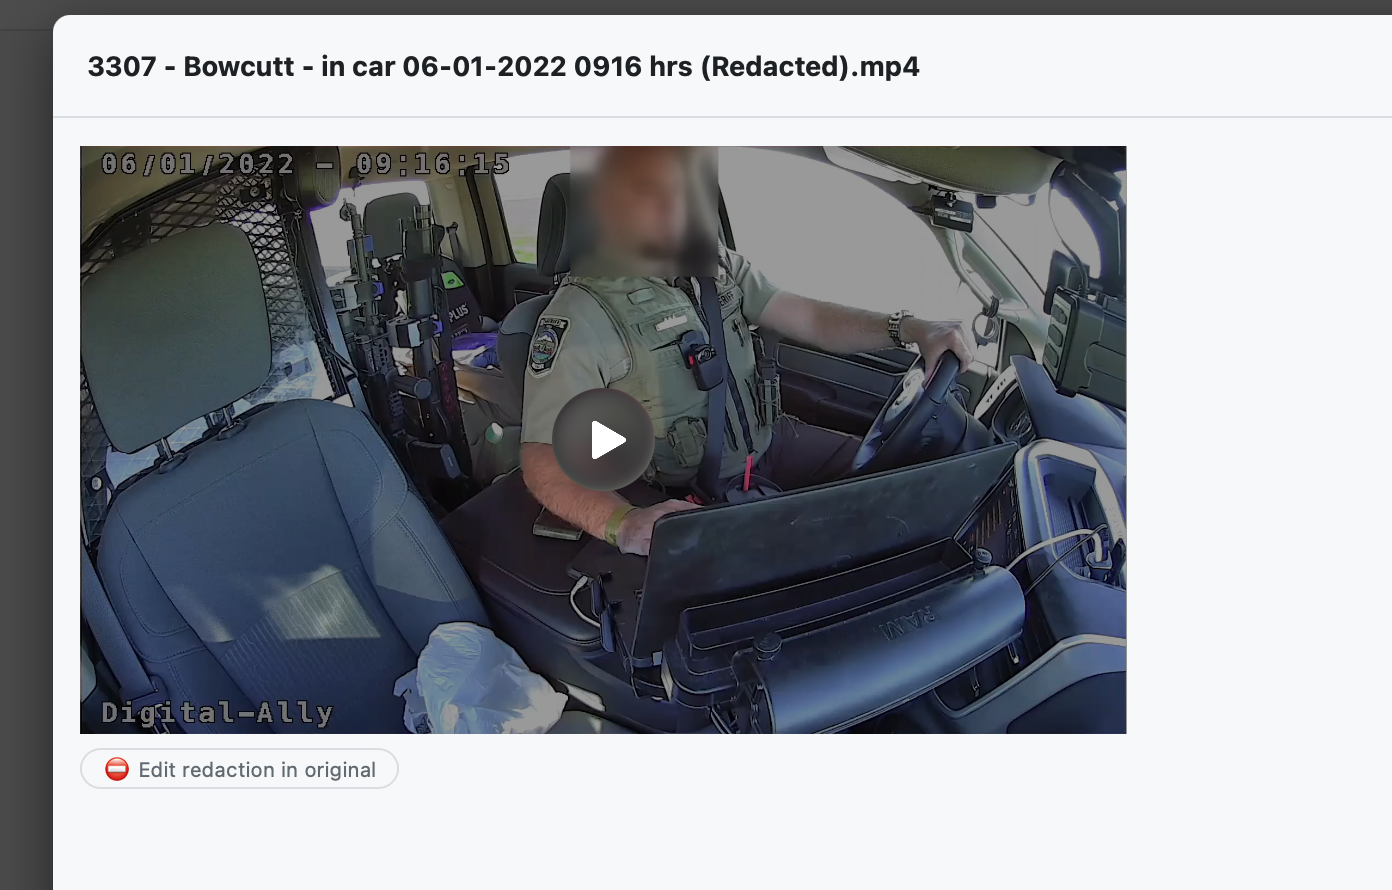
ASK ARC IFyou can't find the redaction tools, you're unsure whether a redaction actually removed the content versus just covering it, or you want help locating the moment to redact. (“Arc, where do they say the Social Security number?”)
Export your work
When you're ready to file, share, or hand off, use Export to download your material — try a single document, a folder, and the whole case. What you get back is an organized set that mirrors how things are arranged in the app, so there's nothing to re-sort by hand. If you made a redacted copy in the previous step, you can export that clean version too.
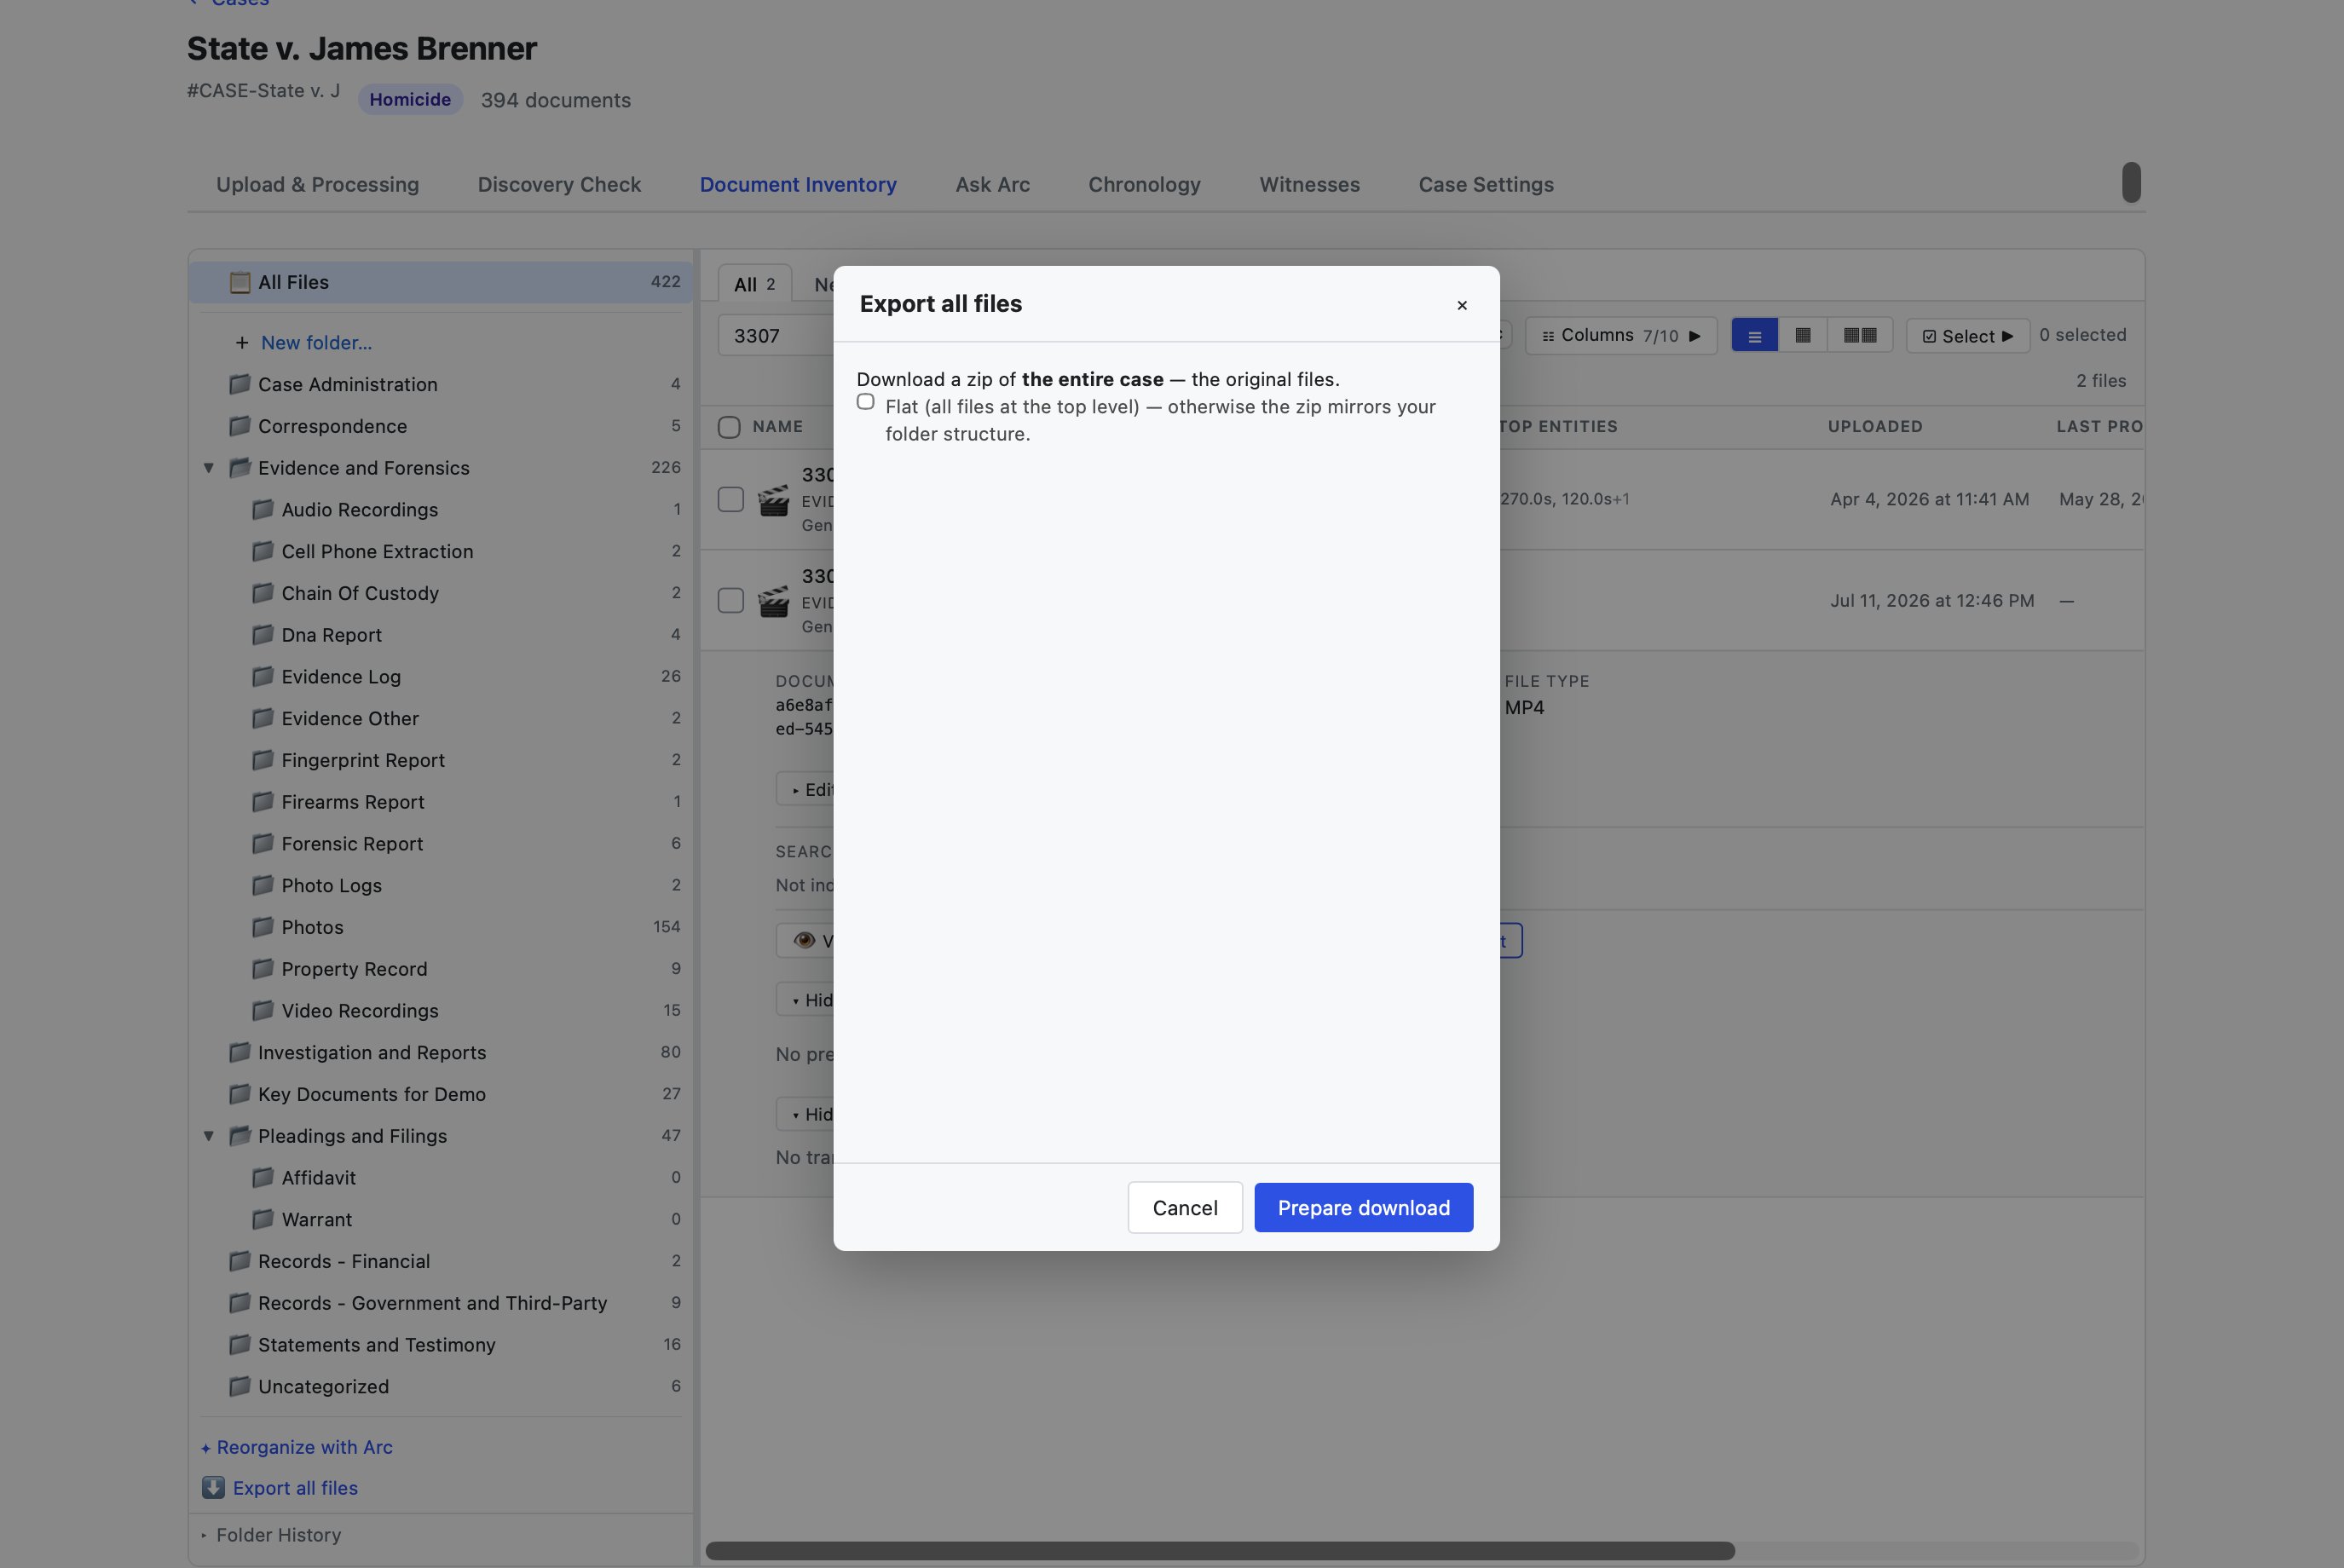
ASK ARC IFyou're not sure what will be included, or how to choose exactly what to export.
That’s the whole workflow
Onboard, install the uploader, build your case, check the production, organize, review and take notes, search, ask, see the case, research the sentence, redact, and export. Everything else in ChargeStack builds on these moves — and Arc is one question away whenever you want a hand.
ChargeStack does not provide legal advice. Questions? support@chargestack.ai · chargestack.ai